
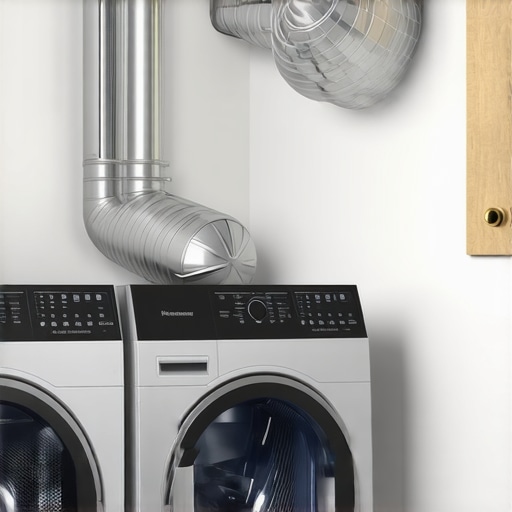
I remember the day I finally bought my new dryer. Excitement quickly turned to concern when I realized I hadn’t paid much attention to the vent installation. Later, I discovered that improper venting could have turned my home into a safety hazard. That lightbulb moment made me realize how vital it is to understand why a rigid metal vent isn’t just a recommendation—it’s a necessity for safety.
Ensuring Safety Starts with the Right Vent
It’s easy to focus on getting your appliances up and running but overlooking the type of venting can lead to serious risks. When I initially installed my dryer, I used a flexible plastic vent—thinking it was enough. Soon, I noticed longer drying times and a burning smell. That was my wake-up call. Over time, I learned that flexible plastic vents can trap lint, increase fire hazards, and even cause dryers to overheat. Choosing a **rigid metal vent** was the smartest decision I made afterward. Not only does it improve airflow, but it also significantly reduces fire risks. According to the U.S. Fire Administration, a substantial percentage of household fires are caused by dryer vent fires, often due to improper venting materials and poor maintenance. This verified my suspicion that cutting corners on vent type isn’t worth the safety risks.
Could my DIY approach be putting me in danger? Absolutely.
I made the mistake early on of ignoring the importance of a proper vent. I thought a quick fix was enough, but that mistake could have had devastating consequences. That’s why I now advocate for installing a **rigid metal vent**—it’s a simple upgrade that packs a punch in safety. Ready to learn how to protect your home and family? Let’s walk through what makes this upgrade so essential and how to get it right.
Remove the Existing Vent Carefully
Begin by unplugging your dryer and detaching the old vent. Use a screwdriver to loosen clamps or screws holding the vent in place. Be prepared for lint and dust to fall as you disconnect—wear a dust mask and gloves for safety. Remember, this initial step is like opening a stubborn jar—gentle steady effort prevents damage and mess. During my installation, I found that removing the old flexible vent revealed a buildup of lint and debris, highlighting the importance of starting with a clean slate.
Measure and Cut the Rigid Metal Pipe Precisely
Measure the length from your dryer’s exhaust port to the vent opening outside. Add a few extra inches for slack and maneuverability. Cut the rigid metal pipe to size using a hacksaw, ensuring edges are smooth to prevent damage to the hose clamps. Think of this like tailoring a suit—you want a perfect fit to maximize airflow and safety. I once underestimated the length needed, leading to a tight squeeze that caused the pipe to bend and reduce airflow—lesson learned the hard way.
Assemble the Vent in Segments Confirming Fit
Connect the straight segments of the rigid pipe with appropriate elbows if needed, securing each joint with foil or sheet metal tape—never duct tape, which can degrade over time. Tighten clamps firmly, but avoid overtightening which may deform the pipe. Picture this step as building a sturdy bridge—each piece must align perfectly for reliable support. Once, I hurried this step and didn’t secure a joint tightly; the connection loosened over time, causing leaks and lint buildup. Careful assembly ensures safe, efficient operation.
Seal the Connections to Prevent Leaks and Lint Escape
Apply foil or sheet metal tape around all joints and seams to create an airtight seal. This prevents lint from escaping, which is a fire hazard, and ensures optimal airflow. For a visual guide, see this professional installation resource. In my case, failing to seal properly led to lint accumulation around the joints, increasing fire risk. Sealing is simple but critical for safety and efficiency.
Attach and Secure the Vent to Exterior and Dryer
Secure the vent pipe to the dryer’s exhaust port with a clamp, ensuring a tight fit. Then, bring the vent to the exterior wall opening and attach it with a wall fitting or collar, sealing any gaps with weatherproof caulk if necessary. Use screws or clamps to hold everything firmly. Think of this as anchoring a sailboat—secure attachment prevents leaks and disconnections. During my update, I discovered that using metal screws instead of staples provided a more durable and safety-compliant connection.
Check the Entire Path for Proper Airflow and Safety
Once assembled, run the dryer on a low heat cycle and check outside to confirm airflow is strong and unobstructed. Use a pocket flashlight to look into the pipe for blockages. If airflow is weak, revisit the joints and seals for leaks or misalignment. It’s like performing a health check—ensuring your work is thorough for safety. After completing my installation, I noticed a slight decrease in airflow—re-adjusting a clamp improved performance significantly. Testing final airflow is vital to confirm a job well-done and safe.
Many homeowners assume that appliance repair, same-day service, installation, and warranties are straightforward processes, but beneath the surface lie subtle complexities that can trip up even seasoned DIYers and consumers.
Myths That Can Cost You More
It’s commonly believed that all service providers are equally reliable, but in my experience, not all warranties are created equal. Some companies advertise broad coverage, yet they exclude common repairs or have hidden fine print that limits your protection. For instance, many warranties don’t cover labor costs or parts replacement for certain components, which can turn an expected free repair into an unexpected expense. To avoid being misled, always scrutinize warranty terms carefully and consider service providers with transparent policies, such as those highlighted in warranty-backed services.
Why Same-Day Service Might Not Be So Fast
The idea of getting an appliance fixed the very same day sounds appealing, but this expectation can be unrealistic. Many repair companies prioritize urgent cases, which can lead to scheduling delays for non-critical repairs. Moreover, ensure your service provider isn’t just offering quick fixes but also comprehensive diagnostics. Rushing to replace a part without proper diagnosis often results in recurring issues. According to a recent industry study, the most effective repairs involve thorough inspections, which might extend beyond a single day but ultimately save you money and trouble.
Advanced Repair Traps Every Homeowner Should Know
A common mistake is assuming that a quick fix now will last forever. For example, bypassing proper installation procedures, such as not sealing connections or ignoring airflow requirements, can lead to long-term damage. Be aware that cutting corners—like using lower-quality replacement parts—may void your warranty or cause safety hazards. Investing in proper, high-quality components and services ensures durability and safety. Don’t fall into the trap of cheap repairs that seem convenient; instead, consult resources like professional guides to learn what truly makes a repair last.
Investing in the Right Equipment for Long-Term Performance
To ensure your appliances operate efficiently and safely over the years, I rely on a few meticulously chosen tools and software. One essential item is a high-quality multimeter, like the Fluke 115, which I use to troubleshoot electrical components accurately. Its precision helps me diagnose issues like faulty thermostats or burnt-out heating elements without guesswork. Additionally, a digital infrared thermometer is invaluable for quickly identifying uneven heat distribution in ovens or cooling inconsistencies in refrigerators, allowing for precise adjustments. On the software side, I recommend using maintenance management apps such as UpKeep or Fiix, which help track service dates, repair histories, and warranty details. These platforms streamline scheduling regular inspections and ensure no aspect of your appliance maintenance falls through the cracks, ultimately extending the lifespan of your devices. Real-time monitoring tools, like appliance-specific diagnostics, are also gaining popularity. For instance, some modern appliances come with smart technology that alerts you via a dedicated app when maintenance is needed, or if a component begins to fail, potentially preventing costly breakdowns. Predictive maintenance, driven by this data, is the future of appliance care—saving both time and money.
How do I keep my appliances operating smoothly over time?
Regular inspections are key. I’ve found that setting monthly reminders to clean filters, check vents, and inspect connections can prevent issues before they escalate. When cleaning dryer vents or refrigerator coils, using a dedicated vent cleaning kit or coil brush ensures thorough removal of lint and dust, which can hinder performance and pose fire hazards. Also, replacing worn-out seals and gaskets at the first sign of deterioration helps maintain efficiency and prevent leaks. Investing in quality repair parts, like OEM components, guarantees durability and supports warranty coverage. To further safeguard your appliances, consider scheduling professional servicing periodically—many providers now offer affordable same-day services with warranty benefits, making preventative maintenance both accessible and cost-effective. You can see how these proactive steps significantly reduce unexpected failures and extend your appliance’s lifespan.
Why professional maintenance remains crucial
While DIY fixes are helpful for minor issues, having a trusted technician perform comprehensive inspections guarantees that insidious problems don’t hide beneath the surface. Certified technicians utilize advanced diagnostic tools and follow manufacturer recommendations, ensuring safe, code-compliant repairs that stand the test of time. For instance, some faults require recalibration or firmware updates, which only qualified service providers can perform correctly. Moreover, professional maintenance often comes with warranties or guarantees, giving you peace of mind that your investment is protected. Don’t forget that many companies now offer same-day service, allowing you to get your appliances back in operation with minimal disruption, especially if scheduled in advance. To choose the best provider, look for those with transparent warranty policies and positive reviews. An example of a reliable option is detailed in warranty-backed appliance services. Regular maintenance and professional check-ups form the backbone of a long-lasting appliance setup, safeguarding your home and family’s comfort.
What’s the secret to maintaining appliances that last?
Consistency is everything. Establishing a scheduled maintenance routine—whether annually or semi-annually—helps catch potential issues early. For example, checking the drain hoses in dishwashers and washing machines for cracks or blockages prevents water leakage and damage. Applying high-quality lubricants to moving parts, like dryer drum rollers or oven hinges, reduces wear and tear. Always refer to the manufacturer’s maintenance guidelines, and keep a log of repairs and inspections; it simplifies warranty claims and future servicing. And don’t forget—remember that technology-driven diagnostics will continue to evolve, making maintenance smarter and more predictive. For a detailed guide, see future-proof your maintenance routine. Start by trying out one of the advanced diagnosis tools I mentioned, such as the infrared thermometer, for immediate accuracy and peace of mind. Keeping appliances in prime condition is an ongoing process—embrace it for a safer, more efficient home.Throughout my journey with appliance maintenance, I’ve discovered that the tiniest oversights can lead to significant safety hazards. One of the most impactful lessons was learning the importance of proper venting for dryers—an area often overlooked by homeowners trying to save time or money. Upgrading to a **rigid metal vent** wasn’t just about improving efficiency; it became a crucial step in safeguarding my home from potential fire hazards. Remember, a small investment in the right vent type and installation practices can offer peace of mind that lasts for years. After my experience, I also realized that regular inspections and sealing connections are essential practices to prevent lint buildup and ensure optimal airflow. The difference between a safe, efficient dryer and a risky setup often hinges on such details—details that professionals prioritize in their expert services. Incorporating these lessons into your routine will not only protect your home but also extend the lifespan of your appliances, saving you money in the long run.