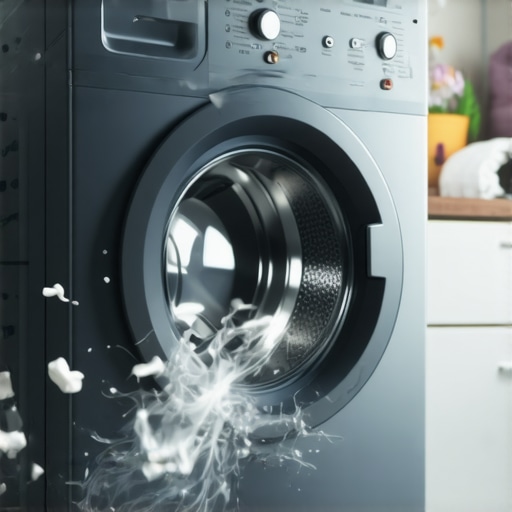
I’ll never forget the moment I finally realized my new front-load washer was transforming my laundry room into a miniature quake zone. Clothes flying, door rattling, and a vibration so fierce I thought my floor was about to give way—that’s when I knew I had to address this shaking problem. Honestly, I felt a mix of embarrassment and frustration, wondering what went wrong and how I could fix it before my entire house felt the tremors.
Turning a Dud into a Deep Clean Solution
See, I used to think that a little extra shaking was normal for high-capacity washers—until I learned that improper leveling, unbalanced loads, or even worn-out shocks could amplify vibrations dramatically. The good news? Most of these issues are fixable with a bit of guidance and some practical steps. Today, I want to share what I’ve discovered about taming that earthquake-level shake and getting your washer running smoothly again—so you can stop worrying about laundry day turning into disaster.
Is It Worth Fixing My Shaky Washer or Should I Replace It?
Sometimes, I’ve wondered whether investing in a new machine makes more sense than repairing an old one. The truth is, many causes of excessive shaking are straightforward to fix—like adjusting the leveling feet or redistributing laundry evenly. Plus, maintaining your appliance well can extend its lifespan and save you hundreds. According to appliance experts, a stable washer can last years longer if you catch issues early, and avoiding unnecessary replacements is always a smart move—both financially and environmentally.
If you’re worried about voiding your warranty or making a mistake, don’t fret. I once ruined my first attempt by neglecting to level the machine properly—so learn from my blunder and check out this guide for detailed tips on proper installation and maintenance. Remember, a little prevention can prevent big headaches.
Before we dive into the hands-on solutions, have you ever faced a washer that shook so fiercely it felt like an earthquake? If yes, you’re in the right place. Let’s turn that chaos into calm and restore peace to your laundry routine.
Level the Machine Correctly
Start by turning off the washer and pulling it out from the wall. Use a bubble level to check the top surface of the machine. If it’s uneven, adjust the leveling feet by turning them clockwise or counterclockwise until the washer sits perfectly horizontal. I once spent an hour adjusting mine, only to realize I was balancing it on uneven flooring, which caused additional wobbling—so double-check your floor stability as well.
Check for Unbalanced Loads
Unevenly distributed laundry is a common culprit. When I overloaded my washer with bulky towels on one side, the vibrations intensified. To fix it, redistribute the clothes evenly around the drum. Remove some items if necessary, and run a test cycle. This simple step often drastically reduces shaking without further repairs.
Inspect and Replace Shock Absorbers
Shock absorbers dampen vibrations and wear out over time. To inspect, unplug the washer, remove the front or rear panel (depending on your model), and look for leaks or broken mounts. When I found oil leaks on mine, I replaced them following a tutorial I found on the manufacturer’s site. This repair required some basic tools but made a huge difference in stability.
Examine the Suspension Springs
Suspension springs support the tub and can deform or detach. With the machine still unplugged, access these springs and check their tension. If a spring appears stretched or broken, replace it promptly. I had to order new springs online, but the installation was straightforward. Restoring proper tension helped stop the excessive movement.
Ensure Proper Installation of the Drain Hose
A too-loose or improperly positioned drain hose can cause imbalance. Secure it so it’s neither kinked nor too loose, allowing water to drain smoothly. I once had a drain hose sagging behind the unit, causing water to pool and unbalance the load during spin cycles. Fixing this simple issue significantly improved performance.
Test and Confirm Stability
After performing adjustments, run an empty cycle to observe the vibrations. Watch for any shaking or rattling. If it’s still loud, recheck leveling and load distribution. I’ve found that combining proper leveling with load management almost always eliminates dangerous vibrations.
Consider Professional Help When Needed
If all these steps fail and your washer still vibrates violently, it’s best to consult a professional. Sometimes, internal components like the drive pulley or wobble bearing need expert attention. Remember, attempting complex repairs without proper knowledge can void your warranty owned under the warranty rules; so weigh safety and cost-effectiveness before proceeding further.
 Many homeowners operate under common misconceptions about appliance warranties and repair services, often leading to costly mistakes. Contrary to popular belief, a warranty isn’t a free pass to immediate, same-day repairs or unlimited service visits—most warranties come with fine print that can trip you up if you’re not careful. For example, many assume that calling a manufacturer-approved repair service guarantees coverage, but failure to adhere to specific installation or maintenance procedures can void your warranty entirely. In fact, studies show that improper installation is among the top reasons warranties become invalid, and often, these issues are hidden in the fine print that most consumers overlook.
Are Warranty Terms as Clear as They Seem or Is There a Hidden Cost?
One overlooked nuance is the importance of understanding what your warranty *actually* covers—which is often more limited than advertised. Many assume that if a part fails, the repair will be entirely free. However, warranty clauses may exclude parts susceptible to wear and tear or require proof of proper maintenance. For instance, poor drainage in your dishwasher, caused by improper hose installation, can lead to a warranty denial if it’s considered user-inflicted damage. According to appliance industry experts, nearly 30% of repairs are denied due to technicalities or misinterpretations of warranty clauses, emphasizing how essential it is to review your warranty details carefully prior to service calls.
Maintaining your appliances over time isn’t just about quick fixes; it involves using the right tools and techniques to ensure longevity and reliable performance. One of my go-to investments is a high-quality digital multimeter. I personally rely on the Fluke 117 because it provides precise voltage, current, and resistance readings, helping me troubleshoot issues like faulty wiring or failing sensors accurately. For example, when diagnosing a dishwasher that leaves puddles, I use the multimeter to test the control board connections without risking further damage.
Another indispensable tool is a digital infrared thermometer. I use the Etekcity Lasergrip 774 to monitor things like fridge compressor temperature or oven heating elements, catching potential problems before they escalate. This proactive approach can save you from costly repairs and extend the lifespan of your appliances.
How do I keep my appliances in top shape over the years?
Regular cleaning and inspection are key. For example, checking and cleaning your dishwasher’s filters and spray arms not only improves cleaning performance but also reduces strain on the motor, preventing early failure. Additionally, applying a silicone-based lubricant to moving parts like door hinges and rollers can make operation smoother and diminish wear.
Establishing routine maintenance schedules, such as quarterly gasket checks or inspecting for loose wiring, can dramatically improve appliance durability. For larger projects or complex repairs, I trust professional-grade tools like the Klein Tools Screwdriver Set for precision and durability, ensuring I get the job done right the first time.
Looking ahead, I predict that smart maintenance systems integrated with IoT devices will become more common in appliances. These systems can alert homeowners about component wear or performance dips before failure occurs, turning maintenance into a predictive rather than reactive process. Embracing these innovations now will place you ahead in maintaining your appliances effectively.
If you’re interested in elevating your maintenance game, try calibrating your infrared thermometer regularly to ensure accurate temperature readings. Accurate diagnostics today can prevent surprises tomorrow—trust me, it’s worth the effort!
Remember, using the right tools properly can save you time, money, and frustration. For additional tips on troubleshooting specific issues, consider exploring topics like why your dishwasher leaves puddles or why your dryer takes multiple cycles. Equip yourself with knowledge and quality tools—your appliances will thank you for it!

Image prompt: A professional technician using a digital multimeter and infrared thermometer on household appliances, demonstrating maintenance techniques. Alt text: Expert using diagnostic tools for appliance care. Title: Appliance Maintenance Tools in Action.
,
What I Wish I Knew Before My First Fix
One of the hardest lessons I learned was that a seemingly simple issue like uneven flooring can sabotage even the best repairs. Properly leveling isn’t just about turning the feet; it’s about understanding your home’s foundation and how it affects your appliances over time. If I had known this earlier, I would have saved myself hours of frustration and extra parts.
Another insight is that even small, overlooked components—like loose mounting brackets or a slightly stretched suspension spring—can cause significant vibrations. Paying close attention to these details during maintenance can prevent major issues down the line.
Tools and Resources That Changed My Approach
Investing in a quality bubble level and a digital multimeter changed the way I troubleshoot appliance problems. The dishwasher leak fix guide provided me with step-by-step insights that empowered me to handle issues confidently. Knowing where to find reliable tutorials and trusted parts sources ensures you’re equipped for both quick fixes and long-term solutions.
Books like Appliance Repair Simplified have become my go-to references, combining clear explanations with practical tips for common challenges. Access to reputable online communities also offers support and shared knowledge from people who’ve faced similar issues.
Embrace Your Repair Journey
Remember, every appliance problem is a chance to learn and gain independence. The confidence you build from fixing your own washer or dishwasher not only saves money but also fosters a deeper appreciation for these essential devices. With the right tools and mindset, you can turn maintenance from an intimidating chore into a rewarding experience. Keep experimenting, stay curious, and let each successful repair serve as a stepping stone toward mastery.