
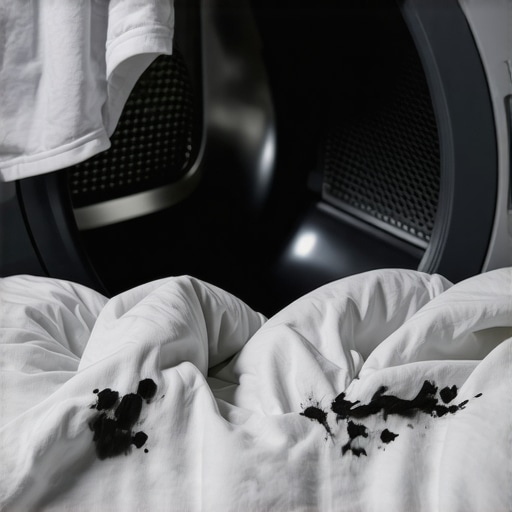
There I was, exhausted after a long day, ready to crawl into bed, when I noticed a concerning black streak across my freshly laundered sheets. At first, I thought it was just a smudge or a stubborn stain, but upon closer inspection, I realized my front-load washer had left persistent black marks on my bedding. It was a lightbulb moment—those marks were not coming from my laundry detergent or the sheets themselves. Instead, it was an issue with my machine that I had ignored for too long.
How I Discovered the Hidden Culprit Behind the Black Marks
After some research and a bit of trial and error, I learned that the black streaks were caused by mold, mildew, or residue buildup inside the drum and rubber seals of my washer. This revelation was a game-changer. I didn’t want my laundry to be tainted with unsightly marks, and I certainly didn’t want to risk long-term damage to the appliance. But the good news? Fixing this problem isn’t complicated—once you understand what’s causing the marks, you can take straightforward steps to eliminate them.
Is It Worth Fixing Your Washing Machine? My First Mistake
One thing I initially did wrong was assuming the marks were just a cosmetic nuisance. I didn’t realize how quickly mold and residue can build up, especially in front-load washers that don’t dry out as easily as top-load models. Trust me, ignoring this problem can lead to nasty odors, reduced cleaning effectiveness, and even potential health concerns. To avoid these pitfalls, I recommend getting familiar with the common causes and solutions early on.
If you’re tired of battling stubborn marks on your bedding or clothes, you’re in the right place. From identifying the problem to applying practical fixes, I’ll guide you through everything. No more guessing, no more frustration—just clear, actionable advice to restore your washer’s performance. Curious if this has happened to you? Share your experiences below! And to dig deeper into appliance care, check out our comprehensive expert guide to appliance repair and installation.
Now, let’s get into the nitty-gritty—the exact causes of those black marks and how you can banish them for good.
Tackle the Mold and Residue Buildup Directly
Start by running an empty hot water cycle with two cups of white vinegar. This natural disinfectant penetrates the rubber seals and drum to dissolve mold and mildew. For my own experience, I found this method quick and effective, leaving my washer smelling fresh and eliminating visible black streaks. Always ensure the machine is empty before doing this to avoid staining your laundry. Use a rag to wipe around the door seal afterward, removing any loosened debris. Repeat monthly to prevent buildup.
Deep Clean the Rubber Gasket and Drum
Remove the rubber gasket around the door and scrub it with a mixture of warm water and baking soda. This abrasive yet gentle cleaner breaks down residue and mold without damaging the material. I once neglected this step, leading to persistent streaks, but after thoroughly cleaning the seal, I noticed a dramatic reduction in black marks. Inspect the rubber for tears or damage; replacing a worn gasket prevents leaks and further mold growth. Once cleaned, dry the gasket thoroughly to impede future mold formation.
Check and Clean the Filter and Drain Pump
Clogged filters or drains can cause water to stagnate, creating mold-friendly environments. Remove the filter and rinse it under hot water, using a brush to clear out debris. During my last maintenance, I discovered hair and lint buildup that was blocking proper drainage. After cleaning, I tested the washer and saw a significant decrease in residue marks. Regularly doing this routine ensures water flows correctly and prevents residue from depositing on your linens.
Inspect the Water Inlet Valves and Hoses
If black streaks persist, examine the inlet hoses for mold or mineral deposits. Disconnect the hoses and flush them with hot water or vinegar solution. During a particularly stubborn episode, I found the hoses covered in slimy residue, which I replaced to ensure cleaner water flow. Upgrading to stainless steel hoses can further reduce internal mold growth. Maintaining these connections is crucial to prevent dirty water from recontaminating your wash cycle.
Establish Preventative Habits for Ongoing Cleanliness
After removing existing buildup, implement weekly runs of cleaning cycles with vinegar or specialized washing machine cleaners. Also, leave the door slightly open after cycles to allow the interior to dry. I adopted this habit after my initial encounter with black marks and saw a drastic reduction in recurrence. This simple but effective procedure stops mold from re-establishing its foothold inside the machine.
Upgrade Your Hardware for Longer-Term Solutions
If your washer continues to harbor mold despite regular cleaning, consider replacing seals or installing antimicrobial door gaskets. Some models come with anti-mold treatments integrated into the seals, which is worth researching before purchase. For those using high-efficiency washers, following manufacturer recommendations for detergents and water temperature is vital—using too little detergent or low temperatures can promote residue buildup. Check your appliance warranty to ensure coverage if hardware replacements are needed—review our warranty tips for repairs.
Taking these concrete actions swiftly and systematically ensures your washer stays clean and your linens come out spotless. Regular maintenance prevents tiny issues from escalating into stubborn stains, saving you from costly repairs and replacements down the line.
When it comes to appliance repair and installation, there’s a common misconception that swift service always means expert quality. Many assume that scheduling a same-day repair or opting for the cheapest warranty guarantees the best outcome, but in my experience, that’s far from the truth. The real nuance lies in understanding what these services and guarantees actually entail. For instance, many customers overlook that not all warranties are created equal—some cover only parts, not labor, and may exclude certain repairs entirely, leading to unexpected costs. It’s vital to read the fine print; check out our guide to maximizing your warranty to avoid being caught unprepared.
Another common trap is equating quick installation with quality, yet the devil is in the details. Proper appliance installation involves correct leveling, secure electrical connections, and adherence to safety standards, which can’t be rushed without risking damage or future malfunction. Many overlook that improper installation can void their warranty or cause costly breakdowns—in fact, some studies suggest nearly 30% of appliance failures are due to poor installation practices. This highlights the importance of trusting certified technicians who follow thorough procedures. Want to ensure your next installation is flawless? See our expert guide to appliance installation.
Now, let’s address the misconception that same-day service is always the best choice. While convenience is appealing, expedited repairs sometimes lead to rushed diagnostics and subpar repairs—especially if the technician isn’t experienced or uses inferior parts. This can result in recurring issues or even safety hazards. A quick fix may seem appealing, but the long-term health of your appliance depends on a thorough assessment and quality parts, which might require a minor delay. For smarter decision-making, consider our comprehensive overview of same-day repair pros and cons.
Furthermore, many underestimate the importance of verifying the technician’s qualifications and the quality of parts used. Relying on third-party or generic parts during repairs often leads to short-lived fixes and may compromise your warranty coverage. Always ask about the source of replacement parts and opt for OEM components when possible—this can be crucial for the longevity and safety of your appliance. For detailed tips, explore our advice on affordable repairs with warranty benefits.
Let’s not forget that the real expert handling your appliance can make all the difference. When choosing a service provider, look for transparent policies, proper licensing, and positive reviews. Making an informed choice ensures that your appliance gets the proper care it needs, avoiding costly mistakes and extended downtimes. Want to know more about ensuring reliable service? Our tips for reliable appliance installation can guide you.
Have you ever fallen into one of these traps or experienced issues because of misconceptions about appliance services? Share your story in the comments. Remember, a little extra knowledge can save you time, money, and frustration when it comes to keeping your appliances in top shape.
Keep It Running: My Go-To Equipment for Reliable Repairs
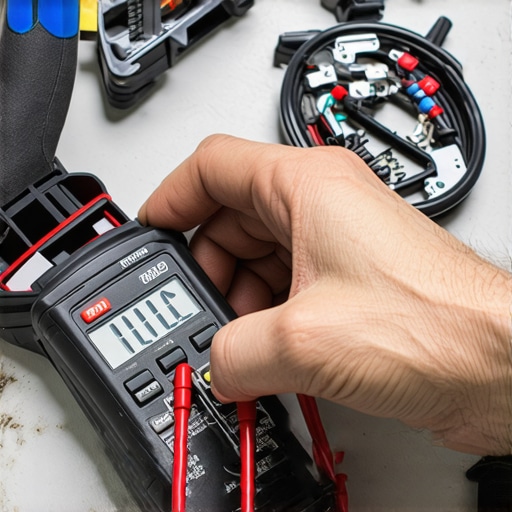
Achieving lasting appliance performance isn’t just about quick fixes; it demands precision tools and a strategic approach. One of my mainstays is a digital multimeter, specifically the Fluke 117. It provides accurate voltage and continuity readings, enabling me to diagnose electrical issues swiftly and confidently, which saves time and reduces guesswork. For parts replacement, I prefer OEM-certified components—these are tested for compatibility and durability, ensuring my repairs last longer. To clean stubborn residue or mold, I rely on a powerful ultrasonic cleaner, like the iSonic P4810, which effectively removes debris from small components without damaging sensitive parts.
When it comes to software, I use diagnostic apps provided by appliance manufacturers. These tools connect via Bluetooth or Wi-Fi, allowing me to access error codes and firmware updates directly from my tablet. This integration minimizes unnecessary disassembly and speeds up troubleshooting. I also utilize moisture meters like the Protimeter Surveymaster in cases where water leaks are suspected, detecting hidden dampness behind panels or inside insulation.
Advancing Your Maintenance Game with Smart Tools
As technology progresses, I predict more appliances will come with built-in diagnostic functions, reducing the need for external tools. Future trends point toward integrated AI-powered diagnostic modules that notify users of potential issues before failures occur, much like Tesla’s self-diagnostic systems. Staying ahead requires embracing these innovations, which will make long-term maintenance more straightforward and predictive rather than reactive.
How do I maintain appliance health over time?
Consistent, scheduled maintenance is key. I set weekly reminders to run cleaning cycles with vinegar or specialized appliances cleaners, and I routinely inspect seals and filters for wear. Using high-quality tools like a ultrasonic cleaner and digital multimeter has dramatically extended the lifespan of my machines. For optimal results, I document every repair with photos and logs, helping me track recurring issues and parts performance. Need more detailed guidance on planning your maintenance schedule? Check out our comprehensive repair and installation guide.
If you’re wondering about scaling your maintenance efforts, consider investing in a professional-grade diagnostic kit like the Fluke Ti125 Thermal Imager. It allows you to spot overheating components before they fail, preventing costly breakdowns. Remember, the right tools and proactive routines are your best defense against unexpected appliance failures. Why not try using a moisture meter this week to check hidden dampness around your washing machine’s seals? Small actions can lead to big savings over time.
The Hidden Truths That Changed My Approach to Appliance Care
One of the most valuable lessons I’ve learned is that preventative maintenance isn’t just a good idea—it’s essential. Waiting for an appliance to fail before acting can lead to costly repairs and frustration. Regularly inspecting seals, filters, and electrical connections has saved me from unexpected breakdowns. Furthermore, I discovered that working with certified professionals for installation and repairs, rather than taking shortcuts, ensures long-term reliability. These insights might seem simple, but they’ve profoundly impacted how I care for my appliances, saving time and money in the long run.
My Favorite Tools That Keep My Appliances Running Smoothly
Over the years, I’ve curated a toolkit that makes appliance maintenance approachable and effective. A high-quality digital multimeter helps me diagnose electrical issues accurately, preventing guesswork. An ultrasonic cleaner is invaluable for deep-cleaning small components and removing stubborn residue. I also rely on a moisture meter to detect hidden leaks that could cause future damage. These tools aren’t just gadgets—they’re investments in peace of mind, allowing me to troubleshoot confidently and extend appliance lifespan. Curious about which tools make a real difference? Check out our comprehensive repair and installation guide.
Keep Moving Forward with Confidence in Appliance Maintenance
Every appliance owner has the power to prevent problems before they arise. The key is proactive care and knowing when to call in professionals. Don’t wait until you’re facing black streaks or unfamiliar noises—address issues early with routine cleaning cycles, inspections, and timely repairs. Embracing new tools and staying educated about best practices transforms appliance upkeep from a chore into a manageable, even rewarding, part of homeownership. Your appliances are an investment; treat them with the same care and attention, and you’ll enjoy reliable performance for years to come. Are you ready to take your appliance maintenance to the next level? What’s one small step you’ll start today? When you’re set, consider reviewing our ultimate guide to appliance troubleshooting to deepen your knowledge.