
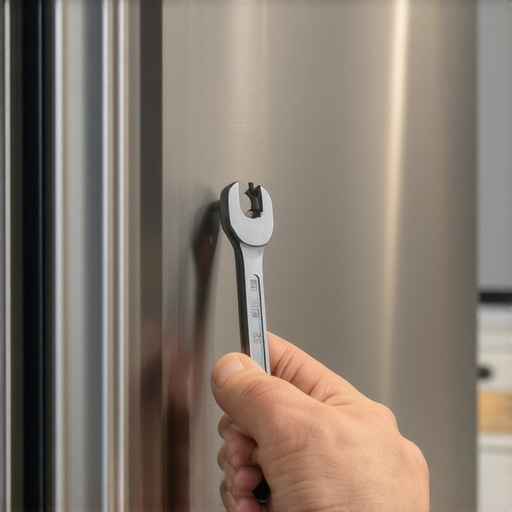
I’ll never forget the Tuesday night I reached for a pint of mint chocolate chip and nearly ended up with the freezer handle in my lap. It didn’t just wiggle; it felt like it was hanging by a single, exhausted thread. At first, I ignored it, thinking I’d eventually need to learn what to expect from same-day appliance repair experts to come save the day. But let’s be honest—nothing makes a kitchen feel more ‘broken’ than a handle that doesn’t feel solid. I actually made the mistake of trying to shove some folded paper behind it once, thinking I was a genius. Spoiler alert: I wasn’t. All it did was make the handle sit crooked and eventually fall off entirely during a dinner party. Embarrassing? Absolutely. Fixable? Easier than you think. Today, I’m going to show you exactly how to find that sneaky hex bolt and lock it down so your fridge feels brand new again.
That Wobbly Handle is Driving You Crazy for a Reason
It’s not just in your head. A loose handle is a tiny mechanical failure that often happens because of thermal cycling. Every time your freezer kicks on and off, the metal components expand and contract slightly. Over hundreds of cycles, those tiny vibrations back the mounting screws out. According to studies on mechanical fastener reliability, thermal expansion in household appliances is a primary cause for hardware loosening over time. If you’ve been worried about wear and tear clauses that might void your warranty, don’t panic yet. Most of the time, this is a simple maintenance task you can handle in five minutes with the right Allen wrench. I’ve spent years tinkering with my own gear, and I’ve learned that catching these small things early prevents you from needing a full expert guide to appliance repair and installation today later. Have you ever felt that sinking feeling when a handle just feels ‘off’ under your hand?
Does a loose handle mean the whole door is failing?
Many of my neighbors ask if a wiggly handle means the door seal is failing or if the hinges are shot. Usually, the answer is a relieved ‘no.’ It’s almost always just the set screw—the hex bolt—losing its grip on the mounting stud. However, if you let it go too long, you can actually strip the mounting post, and that is a much more expensive headache. Before you go scheduling your appliance repair for same-day service in 2025, let’s look at how to tighten that bolt yourself. You just need to know where the bolt is hiding and which way to turn the wrench without scratching your beautiful stainless steel finish.
Grab the Right Size Hex Key First
Most people assume a simple screwdriver will do the trick, but appliance manufacturers love their hex bolts. You’ll usually need a 1/8-inch or a 2.5mm Allen wrench to get the job done. Using the wrong size is like trying to turn a round peg with a square hole—you’ll just strip the head and end up needing affordable same-day appliance fixes with warranty benefits. I learned this the hard way a few years back when I tried to force a T-15 Torx bit into a hex slot. I felt that sickening ‘click’ of the metal rounding off, and suddenly, my five-minute fix became a nightmare. If the wrench doesn’t seat perfectly deep into the screw, stop immediately. A properly seated wrench should feel like it’s locked in place before you even apply pressure.
Locate the Hidden Set Screw
These little bolts are masters of hide-and-seek. Open your freezer or fridge door and look at the side of the handle that faces the other door or the inner seam. You’ll see a tiny, recessed hole. This is the gateway to your sanity. If you can’t see it, use your smartphone’s flashlight to peer inside. Sometimes, grease or kitchen grime can fill these holes, making them look like solid plastic. I once spent ten minutes poking at a handle before realizing the screw was just buried under a layer of dried-on orange juice. Once you find it, you’re halfway there. 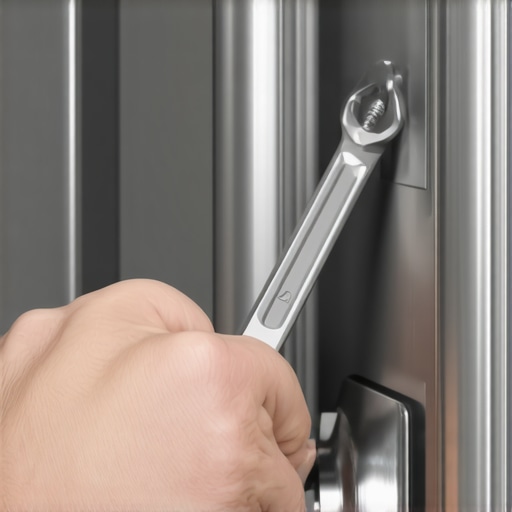
Turn Until It Bites
Once the wrench is in, turn it clockwise. You aren’t trying to lug-nut a truck wheel here; you just need it ‘snug plus a quarter-turn.’ Think of it like tightening a faucet—if you overdo it, you’ll crack the plastic mounting bracket inside the handle. If you feel the handle still wiggling after the screw is tight, the mounting stud on the door itself might be loose. In that case, you have to take the handle all the way off and tighten the base screws that hold the stud to the stainless steel skin. This is the kind of detail found in an expert guide to appliance repair and installation today, and it’s a common point of failure.
Why This Maintenance Protects Your Warranty
Leaving a handle loose isn’t just annoying; it can actually cost you your protection plan. If the handle eventually snaps off and dents the door, a technician might mark it as ‘consequential damage’ due to neglect. Knowing the reason your warranty claim was denied is often because of skipped minor maintenance can be a tough pill to swallow. I make it a habit to check my handles every six months. It’s a great way to how to prove periodic maintenance to keep your warranty valid if you ever need a major repair down the road. If the screw keeps coming loose every few weeks, a tiny drop of blue threadlocker on the bolt threads will keep it in place permanently. Just avoid the red stuff unless you want that handle to stay there until the heat death of the universe. If you find the internal brackets are shattered rather than just loose, scheduling your appliance repair for same-day service in 2025 is your best bet to get a factory-spec replacement before the whole door face gets scratched up.While that blue threadlocker trick is a lifesaver for handles, it highlights a much larger philosophy: most appliance failures aren’t just ‘bad luck,’ they are cumulative neglect. Everyone thinks the holy grail of fix-its is finding what to expect from same-day appliance repair experts, but here is the contrarian truth: if a company guarantees same-day service for every single call, they are often prioritizing speed over deep diagnostics. In my years of troubleshooting, I’ve seen that the most talented master techs are usually booked out a day or two. Rushing a complex repair can lead to what we call ‘parts-cannon’ diagnostics—where a tech just throws expensive boards at a problem instead of finding the root cause. If you want warranty-backed appliance services you can rely on, sometimes waiting twenty-four hours for a specialist is smarter than demanding a generalist within two hours.
Don’t Sacrifice Diagnostic Depth for a Fast Visit
One of the biggest traps homeowners fall into is the ‘level floor’ myth. Most people think if their fridge doesn’t roll away, it’s level enough. However, high-end refrigerators and ranges are engineered with incredibly tight tolerances. I’ve seen brand-new units fail because of the wrong way to level a professional kitchen range or fridge. If the frame is even slightly torqued, it puts physical stress on the compressor mounts and the door gaskets. Over time, this leads to air leaks that force your unit to work twice as hard. This isn’t just my opinion; a study by the Association of Home Appliance Manufacturers (AHAM) indicates that improper installation is a leading secondary factor in component stress, often overlooked during standard ‘speed-runs’ by technicians. 
Can a slightly tilted floor really burn out your motor?
Surprisingly, yes. In a refrigerator, a frame that isn’t plumb can cause the coolant to pool incorrectly in the evaporator coils, leading to ‘slugging’—where liquid refrigerant hits the compressor instead of gas. This is a death sentence for the motor. When you are looking at how to ensure reliable appliance installation in 2025, you need to verify that your tech is using a digital level, not just eyeballing the trim. This attention to detail is the difference between a machine that lasts five years and one that lasts fifteen.
The Maintenance Paper Trail is Your Best Weapon
Here is another nuance: your warranty isn’t a ‘get out of jail free’ card. If a manufacturer can prove that you ignored basic upkeep—like cleaning those dusty coils or tightening that loose handle—they can legally walk away. I always tell my readers to keep a log. Knowing how to prove periodic maintenance to keep your warranty valid is just as important as the repair itself. If you can show a tech that you’ve checked your door seals and leveled the unit annually, you have massive leverage if they try to claim the reason your warranty claim was denied was ‘consumer negligence.’ For those deeper issues that involve internal circuitry or refrigerant leaks, an expert guide to appliance repair and installation today is vital. Don’t be afraid to ask for a tech’s credentials before they touch your control board. Have you ever fallen into this trap of hiring the fastest available tech only to have them break something else? Let me know in the comments.I’ve seen it dozens of times: a ‘same-day’ pro shows up, looks at the fridge for three minutes, and says you need a $600 compressor when it’s really just a $30 capacitor. If you want to stop being a victim of ‘speed-tax’ diagnostics, you need to own a professional-grade multimeter—I personally swear by the Fluke 117. It has a ‘LoZ’ feature that prevents ghost voltages from lying to you, which is the only way I trust myself when investigating the capacitor test that saves your ac compressor before it fries the whole unit. Most people are terrified of electricity, but understanding basic continuity is the difference between being a savvy homeowner and a walking ATM for shady repair shops.
Get a Multimeter Before You Get a Headache
It’s not just about the big fixes. I use my multimeter for everything from testing my smart locks to checking if my oven’s heating element is actually broken or if it’s just a loose wire. The Association of Home Appliance Manufacturers (AHAM) specifically notes in their recent technical bulletins that improper voltage regulation—often caused by small house-wide surges—is the number one cause of logic board ‘death’ in modern inverter-driven motors. If you aren’t checking your outlet’s voltage, you aren’t doing maintenance. You should also look for same-day appliance repair quick solutions with warranty support that explicitly mention electrical diagnostics in their work order. It shows they actually care about the ‘why’ and not just the ‘what.’
How do I keep my high-end appliances running for decades?
The secret isn’t a magic chemical; it’s consistency. You need to treat your kitchen like a data center. I use smart energy monitors like the Emporia Vue to track the ‘heartbeat’ of my appliances. If I see my refrigerator suddenly drawing 20% more power than it did last month, I know I’ve likely got the clogged capillary tube making your fridge run constantly. By catching that spike early, I can call for top-tips for same-day service warranty coverage before the compressor burns out. It’s about being the ‘detective’ for your own home. 
The Future of Repair is Predictive, Not Reactive
In the next five years, we are going to see a massive shift toward ‘Self-Healing’ appliances. Manufacturers are starting to integrate AI that can adjust its own power cycles when it detects a slight friction increase in a dryer drum or a washer motor. Until that becomes the standard in every home, you are the primary sensor. You need to be proactive with things like how to calibrate your smart thermostat for better efficiency because even a two-degree error can cause your HVAC to short-cycle, leading to the hvac filter direction error that strains your motor. If you wait for the ‘Check Engine’ light to come on, you’ve already lost the battle.
Know Your Rights Before the Tech Arrives
Finally, remember that you are the boss of the repair. When you are looking to maximize your appliance warranty during emergency repairs, always ask the technician for their ‘Delta T’ readings on HVAC or the specific resistance ohms on a heating element. If they can’t give you numbers, they are just guessing with your money. I make it a point to stand nearby—not to be a nuisance, but to show I’m informed. My advanced tip for you today: Go to your main breaker box and check the torque on your appliance breakers; a loose connection at the panel can mimic a failing control board perfectly. Check those screws (carefully!) and see if your ‘glitchy’ stove suddenly starts behaving.
The Expensive Lessons I Learned from ‘Five-Minute’ Fixes
Over the years, I’ve realized that the most ‘obvious’ fix isn’t always the right one. Here are the core insights I’ve gained from hundreds of hours under the hood of refrigerators and ranges:
- The ‘Hand-Tight’ Trap: Most DIYers either under-tighten, leading to more vibration, or over-tighten, which cracks the plastic housing. Always aim for ‘snug plus a quarter’ when using your hex key.
- Identify the Source: If a handle is loose, it might not be the hex bolt. Check the mounting studs directly. If those are loose, you must remove the handle entirely to tighten the base screws. Knowing this helps you how to spot a shady appliance repair quote that tries to sell you an entire replacement door.
- Documentation is King: When I successfully disputed a denied claim, it was because I had photos of my annual coil cleanings and handle checks. If you ever need to how to challenge a warranty claim rejection for your fridge, your maintenance log is your best witness.
The Kit Every Serious DIY Homeowner Needs
#IMAGE_PLACEHOLDER_E#
You don’t need a van full of gear, but these three items will save you thousands over the life of your home:
- Loctite 242 (Blue Threadlocker): This is the secret sauce for fridge handles. A tiny drop on the hex bolt ensures it never wiggles again, regardless of how many times the freezer cycles on and off.
- Digital Level: Essential for ensuring your unit isn’t torqued. A level fridge is a quiet, efficient fridge that won’t burn out its compressor prematurely.
- A Professional Network: Sometimes, a job is too big for a Saturday afternoon. Knowing where to find fast trustworthy appliance installation near you or how to maximize your appliance warranty during emergency repairs gives you the confidence to know when to DIY and when to call in the cavalry.
Your Path to a Stress-Free Kitchen
Taking ten minutes to tighten a handle or check a gasket isn’t just about aesthetics; it’s about respecting the machines that feed your family. While you might occasionally need same-day appliance repair for a catastrophic failure, most ’emergencies’ are preventable with a bit of foresight and the right Allen wrench. You’ve got the tools and the knowledge—now it’s time to use them. Have you ever ignored a tiny rattle only to have a major component fail a few weeks later? Let me know your stories in the comments below!