
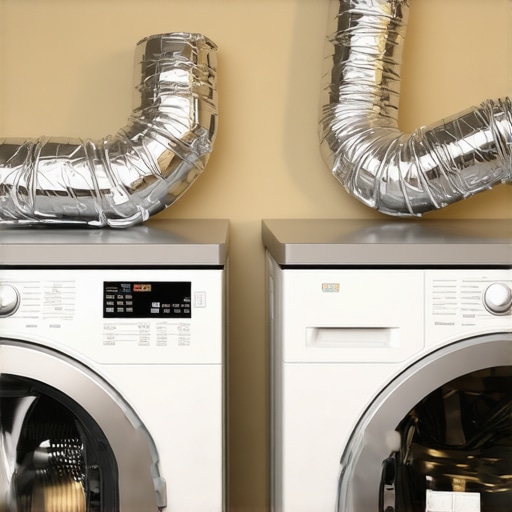
It was a dull Tuesday morning when I finally decided to give my laundry room a quick update. I had just bought a new dryer, and with all the excitement, I thought, “This will be easy.” Little did I know, the nightmare was lurking behind the scenes. As I pulled the dryer out to install the vent, I noticed the flimsy foil pipe I had used in the past. It looked so harmless—just a cheap, flexible slinky of foil. But the moment I pressed start, I could smell that familiar, burnt scent lingering around my laundry room. Turns out, that tiny mistake was setting me up for trouble.
Don’t underestimate your dryer vent’s importance
Ever experienced a sudden, almost *smoky* smell during your laundry cycle? Or wondered why your dryer isn’t drying clothes efficiently anymore? That’s a red flag that might be linked to the vent—an often overlooked component in home appliance maintenance. A proper vent isn’t just about keeping things tidy; it’s your first line of defense against fire hazards and energy waste. If you’re still clinging to those cheap foil pipes, you’re risking more than just inefficient drying. According to the U.S. Fire Administration, improper venting causes thousands of house fires annually, many stemming from subpar duct setups. That’s a serious wake-up call for homeowners who just want laundry done without risking their homes.
Is all ducting created equal? Or is it just hype?
Let me admit: I made the mistake early on of thinking all vent pipes were the same—so I used a quick foil slinky because it was cheap and flexible. Big mistake. That flexibility might seem convenient, but over time, it traps lint, restricts airflow, and heats unevenly—factors that inevitably lead to fire risks or costly breakdowns. Trust me, not all pipes are created equal. Investing in rigid metal pipes might seem like an extra step, but it’s a game-changer in safety and efficiency. For tips on ensuring your setup maximizes your warranty and protects your home, check out [this guide on appliance warranties](https://discountappliancehub.com/maximize-your-appliance-warranty-during-emergency-repairs).
Throughout my experience, I’ve learned the hard way that a small upgrade—like switching to durable, rigid pipes—can save you from a potential disaster and improve your dryer’s performance. Don’t let a careless installation or a cheap workaround put your home at risk. In the next sections, I’ll walk you through the reasons why rigid metal pipes are essential and how you can upgrade your vent system seamlessly. Ready to make that smart change? Let’s dive in!
**{
Select the Right Materials to Ensure Safety and Efficiency
Start by choosing a rigid metal duct, preferably galvanized steel or aluminum. These materials resist heat buildup and lint accumulation better than flexible foil or plastic options. As I did when upgrading my own vent, avoid cheap plastic or foil pipes; they can melt or trap lint, increasing fire risk. Visit your local hardware store or order online to find a pipe with smooth interior surfaces that promote airflow.
Prepare Your Workspace and Gather Necessary Tools
Clear the area around your dryer and measure the length of duct needed with some extra slack for flexibility. You’ll require screwdriver, foil tape (not duct tape), foil tape for sealing joints, and possibly a drill. I once tried to skip steps by using duct tape—seems quick, but it doesn’t seal well against heat and lint. Proper preparation ensures a neat, secure installation that lasts.
Disconnect and Remove the Existing Vent
Unplug the dryer and carefully detach the old duct. Check for lint buildup or damage. Be meticulous—neglecting this can clog your new duct and cause inefficiency or fire hazards. During my first replacement, I found a thick layer of lint settled in the old pipe; removing it was a game-changer for airflow. Keep the area clean for optimal results.
Attach the New Rigid Duct to the Dryer and Vent
Connect one end of the duct to the dryer’s exhaust outlet using the clamps provided. Make sure the connection is snug—use a screwdriver to tighten clamps securely. Then, extend the duct to the exterior vent, ensuring there’s no sagging or kinks that can trap lint or restrict airflow. Seal all joints with foil tape, pressing firmly for a tight fit. I once overlooked sealing a joint; I noticed increased drying time and a slight smell of burnt lint—lesson learned the hard way.
Ensure Proper Ventilation and Safety Checks
Make sure the exterior vent opening is unobstructed and installs with a vent cap or flap to prevent critters from entering. Turn on the dryer and observe the airflow at the exterior vent. A strong, steady flow indicates a successful upgrade. I tested my vent after installation, and seeing the confident blast of air made me realize how much better my dryer would perform. Regularly inspect and clean the duct to maintain safety and efficiency.
For tips on maximizing your appliance’s warranty during such repairs, visit this guide. When in doubt, consider professional installation services for peace of mind. Proper duct installation not only prolongs your appliance’s life but also safeguards your home from fire risks—don’t cut corners when it comes to safety.
Many homeowners assume that appliance installation is a simple plug-and-play process, but the reality is far more nuanced. Misconceptions about warranties and same-day services can lead to costly mistakes. For instance, a widespread myth is that all repair services are created equal—many believe that a quick fix guarantees long-term reliability, but *not* all technicians are equally trained or certified. Rushing into repairs without verifying credentials can cause further damage or void your warranty, which is why it’s crucial to check the qualifications of your repair tech. For comprehensive guidance, visit [warranty-backed appliance services you can rely on](https://discountappliancehub.com/warranty-backed-appliance-services-you-can-rely-on).
One hidden trap homeowners often fall into involves underestimating the importance of choosing the right parts. Using generic or cheap replacement components might seem cost-effective initially, but studies indicate they often fail sooner, costing you more in the long run. This mistake is especially costly during warranty repairs, where substandard parts can void coverage. To maximize your warranty benefits during emergency repairs, read [this detailed guide](https://discountappliancehub.com/maximize-your-appliance-warranty-during-emergency-repairs).
When it comes to same-day service, many assume it’s always the best choice. While convenience is appealing, there are hidden nuances. Fast turnaround times often depend on technician availability and parts stock. If your repair involves complex diagnostics, rushing might lead to incomplete fixes or overlooked issues. Advanced homeowners understand that a thorough initial assessment—sometimes requiring a slightly longer wait—saves money and trouble later. For reliable same-day solutions that prioritize quality, explore [affordable same-day appliance fixes with warranty benefits](https://discountappliancehub.com/affordable-same-day-appliance-fixes-with-warranty-benefits).
Ever wondered about the technical pitfalls that even seasoned DIYers might overlook? One common mistake is neglecting to verify if the repair tech is certified—an unqualified worker can misdiagnose problems, leading to recurring issues or safety hazards. A quick way to confirm credentials is by reviewing the technician’s certifications and experience. For a step-by-step on verifying your technician’s qualifications, see [how to verify your appliance repair tech is actually certified](https://discountappliancehub.com/how-to-verify-your-appliance-repair-tech-is-actually-certified).
Lastly, understanding the fine print in warranties is crucial. Many believe warranties cover everything, but exclusions like cosmetic damage or improper installation are common. Reading the warranty details or consulting experts can prevent disappointment. To learn the key points to consider, check [top tips for same-day service warranty coverage](https://discountappliancehub.com/top-tips-for-same-day-service-warranty-coverage).
By recognizing these hidden nuances—such as the importance of certified technicians, quality parts, and realistic expectations about quick fixes—you safeguard your appliance investments and ensure safety. Remember, rushing or cutting corners in installation or repair often leads to bigger problems than originally expected. Have you ever fallen into this trap? Let me know in the comments.Maintaining your appliances and ensuring repair work is done efficiently requires more than just basic effort; it demands the right tools tailored to specific tasks. One essential item I personally swear by is a high-quality digital multimeter. It allows me to accurately diagnose electrical issues, measure voltage, resistance, and continuity—crucial steps before replacing parts or confirming faulty wiring. Investing in a digital multimeter with auto-ranging capabilities simplifies troubleshooting, saving time and preventing unnecessary parts replacement. For more advanced diagnostics, I use a thermal imaging camera, which aids in spotting hidden heat signatures indicating failing components—like a malfunctioning compressor or worn-out motor. This non-contact inspection method has saved me from costly guesswork and premature replacements, especially in complex systems. Additionally, a quality set of screwdrivers with insulated handles ensures safety when working around live circuits, which many DIY enthusiasts overlook. I prefer screwdrivers with magnetic tips for ease of handling tiny screws during delicate work.
Regarding software solutions, I rely on appliance-specific diagnostic apps that interface with smart appliances. These apps provide real-time error codes and troubleshooting steps, streamlining the repair process. For instance, when dealing with smart refrigerators, pairing diagnostic tools with manufacturer apps can reveal issues that aren’t visible through standard methods, reducing the number of service calls needed.
Looking ahead, I believe the trend towards integrated diagnostic tools that connect seamlessly with smartphones will grow, enabling even more precise and quick repairs. Devices like portable scanners that interface via Bluetooth and apps designed for technicians make maintenance more accessible and less time-consuming.
**How do I keep my tools and methods effective over time?** Regular calibration of diagnostic instruments, staying updated with manufacturer repair guidelines, and investing in quality tools are key. Timely maintenance of your tools ensures their accuracy and longevity, which translates directly into more reliable repairs. For example, using a certified calibration service for your multimeter—like those detailed in [this expert guide](https://discountappliancehub.com/expert-guide-to-appliance-repair-and-installation-today)—can improve diagnostic precision. Additionally, dedicate time to learning about new diagnostic technologies and software updates from appliance manufacturers.
Ready to elevate your repair game? Try integrating a thermal imaging camera into your toolkit for early fault detection. This small investment can save you hours of troubleshooting and prevent costly downtime. As the future of appliance maintenance leans towards smarter diagnostics, staying ahead with the right tools makes all the difference. For more on ensuring your equipment stays in top condition, check out [this comprehensive guide](https://discountappliancehub.com/fast-trustworthy-appliance-installation-near-you).
The Hardest Lesson I Learned About Installation, Appliance Repair, Warranty, and Same-Day Service
One major takeaway from my journey is that cutting corners with duct materials can lead to unexpected risks and expenses down the line. I once used cheap foil pipes, thinking they’d suffice, but that choice nearly cost me my home in a fire hazard. The importance of investing in quality, rigid metal ducts became glaringly clear when I saw firsthand how inferior materials trap lint and restrict airflow.
How Overconfidence Can Make You Overlook Critical Details
I used to underestimate the significance of proper sealing and airflow—believing that a quick fix or sealant would do the trick. But every overlooked joint or sagging duct increased my drying time and decreased energy efficiency. It’s a lesson that even experienced DIYers need to approach appliance upgrades with humility and thoroughness.
Why Your Warranty Depends on Following the Right Procedures
It’s tempting to think that any repair or upgrade is fair game, but warranties often require certified installation standards. I learned this the hard way when I mistakenly installed a duct that voided my warranty. Now, I always verify that my methods align with manufacturer guidelines and that my repairs are documented properly, ensuring continued coverage.
Being Honest About When to Call Professionals
While DIY saves money initially, some tasks—like venting upgrades—are best left to experts. I finally recognized my limits when I struggled with sealing connections and testing airflow. Consulting certified technicians not only guarantees safety but also prolongs appliance lifespan, saving me money and stress in the long run.