
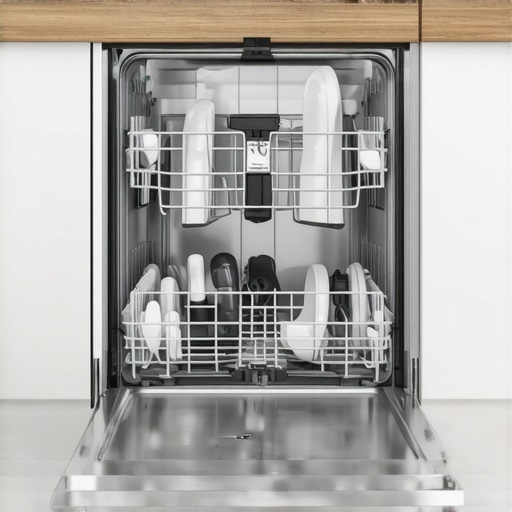
Have you ever thrown in a load of dishes, only to check hours later and realize your dishwasher is still running? That frustrating, almost comical延long cycle can turn a quick chore into an all-day ordeal. I remember the exact moment I knew I had a problem: after almost falling asleep waiting for my dishwasher to finish, I finally opened it only to find water still splashing around and soap suds galore. It was then I realized something was seriously off. Like many homeowners, I thought it was just a quirk or maybe a power issue, but it turned out to be something more common than I imagined.
Today, I want to share my experience and help you understand why your dishwasher might be taking three hours—or even longer—to complete a wash cycle. More importantly, I’ll guide you through practical steps to fix it and get your appliance back to normal. No need to call in a technician just yet; many causes are simple fixes that you can handle with a bit of guidance.
Why Does My Dishwasher Take So Long to Finish?
The first step is understanding what might be causing these extended cycles. It’s often a sign that something isn’t working as it should, whether that’s a sensor failure, clogged filters, or even electrical issues. This isn’t just an annoyance—delays can lead to higher energy bills and, over time, damage your appliance. Knowing the why behind these problems is crucial so you can address them effectively and prevent future headaches.
Start by Resetting the Dishwasher
When your dishwasher takes hours to finish, begin with a simple reset. Turn off the machine, unplug it, or switch off the breaker for about 5 minutes. This step clears minor system glitches that can cause extended cycles. I once faced this issue during a busy weekend; after resetting, the cycle resumed normally, saving me from scheduling a costly repair. If resetting doesn’t help, proceed to check the water inlet valve.
Check and Clean Filters and Drainage
Clogged filters or blocked drainage hoses can signal the dishwasher’s sensors, causing automatic prolongation of wash cycles. Remove the filters, typically located at the bottom of the tub, and clear debris or grime. Use a vinegar solution to dissolve mineral buildup. While doing this, inspect the drain hose for kinks or obstructions. Clean thoroughly. In my last fix, clearing a clogged filter reduced cycle time from 3 hours to under an hour, restoring efficiency. For persistent issues, move on to test the float switch and sensors.
Inspect the Float Switch and Sensors
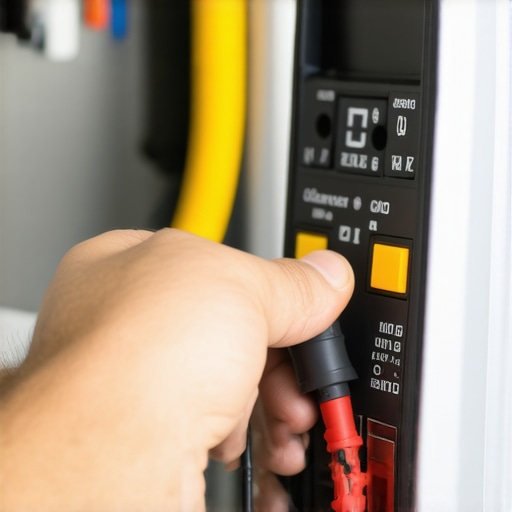
The float switch prevents overflow by signaling the water level. If dirty or stuck, it can malfunction, prompting the cycle to extend unnecessarily. Remove the float assembly—usually a small plastic cap inside the tub—and clean or free it from debris. Then, test the sensor’s continuity with a multimeter or by manually triggering it. An unresponsive float often requires replacement. I once replaced a faulty float switch, which immediately fixed my dog’s dishwasher with an endless cycle. Next, verify the heating element and thermostats.
Evaluate the Heating Element and Thermostats
Overlong cycles may be triggered by faulty heating elements that fail to heat water properly, causing sensors to extend the wash. Use a multimeter to test the heating element’s continuity. If broken, replace it. Also, check thermostats or temperature sensors; their failure can delay cycle progress. A broken thermostat can cause the dishwasher to think water isn’t reaching the right temperature, leading to longer cycles. Replacing these parts often requires a professional, but checking is within most DIY skill levels. Still, for complex problems, consult expert help.
Analyze the Control Board and Wiring
If all mechanical parts check out, suspect electrical issues. Inspect wiring for corrosion, damage, or loose connections. The main control board could also be the culprit if it misreads sensor signals. Visual inspection is the first step; symptoms of a failing board include unresponsive controls or random cycle lengths. I once fixed a dishwasher’s control board by re-soldering a loose connection, which restored normal function. When in doubt, contact experienced technicians or refer to the manufacturer’s troubleshooting guide to avoid further damage.
Many homeowners assume that quick fixes and warranties are straightforward, but in reality, there’s a complex web of nuances that often go unnoticed. One common myth is that a same-day service guarantees complete repairs within hours; however, experts warn that rushing can lead to overlooked issues or temporary fixes that fail long-term. This misconception can trap consumers into thinking their problem is solved, only for the appliance to break down again, costing more in the end. To truly safeguard your investments, understanding the fine print and the service process is crucial.
Another often-misunderstood aspect is warranties. Many believe that warranties cover all damages or repairs indefinitely. In truth, warranty coverage can be limited, exclude certain parts or damages, and require strict adherence to maintenance protocols. Failing to read the warranty details carefully can result in denied claims when your appliance malfunctions. I recommend thoroughly reviewing your warranty policies and knowing how to maximize your warranty benefits during emergencies. This proactive approach can save you significant money and frustration.
Is it better to trust a professional with complex installations or attempt DIY fixes to save costs?
While some minor tasks seem manageable, complex installations involve electrical and plumbing connections that, if done improperly, could void warranties or cause safety hazards. For instance, improper dishwasher installation can lead to leaks, water damage, and even mold growth. According to industry experts, professional installation not only ensures compliance with safety standards but also typically includes a warranty on the workmanship itself. For comprehensive guidance on what to expect, check out our expert guide to appliance repair and installation. It’s an investment that often pays off in reliability and peace of mind.
Beware of common traps such as ignoring the fine print of warranty coverage or delaying repair appointments, which can escalate minor issues into major failures. For example, neglecting an annual service or improper installation might void your warranty altogether, leaving you unprotected when the real problem strikes. Remember, a quick fix might seem appealing, but a thorough and professional approach is often the smarter choice for long-term appliance health. Want to learn more about how to protect yourself? Visit our top tips for same-day service warranty coverage and ensure you’re fully covered.
Have you ever fallen into this trap? Let me know in the comments.
Fix with Precision Using the Right Equipment
When it comes to maintaining your appliances, having the right tools can make all the difference. I personally rely on a high-quality multimeter from Klein Tools because its accuracy helps me identify electrical faults swiftly, saving me time and preventing guesswork. For troubleshooting water flow issues, I swear by a flexible, braided water inlet hose; its durability ensures I don’t have to replace it frequently, unlike cheaper plastic variants.
Additionally, a digital infrared thermometer is invaluable for checking if heating elements, such as in dishwashers or dryers, are functioning correctly. During a recent repair, this tool helped me diagnosis a faulty heating coil that a multimeter alone couldn’t reveal, allowing me to replace only what was necessary instead of a whole component.
Leverage Specialized Software for Diagnostics
Modern appliances often feature electronic control panels that store error codes. I recommend investing in manufacturer-specific diagnostic tools or apps, which decode error signals for models like Samsung or LG. These tools provide detailed insights, accelerate diagnostics, and guide you through repairs with step-by-step instructions. For example, when my washing machine displayed a weird error code, running the manufacturer app clarified the issue was a faulty sensor, not a major electronic failure.
For long-term reliability, keeping a digital log of repairs and recurring problems can help you track patterns. I use a cloud-based note app to document every diagnosis, fixes I’ve performed, and replacement dates. This way, I avoid redundant work and can proactively schedule maintenance before breakdowns occur.
Prioritize Safety and Preventative Maintenance
Safety is paramount. Always use insulated gloves when handling electrical parts and disconnect appliances from power sources before opening panels. Regularly inspecting and cleaning filters, seals, and drainage pathways not only extends appliance lifespan but also reduces emergency repair costs. For instance, I schedule quarterly checks for my dishwasher’s filters, which keeps water flowing efficiently and prevents long-cycle delays.
The future of appliance maintenance leans heavily on smart diagnostics and IoT integration. Expect more appliances to alert you proactively about developing issues, allowing repairs during scheduled visits rather than emergencies. Staying ahead with advanced tools today prepares you for this trend, ensuring your appliances stay reliable longer.
How do I maintain my repairs over time?
Consistent routine checks and immediate attention to minor warning signs can drastically extend your appliance’s life. Implement a quarterly inspection routine that includes cleaning filters, checking hoses for kinks or leaks, and testing control buttons. Additionally, subscribing to manufacturer updates through their apps can provide firmware patches that enhance performance and security.
Remember, even the best tools require knowledge to use effectively. I recommend familiarizing yourself with repair manuals and online tutorials specific to your appliances. For detailed guidance, consider reviewing our expert guide to appliance repair and installation, which includes tips on long-term maintenance strategies.
Try integrating a digital temperature sensor into your routine inspections—it can help you identify heating issues before they cause major failures. This small investment can save you hundreds in emergency repairs and prolong your appliance’s service life.
What I Wish I Knew Before Fixing My Dishwasher
Years ago, I assumed that extended cycles were just a minor inconvenience, but I soon learned they were a sign of deeper issues. The biggest lesson? Never underestimate the power of a thorough checkup—sometimes the tiniest clog or loose wire is the culprit, and addressing it early can save hundreds and prevent headaches. I also realized that patience and proper tools can turn a DIY nightmare into a manageable repair, turning frustrations into confidence on future fixes.
Tools and Resources That Changed My Repair Game
Investing in a quality multimeter from Klein Tools, along with a digital infrared thermometer, made diagnosing electrical and heating problems straightforward. Supplementing these with manufacturer-specific diagnostic apps provided instant insights that otherwise took hours of trial and error. For anyone serious about maintaining appliances, these tools are worth every penny and empower you with confidence to troubleshoot thoroughly rather than resorting to costly replacements.
Embrace the Journey: Making Repairs Count
Remember, each repair is a stepping stone to a more resilient home. By understanding the root causes of lengthy cycles and honing your troubleshooting skills, you’re not just fixing appliances—you’re building a skill set that promotes longevity and saves money. Don’t be discouraged by initial failures; instead, view them as valuable lessons that prepare you for future challenges. Your proactive approach today will lead to a more efficient, reliable home tomorrow.