Have you ever been in the middle of a quiet evening, only to be jolted by a piercing high-pitched whine from your dishwasher? I remember the first time I heard that noise—it was so shrill that it practically echoed through the entire house, ruining my peaceful night. At first, I thought it was some weird glitch or that my appliance was about to give up the ghost. Turns out, that shrill sound wasn’t just annoying—it was a sign something needed my attention. If you’ve faced this frustrating issue, you’re not alone. I’ve been there, and after some trial and error, I discovered ways to diagnose and fix the problem without calling in a costly repair service.
Understanding Why Your Dishwasher Emits That Piercing Sound
The high-pitched whining is often caused by issues like a failing pump, a worn-out motor, or a problem with the spray arms. These components are vital for proper operation, but when they start to go, they can produce that nerve-wracking noise. The good news? Many times, the culprit is something that can be addressed with a simple fix or maintenance routine. Recognizing these signals early can save you cash and prevent further damage to your appliance. For example, a worn bearing or a loose belt might just need tightening or lubrication—quick fixes that can restore quiet to your kitchen. Want to dive deeper into specific causes? Check out this detailed guide on why your dishwasher might smell like fish, which also touches on related motor and pump issues.
Does This Noisy Problem Really Warrant a Repair or Replacement?
When I first encountered that deafening whine, I worried I had to buy a new dishwasher. Honestly, I made the mistake of ignoring it until the noise worsened, which only led to more costly repairs. Early diagnosis is key. Sometimes, the whine is a transient issue—like debris caught in the spray arms—that’s easy to clear. Other times, it’s a sign of a part nearing the end of its life. Knowing when to repair and when to replace can be daunting, but understanding your appliance’s signals helps. If you’re feeling unsure, here are some tested tips to test your dishwasher’s motor and other parts for wear and tear.
Start by Unplugging and Clearing the Area
Before diving into repairs, always unplug your dishwasher to prevent electric shocks. Move nearby objects, like pots and utensils, away to prevent accidents. I remember the first time I did this; I accidentally knocked over a jar while bending down—lesson learned: clear the workspace fully. Safety first ensures a smoother repair process.
Inspect and Clean the Spray Arms
Remove the spray arms according to your dishwasher model—usually by unscrewing or unclipping them. Check for debris, mineral buildup, or obstructions that could cause imbalance or noise. Use a toothpick or brush to clear small holes, ensuring proper water flow. Once cleaned, reinstall the spray arms. This straightforward step often resolves issues caused by debris causing imbalance or vibrations.
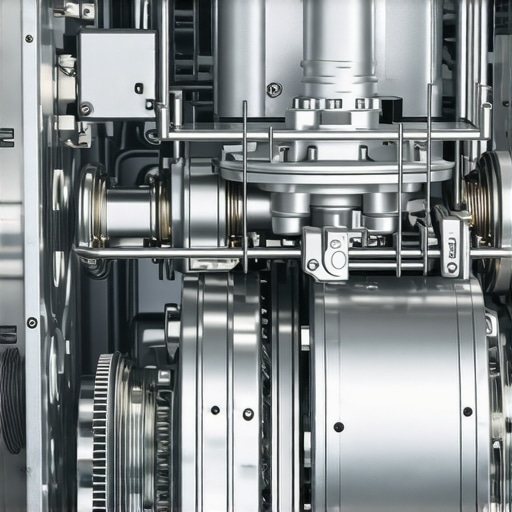
Check the Pump and Motor Components
Locate the pump assembly, typically at the bottom of the unit. Listen for any grinding or rattling sounds when you turn the motor manually—if accessible. Tighten loose mounting screws and look for worn bearings or cracked impellers. In my experience, a worn bearing can produce a shrill squeal, much like a squeaky wheel. Replacing these parts can significantly reduce noise. If unsure, refer to the dishwasher’s service manual or consider consulting a professional.
Examine the Drive Belt and Clutch Assembly
Inspect the drive belt for cracks or looseness—dislodged or frayed belts tend to slip causing whines. If the belt is damaged, it needs replacement. The same goes for clutch assemblies that may wear over time, leading to excessive noise during operation. I once replaced a belt myself, watching a quick tutorial online, and within an hour, I had my dishwasher functioning quietly again. For belt replacements, ensure you use the correct part number.
Verify and Lubricate Moving Parts
If the components seem fine but the noise persists, lubricate the moving parts with a food-grade silicone spray—avoiding oil-based lubricants that can attract dirt. Focus on the pump motor shaft, spray arm pivots, and other moving joints. A little lubrication can mean the difference between shrill noise and peaceful operation.
Test the Repairs by Running a Cycle
Plug the dishwasher back in and run a short cycle with no dishes inside. Observe and listen carefully—are the noises gone? Did the pump operate smoothly? If sounds persist, repeat inspections or consider that internal components like the motor windings might be failing. At that point, consulting an appliance repair expert or considering part replacement might be necessary.
Prevent Future Noises with Regular Maintenance
Schedule annual cleanings of spray arms and filters to prevent debris accumulation. Keep an eye on rubber seals and replace any worn parts promptly. Regular maintenance reduces the chance of sudden, shrill noises—saving you money and stress. Want more tips? Check out this detailed guide on [why your dishwasher is making your dishes smell like fish](https://discountappliancehub.com/why-your-dishwasher-is-making-your-dishes-smell-like-fish), which also covers related motor and pump issues.
Many homeowners fall prey to misconceptions about appliance installation, same-day service, warranties, and repair practices. One common myth is that signing a warranty immediately guarantees comprehensive coverage; however, detailed reading reveals many exclusions—such as damage caused by user error—that void the warranty. In my experience, understanding the fine print is crucial to avoid costly surprises later. Moreover, there’s a prevalent belief that the fastest service is always the best, but rushing can lead to overlooked issues or improper repairs, which might cause more damage in the long run. It’s wiser to choose technicians with proven expertise rather than simply the quickest turnaround.
A nuanced trap often overlooked involves appliance installation. Many assume that following the manufacturer’s setup instructions is sufficient, but improper installation—like incorrect leveling or inadequate power supply—can cause persistent problems. For instance, an improperly installed induction cooktop could lead to uneven heating or electrical hazards, which are not always apparent initially. To ensure longevity and safety, a professional installation that adheres to all specifications is essential. Check out this comprehensive guide on the *most common installation errors* for modern appliances to prevent such issues.
What most people fail to realize is that same-day service isn’t necessarily synonymous with quality. While quick repairs are tempting, they sometimes mean untrained or overbooked technicians skip critical diagnostic steps, resulting in incomplete fixes. This oversight can lead to recurring problems and even more expensive repairs down the line. My advice? Prioritize repair shops that emphasize thorough diagnostics—even if it takes a bit longer—over those promising rapid fixes. Have you ever fallen into this trap? Let me know in the comments.
Furthermore, a less obvious nuance concerns warranties and the documentation required to uphold them. Many forget that the *most important document* is often the receipt or proof of purchase. Without it, warranty claims can be denied, leaving you footing the entire bill for repairs. This isn’t just anecdotal; experts agree that retaining all purchase records and warranty paperwork is best practice for any appliance owner. Learn more about this here: [The one document most people lose that voids their warranty](https://discountappliancehub.com/the-one-document-most-people-lose-that-voids-their-warranty).
In the realm of repairs, avoiding advanced mistakes also involves recognizing when to opt for professional help versus DIY. Even experienced DIYers can overlook subtle signs like beginning corrosion or wear on internal components, which if ignored, could cause appliance failure. For example, neglecting to replace a worn compressor capacitor can result in inefficient cooling or costly breakdowns, as discussed in [The warning signs your AC capacitor is about to blow](https://discountappliancehub.com/the-warning-signs-your-ac-capacitor-is-about-to-blow). Being vigilant about these hidden signs ensures your appliance remains dependable.
In conclusion, mastering the nuances—like reading warranty exclusions, prioritizing thorough diagnostics, and understanding installation pitfalls—can save you money and headaches. Don’t be swayed by common myths; instead, equip yourself with knowledge that empowers smarter decisions. Remember, the devil’s in the details when it comes to appliance repair and service. Since we’re talking about secrets, check out this article on [The hidden lint trap inside your dryer you didn’t know existed](https://discountappliancehub.com/the-hidden-lint-trap-inside-your-dryer-you-did-not-know-about) to uncover more lurking issues in your home appliances. Have you ever fallen into this trap? Let me know in the comments.
Maintaining your appliances over time requires more than just occasional cleaning; it demands the right tools, keen attention to detail, and a methodical approach. Personally, I rely on a few key pieces of equipment that have proven invaluable in diagnosing and fixing issues efficiently. For instance, a high-quality digital multimeter allows me to verify electrical components like heating elements or thermostats accurately, saving time and preventing unnecessary part replacements. Similarly, a specialized appliance inspection mirror enhances my ability to see into tight spaces, such as behind refrigerators or beneath washing machines, without intrusive disassembly.
Investing in the Right Diagnostic Tools
For consistent results, I recommend using a digital clamp meter that measures current flow with precision. This is crucial when troubleshooting circuits in high-power appliances like electric stoves, where understanding current draw can reveal problems with burners or controllers. Additionally, an infrared thermometer helps monitor temperature variations during operation, aiding in the detection of defective heating elements or thermal sensors. These tools have saved me hours by pinpointing issues that aren’t immediately obvious through visual inspection alone.
Utilizing Software for Long-Term Results
When it comes to modern appliances, software diagnostics are becoming increasingly useful. Many smart devices come with companion apps that provide error codes and troubleshooting guidance, streamlining the repair process. I’ve found that regularly updating the firmware on smart thermostats or ovens ensures you have access to the latest diagnostic features, leading to more effective maintenance. Embracing these digital tools allows me to preempt failures and plan preventive maintenance routines—keys to extending appliance lifespan.
Scaling Repairs and Maintenance Strategies
As your familiarity with your appliances grows, so does your capacity to scale maintenance efforts. Implementing scheduled checks—such as inspecting the door seals on refrigerators or cleaning dryer vents—prevents small issues from escalating. For larger equipment like HVAC systems, I recommend professional deep-cleaning at least once a year, complemented by software-based system health monitoring. Over time, this proactive approach not only conserves energy but also reduces repair costs, making your appliances more reliable in the long run.
How do I maintain appliances over the long term?
Consistency is key. Regular cleaning, timely component checks, and utilizing the right diagnostic tools ensure you catch problems early. For example, inspecting and cleaning your dishwasher’s filter and spray arms using specialized brushes helps prevent issues like poor drainage or odors, which can otherwise lead to costly repairs. Furthermore, keeping records of maintenance activities and repair histories can inform future troubleshooting and confirm warranty validity—especially if you’ve retained your proof of purchase from important suppliers. A good practice is to review your appliance manuals periodically; many manufacturers release updates or recommend maintenance schedules that can be crucial for sustained performance.
Looking toward the future, automation and smarter diagnostics are likely to become standard. Appliances equipped with sensors that alert homeowners to impending failures or maintenance needs are already on the rise, and adopting these technologies now can pay off by preventing unexpected breakdowns. For instance, smart refrigerators that monitor compressor health can suggest timely repairs, avoiding costly replacements. To make the most of these advancements, start integrating tools like mobile diagnostics apps into your maintenance routine today. Try implementing a routine check with a digital multimeter on your oven bake element, which is a common failure point, and you’ll be surprised how much you can prevent issues before they escalate.
The Stealthiest Lessons From My Repair Journeys
One of the most valuable insights I gained was realizing that not all components wear out at the same rate—sometimes, a simple misalignment or overlooked debris causes more noise than a faulty motor. Learning to listen carefully taught me that patience and a keen ear can save both money and time, preventing unnecessary replacements and extending appliance life. Also, I understood that buying the highest-priced part isn’t always the best choice; sometimes, a well-maintained affordable component outperforms a neglected premium item. Finally, I discovered that consistent, proactive maintenance beats reactive fixes—those small checks and cleanings can forestall big repairs and costly headaches in the future.