
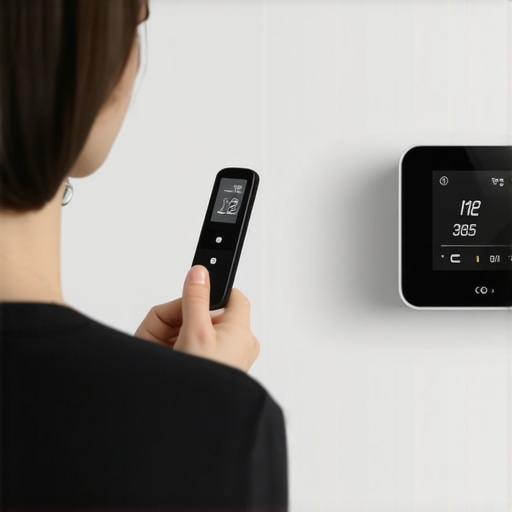
I remember the sweat dripping off my chin as I tightened the last screw on my fancy new smart thermostat. I had spent all morning [expertly guiding myself through the appliance installation](https://discountappliancehub.com/expert-guide-to-appliance-repair-and-installation-today), feeling pretty smug about not needing a pro. But an hour later, I was shivering in my living room while the display boasted a perfect 72 degrees. It was a total lie. I’d made a classic rookie mistake that almost cost me a fortune in heating bills and a very grumpy evening. If you’ve ever felt like your HVAC system is gaslighting you, you aren’t alone. Today, I’m pulling back the curtain on the one calibration step that almost every DIYer skips, ensuring you actually get the [reliable appliance installation](https://discountappliancehub.com/how-to-ensure-reliable-appliance-installation-in-2025) you paid for.
Stop Trusting the Factory Settings Immediately
For years, I assumed these high-tech gadgets were perfect right out of the box. I was wrong. My big blunder? I didn’t realize that the gaping hole in the drywall where the wires come through acts like a tiny wind tunnel of unconditioned air. According to the Lawrence Berkeley National Laboratory, residential thermostats can be off by several degrees if they aren’t properly shielded from wall-cavity drafts. This means your sensor is reading the temperature inside your walls, not your room. It’s similar to [why your oven temperature sensor needs a calibrated adjustment](https://discountappliancehub.com/why-your-oven-temperature-sensor-needs-a-calibrated-adjustment)—if the input is wrong, the output is a mess.
Is your wall actually sabotaging your comfort?
Have you ever noticed your AC running way longer than it should even though the house feels like an icebox? That’s the “wall-draft effect” in action. I used to ignore it, thinking it was just “breaking in” the new tech. Don’t be like me. You need to seal that wire hole with a bit of plumber’s putty or even a piece of insulation before you even think about the software settings. This simple physical calibration is the foundation of a [fast, trustworthy appliance installation](https://discountappliancehub.com/fast-trustworthy-appliance-installation-near-you) that actually delivers on its energy-saving promises. Let me know in the comments—did you seal your wall hole, or is your thermostat currently lying to your face?
Seal the breach to save your wallet
Grab a small tub of plumber’s putty—it’s cheap and won’t ever harden into a rock, which is vital if you need to pull those wires out again for future upgrades. To begin the physical execution, gently pull the thermostat off its baseplate and inspect the hole where the wiring bundle emerges. If you can feel even a faint breeze on your fingertips, you’ve found the culprit. Pack the putty firmly around the wires until the hole is completely airtight, preventing the chimney effect where unconditioned air from the attic or basement is sucked directly onto the sensitive internal sensors. This low-tech fix is the secret to a [reliable appliance installation](https://discountappliancehub.com/how-to-ensure-reliable-appliance-installation-in-2025) that actually reflects your room’s comfort level.
Kill the draft with plumber’s putty
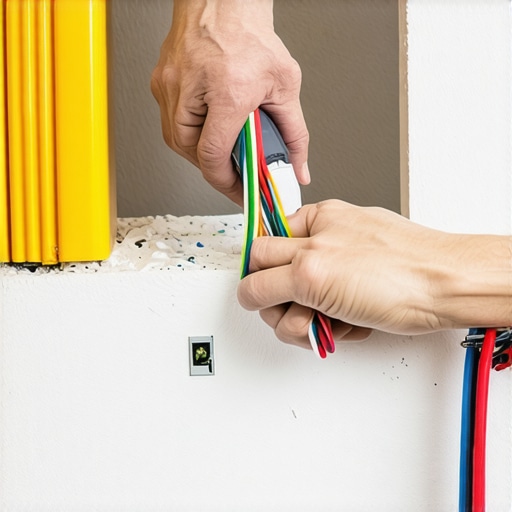 I used to think a bit of tape would work, but the thermal fluctuations inside walls eventually peel the adhesive away, leaving you right back where you started. Applying putty is like caulking a window; it creates a permanent, flexible seal. This attention to detail is what separates a DIY disaster from a [fast, trustworthy appliance installation](https://discountappliancehub.com/fast-trustworthy-appliance-installation-near-you) that lasts for years.
Force your tech to tell the truth
Once the physical barrier is in place, you have to sync your digital reality with your physical one. Place a trusted, high-quality thermometer—not the one on your phone—right next to the thermostat and let it sit for twenty minutes. Compare the two readings. If they don’t match, you need to dive into the thermostat’s hidden menu.
Use the calibration offset to match reality
Most modern devices have a setting labeled Temperature Correction or Offset. This is your most powerful tool. Adjust the number until the display matches your handheld thermometer exactly. This process ensures your HVAC doesn’t experience [the thermal overload trip keeping your ac from starting](https://discountappliancehub.com/the-thermal-overload-trip-keeping-your-ac-from-starting) because it’s no longer trying to compensate for a ghost temperature. This level of precision is a key part of any [expert guide to appliance repair and installation today](https://discountappliancehub.com/expert-guide-to-appliance-repair-and-installation-today).
Don’t let your power setup fry the motherboard
The biggest hurdle for most DIYers is the C-Wire or common wire. I remember the first time I tried to bypass this; the constant clicking of the furnace relay sounded like a frantic woodpecker in my basement. Without a steady flow of power, your smart thermostat has to steal electricity from the heating or cooling circuits, which causes short cycling.
Fixing the missing common wire headache
If you’re missing that fifth wire, you’ll need to install a C-wire adapter at the furnace or look into [how to wire your smart thermostat without a c-wire](https://discountappliancehub.com/how-to-wire-your-smart-thermostat-without-a-c-wire) to prevent permanent hardware damage. Failing to ground the system properly can lead to [the grounding error that makes your smart stove controls glitch](https://discountappliancehub.com/the-grounding-error-that-makes-your-smart-stove-controls-glitch) across other appliances on the same circuit. Messing this up is one of [the hidden costs of diy repairs on warranty covered items](https://discountappliancehub.com/the-hidden-costs-of-diy-repairs-on-warranty-covered-items) that can void your protection plans instantly.
Balance the airflow for consistent readings
Finally, look at the room as a whole. A thermostat is only as smart as the air flowing around it. If your unit is positioned directly under a supply vent or hidden behind a heavy curtain, it’s essentially blind.
Check your vents before you blame the sensor
Ensure there is at least two feet of clear space around the unit. Furthermore, if you’ve recently moved into a new home or installed a new HVAC system, you should learn [how to balance your hvac vents for even room temperatures](https://discountappliancehub.com/how-to-balance-your-hvac-vents-for-even-room-temperatures). I once found my living room was ten degrees warmer than the rest of the house simply because a decorative rug had slipped over the main return vent, forcing the thermostat to work overtime to cool a room that was already freezing. Correcting these air paths is just as important as [scheduling your appliance repair for same-day service in 2025](https://discountappliancehub.com/scheduling-your-appliance-repair-for-same-day-service-in-2025) when components start to fail.While you are busy sealing wall drafts and adjusting offsets, there is a much bigger trap waiting in the shadows of your new purchase. Most people think a manufacturer’s warranty is an ironclad promise of protection, but in my experience, it’s actually a fragile agreement that many DIYers accidentally shatter on day one. You might assume that if the machine breaks, they fix it. However, you need to understand the difference between a manufacturer warranty and a service contract before you ever pick up a wrench. Manufacturers are not looking for reasons to help; they are often looking for specific compliance failures to deny a claim.
Your warranty is more fragile than you think
I’ve seen homeowners lose thousands in coverage simply because they didn’t have a licensed professional sign off on the initial setup. There’s a common belief that ‘self-installation’ is a right, but according to the Association of Home Appliance Manufacturers (AHAM), improper installation is a leading cause for service calls that are ultimately rejected for coverage. If you cannot prove the unit was installed to the manufacturer’s exact specifications, you are on the hook for the full bill. This is why how to ensure reliable appliance installation in 2025 often starts with a professional’s signature or a rigorous photo log of your work, not just a YouTube tutorial.
Why does my ‘unlimited’ coverage have so many limits?
It all comes down to the ‘paperwork trail.’ One of the biggest mistakes I see is people tossing the box and all the ‘boring’ pamphlets inside without scanning the codes. You need to keep the one maintenance record that saves your appliance warranty claim in a safe place. Without proof of periodic checks, a manufacturer can argue that your personal neglect—not a faulty part—caused the failure.
The documentation trap that kills your claim
If you find yourself in a pinch and need affordable same-day appliance fixes with warranty benefits, you better have your documentation ready. Most third-party protection plans have a ‘deductible trap’ that kicks in if you can’t provide the original installation date and a record of the model’s first run. I once helped a neighbor who was denied a new compressor because he could not show how to prove periodic maintenance to keep your warranty valid. He had the receipt, but he hadn’t cleared the condenser coils in two years. That ‘simple’ maintenance task was written into the fine print as a requirement for coverage. Don’t let a lack of records turn a same-day appliance repair quick solutions with warranty support visit into a full out-of-pocket replacement. Have you ever had a warranty claim denied for a silly reason? Let me know in the comments—I want to hear your stories so we can all avoid these traps together.
Buy the tools that actually talk back to you
I once spent three hours trying to figure out why a dryer wouldn’t heat, only to realize my cheap, five-dollar voltage tester was lying to me. If you’re serious about maintaining your home, you need a true RMS multimeter—I personally swear by the Fluke 117. It doesn’t just tell you if power is there; it tells you if that power is ‘clean’ enough to run sensitive logic boards. Having the right gear is the first step toward a fast, trustworthy appliance installation near you because it allows you to verify the circuit before you ever plug in a thousand-dollar machine. For mechanical issues, stop using pliers that strip bolts; get the specific wrench you need to unjam a disposal in seconds and keep it taped to the side of the unit. These small investments prevent the ‘oops’ moments that lead to expensive weekend service calls.
How do I maintain these high-tech systems over time?
Consistency is the boring secret to a long-lived kitchen. I keep a digital log on my phone with photos of every filter I clean and every coil I vacuum. This isn’t just for my peace of mind; it is the primary way how to prove periodic maintenance to keep your warranty valid if a major component fails. According to the National Electrical Code (NEC) Section 210.19, ensuring your appliances are on correctly rated branch circuits is vital for preventing long-term thermal degradation of the internal wiring. I recommend doing a ‘sniff test’ and a thermal scan of your plugs once every six months to catch loose connections before they arc. If you find a scorched outlet, don’t wait—look into scheduling your appliance repair for same-day service in 2025 to swap out the hardware before a fire starts.
Why software diagnostics are the next big frontier
We are moving into an era where your fridge will likely email you before it actually stops getting cold. I predict that within the next three years, ‘Right to Repair’ laws will force manufacturers to open up their proprietary error codes to homeowners via Bluetooth. This means you’ll be able to see what to expect from same-day appliance repair experts before they even arrive at your door because you’ll already have the diagnostic report ready. However, even with all this data, the physical labor of swapping a compressor or a drum remains a specialist’s job. Knowing when to DIY and when to step back is part of a smart expert guide to appliance repair and installation today. If you want to stay ahead of the curve, look for the maintenance contract clause that saves you on labor costs in your next purchase; it often covers these high-tech diagnostic fees that standard warranties ignore. My advanced tip for you today: Download the service manual for your specific model number right now and save it to a cloud folder. When the screen eventually glitches and you need same-day appliance repair quick solutions with warranty support, having that manual ready for the technician can shave an hour off the labor bill.
The expensive lesson I learned while being cheap
Looking back at my shivering living room, I realized that the biggest barrier to a reliable appliance installation isn’t the complex wiring or the software—it’s the ego. We often think we’re saving a few hundred bucks by skipping a professional check, but the real cost shows up later in utility bills and stressed-out components. My ‘lightbulb moment’ happened when I finally stopped viewing these devices as isolated toys and started seeing them as a single, connected ecosystem. If one sensor is off, the whole house suffers. I also learned that you should always verify the ‘as-built’ environment; just because the house was built to code doesn’t mean the guy who ran the thermostat wire didn’t leave a hole the size of a golf ball in your drywall. Finally, never underestimate the power of a physical record. I used to laugh at people who kept binders, but now I know that the warranty document you must save before discarding the box is basically a blank check for your future self.
Tools and shortcuts I now carry in my back pocket
After years of trial and error, I’ve narrowed down my success to a few non-negotiables. First, I never start a job without a decent multimeter—not just for voltage, but for continuity testing. Second, I’ve bookmarked the manufacturer’s diagnostic portal for every device I own. If you find yourself stuck, don’t just Google it; look for top-tips for same-day service warranty coverage to see how to describe the problem to a tech so they come prepared. I also highly recommend using a thermal leak detector; it’s a fun, handheld way to find those hidden drafts that sabotage your thermostat. Lastly, I keep a dedicated digital folder with photos of every installation step. This is how you maximize your appliance warranty during emergency repairs because it proves you didn’t just hack the job together with duct tape and hope.
Go beyond the calibration and claim your comfort
You’ve done the hard work of sealing the gaps and syncing the sensors, but don’t stop there. True home mastery is about staying proactive. When you treat your home with this level of detail, you aren’t just fixing a machine; you’re engineering a better quality of life for your family. If you’re ever in doubt, there are always warranty-backed appliance services you can rely on to bridge the gap between DIY and expert precision. Whether you are scheduling your appliance repair for same-day service in 2025 or just tightening a loose wire, remember that your attention to detail is what makes your house a home. Have you ever found a surprise draft behind your thermostat or a hidden error code that drove you crazy? Let me know your story in the comments below!