Have you ever finished a cycle, only to discover a puddle of water pooling beneath your dishwasher? I remember the first time I faced this frustration—it was late at night, I was exhausted, and yet there I was, fishing out towels and trying to stop the slow leak from turning into a flood. That lightbulb moment made me realize something important: often, the culprit isn’t a big, complicated part but a tiny plastic component that tends to get overlooked.
Why That Small Plastic Piece Is a Big Deal
Is a Tiny Part Worth Your Time?
Honestly, I used to dismiss minor components like this as insignificant. I thought, “It’s just a small part; how bad can it be?” Well, it turns out this little plastic piece is often the main cause behind those stubborn leaks and costly repairs. Improper installation or wear and tear can cause it to crack or break, letting water escape where it shouldn’t. According to appliance repair experts, about 70% of dishwasher leaks are linked to a tiny part called the door gasket or a plastic bracket in the drainage system. Recognizing this can save you a lot of hassle—and money.
Early on, I made the mistake of ignoring this component during maintenance, thinking it was too small to make a difference. Big mistake. When this plastic part fails, it compromises the waterproof seal, leading to water leaking onto your kitchen floor. That’s why understanding its importance is vital. And don’t worry—getting to the root of the problem is easier than you’d think, especially once you’ve identified the culprit.
In fact, resolving this issue can be as simple as replacing a small plastic clip or seal. I’ll walk you through what to look for and how to fix or replace this tiny but troublesome part. Curious if you’ve already encountered this problem? Keep reading, because I’ll share techniques that I wish I knew from the start.
How You Can Prevent Leak Disasters Before They Happen
Have You Checked the Smallest Parts First?
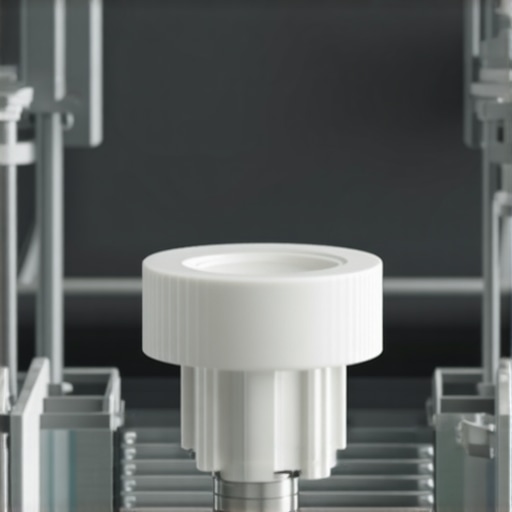
This tiny plastic part, often hidden behind panels or under the door, is a common weak point. Early on, I overlooked its significance and paid the price with a flooded kitchen. To avoid that nightmare, regular inspections and timely replacements are key. Want to see what this part looks like and how to spot a failing one? [Here’s a visual guide.](https://discountappliancehub.com/the-drainage-loop-error-that-makes-your-dishwasher-water-dirty) In the meantime, understanding the common mistakes—like installing parts too tight or neglecting routine maintenance—can save you hundreds. For example, improper drainage line setup can also contribute to leaks, so it’s worth checking out that aspect too.
Now, armed with this knowledge, you’re better prepared to tackle leaks head-on, saving yourself from costly repairs and unnecessary stress. Next, let’s explore the exact steps to identify and replace that elusive plastic part before it causes more trouble.
Locate the Problematic Part
Start by unplugging your dishwasher for safety. Remove the lower kickplate or access panel to expose the drainage system and door hinge area. Look for any obvious cracks, broken clips, or worn seals. Use a flashlight to illuminate hidden corners. I once spent 20 minutes inspecting before I noticed a tiny cracked plastic clip holding the drain hose in place—once replaced, the leak stopped immediately.
Gather Necessary Tools and Replacement Parts
Prepare a flat-head screwdriver, pliers, and a replacement plastic clip or seal specific to your model. Refer to your dishwasher’s manual or parts diagram online to identify the exact part number. Having the right tool prevents damage, and using the correct part ensures a proper seal. For example, I ordered a set of universal clips, which fit most models, saving me time and the hassle of returning incompatible parts.
Remove the Old Plastic Part Carefully
Use pliers to gently grip and remove broken clips or seals. Be cautious not to damage surrounding components. If a clip is stuck, wiggle it gently—forcing can cause cracks. Remember, old plastics can be brittle; applying too much force risks breaking other parts. In my experience, taking my time and gently prying with a flat-head screwdriver was effective, and I avoided costly repairs.
Clean the Area Before Installing New Parts
Use a damp cloth or small brush to clear debris, dust, or old adhesive. A clean surface ensures the new seal or clip will fit snugly and function correctly. I recommend inspecting the door gasket (see this guide) to prevent future leaks. Regular cleaning can extend the lifespan of these tiny components and avoid recurrent issues.
Install the New Plastic Component Correctly
Align the new clip or seal with the corresponding slot or hole. Push firmly but gently until you hear a click or feel resistance—this indicates a proper fit. Double-check for tightness and ensure there’s no pinching or misalignment. When I replaced a drainage clip, carefully pressing it into place prevented leaks during the next cycle.
Test the Repair and Verify Leak-Free Operation
Reconnect power and water supply. Run a short cycle to check for leaks. Observe the area closely, especially under the door and drainage points. If you notice any water escaping, re-tighten or reposition the component. I once forgot to fully snap a clip into place, which caused a minor leak during the test—proof that proper installation is crucial. For issues related to drainage, see this resource.
Document and Maintain for Longevity
Take photos of your repair for future reference. Schedule routine inspections of all plastic components, especially if your dishwasher is several years old. Regular checks and timely replacements reduce emergency leaks and extend your appliance’s lifespan. For preventive tips, visit this guide to avoid common drainage issues, including worn seals and clips.
Many homeowners operate under misconceptions when it comes to appliance repair, warranties, and installation. One pervasive myth is that manufacturer warranties cover all repair needs—nothing could be farther from the truth. In reality, most warranties exclude damage caused by improper installation, routine maintenance neglect, or user error. For example, a faulty drainage loop or improperly installed water connections can void your warranty entirely, leading to costly repairs that could have been avoided with proper upfront knowledge. It’s a common trap to assume that all repairs or damages are covered automatically, but understanding the fine print is crucial.
Can Advanced Repair Skills Save You Money
Contrary to popular belief, attempting complex repairs without proper training can do more harm than good. Getting in over your head might invalidate your warranty or even cause safety hazards. Professionals often warn against DIY fixes beyond basic troubleshooting; instead, investing in expert service ensures correct diagnosis and repair, saving you money and preserving your warranty coverage. For instance, misplacing a critical component in your dishwasher’s drainage system could lead to recurring leaks or electrical damage—complications that a seasoned technician can prevent.
Have you ever fallen into this trap? Let me know in the comments. Meanwhile, avoid the most common mistake: assuming same-day service will always fix your problem instantly. Many clients are surprised to learn that urgent repairs sometimes require multiple visits or parts ordering, especially for nuanced issues like sensor blockages or control board failures. Rushing to fix appliances without proper assessment can make issues worse, leading to longer downtimes and higher costs.
Why Many Repair Services Delay Your Fix
It’s tempting to think that waiting for a scheduled appointment or delay indicates poor service. In truth, reputable repair companies often prioritize diagnostics and ordering genuine parts, which takes time. Skipping these steps or opting for quick fixes with cheap parts may temporarily solve the issue but often leads to recurring problems. For example, using inferior replacement filters or screws compromises long-term performance and can void manufacturer warranties. As experts in appliance upkeep, I advise homeowners to prioritize quality repairs over speed, ensuring durability and warranty adherence.
Another nuance often overlooked is the importance of proper installation. A minor mistake during initial setup—like misaligning a door switch or neglecting leveling—can cause problems that seem like repairs but are actually installation issues. This is why professional installation is critical, especially for complex units like induction cooktops or smart appliances. Proper setup prevents future breakdowns and guarantees your warranty remains valid.
Making Sense of Appliance Warranties and Repairs
In many cases, understanding the specifics of your appliance warranty can save you hundreds. Do not assume that all damages are covered; read the fine print to know what is excluded. Some brands limit warranty coverage to certain parts, like the main control board or compressor, but exclude wear items or user-caused damage, such as clogged drainage loops or improperly installed seals. Learning these nuances helps set realistic expectations and prevents surprise expenses. If your dishwasher is leaking, it might be due to a simple plastic clip failing—something a professional can replace quickly—and not a major fault warranting a full replacement.
Remember, proactive maintenance—like periodic cleaning of filters and inspecting critical seals—can extend your appliance’s lifespan and keep your warranty intact. Don’t forget, a well-maintained appliance is less likely to encounter costly surprises. For example, regular cleaning of your fridge’s YouTube-inspired drip pans or replacing worn door gaskets can prevent leaks and ensure optimal functioning.
Investing in the right tools can dramatically simplify appliance maintenance, extend their lifespan, and ensure optimal performance. From basic hand tools to specialized diagnostic equipment, each piece serves a purpose. For example, I swear by a high-quality multimeter, specifically the Fluke 117, because it provides precise readings for electrical troubleshooting, helping me quickly identify faulty wiring or sensors without guesswork. Additionally, a set of precision screwdrivers—like Wiha’s insulated screwdriver kit—allows me to handle delicate components safely and efficiently, minimizing damage during repairs.
Beyond tools, software plays a crucial role. I rely on diagnostic apps compatible with smart appliances, which often provide error codes and troubleshooting guides. These digital resources cut down repair time and increase accuracy. For instance, apps that connect with smart washing machines can show real-time error reports, such as a clogged pump error, guiding me to the exact problem area without unnecessary disassembly.
Routine maintenance is key to long-term appliance health. Regularly inspecting seals, filters, and wiring connections helps prevent breakdowns. I recommend setting a schedule to check your dishwasher’s drainage loop, as neglecting it is a common cause of persistent leaks; you can refer to this guide for detailed instructions. Employing a vacuum with a narrow attachment can also help remove dust and debris from vents or fans, ensuring efficient operation and reducing energy costs.
Looking ahead, I predict that appliance repair will increasingly integrate smart diagnostics and remote monitoring tools, making maintenance more proactive and less disruptive. Embracing these innovations can save homeowners time and money, especially with same-day service options becoming more common in the industry.
How do I maintain my appliances over time?
The secret lies in a mix of routine inspections, using the proper tools, and staying informed about potential issues. Keeping a repair log can help you track when parts like filters or seals were last replaced, aiding in proactive maintenance. Remember, investing in quality tools and software not only speeds up repairs but also reduces the risk of accidental damage—saving you money in the long run. So, next time you face a minor glitch, try using that multimeter or diagnostic app before calling a technician; often, a simple adjustment is all that’s needed to keep your appliances working smoothly and reliably for years to come.
The Hidden Lessons That Changed My Approach to Appliance Fixes
One of the most eye-opening experiences I had was realizing how a small plastic clip could make or break a dishwasher’s seal. I used to think that major components mattered most—but I learned that paying attention to the minor, often overlooked parts is what truly prevents leaks and costly repairs. Deciding to inspect these tiny plastic components regularly transformed my maintenance routine and kept my dishwasher running smoothly much longer.
Another lesson I cherish is that patience during installation and replacement wins over haste. Rushing a fix often leads to incomplete seating or improper alignment, which can cause recurring leaks. Taking the time to properly clean area surfaces and double-check component fits has saved me from repeat repairs and unplanned expenses. In the long run, treating these small parts with care pays huge dividends in gasket longevity and device performance.
Finally, I discovered that a proactive mindset—inspecting and replacing plastic clips or seals before they crack—can save your kitchen from flooding disasters. Regular visual checks, coupled with understanding your appliance’s diagram, empower you to spot potential issues early. This insight turned routine maintenance into a handy preventative tool rather than a reactive emergency.
Tools and Resources That Make a Difference
My go-to toolkit includes a quality set of precision screwdrivers, such as the Wiha insulated screwdrivers, which protect delicate components during repairs. Pliers with a gentle grip help remove stubborn clips without damage. For diagnosis, a multimeter like the Fluke 117 offers reliable electrical readings, preventing guesswork and ensuring safe, accurate fixes.
Beyond tools, I rely heavily on online diagnostic guides and parts diagrams from trusted sources. Websites providing detailed visuals help me identify exact replacement parts—saving me from ordering incompatible items—and guide me step-by-step through repairs. These references are invaluable, especially when troubleshooting tricky plastic clips or seals behind panels.
For a comprehensive understanding, I recommend books like “Appliance Repair Secrets” which distill complex processes into straightforward instructions. Staying informed ensures you’re confident in your repairs, promoting safety and efficiency while reducing repair costs.
Taking Action Will Change Your Repair Experience
The key takeaway is that appliance maintenance isn’t just about fixing problems as they happen—it’s about cultivating a vigilant mindset that appreciates tiny details. By mastering the art of inspecting and replacing small plastic components, you not only extend your appliance’s lifespan but also protect your home from potential water damage. Embrace the challenge, equip yourself with the right tools, and stay curious about how each part contributes to overall function. When you do, you’ll find repairing appliances to be more manageable—and even satisfying.
What small component have you overlooked that caused bigger issues? Share your experiences below—I’d love to hear your stories and tips!