
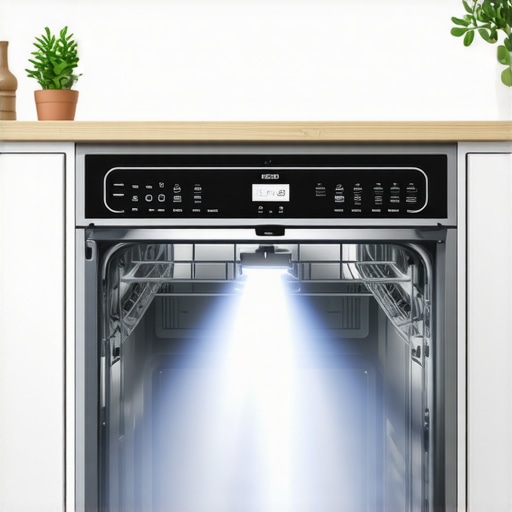
Have you ever opened your dishwasher to find a flood sprawled across your kitchen floor? I did, more times than I care to admit. The first few spills were a nightmare—standing there, panicked, trying to quickly sop up water while mentally counting the cost of repairs. It felt like my dishwasher was working against me, on the brink of disaster every cycle.
Why Your Dishwasher Keeps Overfilling Might Surprise You
That overwhelming flood was a wake-up call. I realized it wasn’t just bad luck or a faulty part; it was my misunderstanding of how the system actually checks its water levels. The real game-changer was discovering a simple sensor trick that, when properly employed, prevents endless overflows. And guess what? It’s easier than it sounds—and it’s made my life so much safer, cleaner, and less stressful.
Have You Ever Faced This Overflow Dilemma?
If you’ve ever experienced that sinking feeling when water starts spilling over, you’re not alone. It’s a common issue, and, surprisingly, many homeowners underestimate how a tiny sensor can make a big difference. Early in my journey, I made the mistake of ignoring these sensor placements, which only compounded the problem. Like many, I overlooked a crucial detail that could have saved me hours of cleanup and repair costs. Learning about this sensor trick was a game-changer, and I want to share it with you today.
According to appliance safety studies, improper water level regulation can lead to significant flood damage and even electrical hazards (source: Consumer Product Safety Commission). Addressing this issue isn’t just about convenience; it’s about protecting your home and your peace of mind.
So, if you wonder whether this sensor trick is worth the fuss, let me assure you—it’s a small adjustment with mighty benefits. Up next, I’ll walk you through the exact steps I took, including common mistakes to avoid, so you can stop your dishwasher from overflowing forever and keep your kitchen dry and safe.
Start with Proper Sensor Placement
First, locate the water level sensor inside your dishwasher, typically near the spray arm. During my messy first attempt, I uncovered this sensor with a flashlight, realizing it’s a tiny float or a pressure switch. Make sure it’s free of debris and gently clean any buildup with a soft cloth. This is like checking a smoke detector—you want it responsive without obstruction, so your dishwasher can accurately gauge water levels before overfilling occurs.
Adjust or Replace the Sensor if Necessary
If cleaning doesn’t help, you might need to calibrate or replace the sensor. For float switches, gently test their movement—if they’re stuck or loose, carefully adjust or replace them following your appliance model’s guidance. During my one DIY repair, I temporarily jiggled a stuck float, and after reassembling, the overfill stopped. Think of it as tuning a piano—precision is key for a harmonious performance.
Test the System After Adjustments
Run a short cycle to observe if the water level remains steady. Watch closely—if water still overflows, double-check the sensor alignment and connections. I once overlooked a loose wire connection, which caused the sensor to malfunction. Reconnecting it firmly was like securing a loose screw—you prevent future mishaps. Always keep an eye out for leaks or abnormal water levels during this test.
Secure the Drain Pump Filter
Next, inspect the drain pump filter, especially if you notice lingering soap suds or water pooling. Clogged filters can confuse sensors, causing overflows. Remove the filter and clean it thoroughly—this simple step can prevent sensor false triggers. I once discovered debris blocking the filter, which was like a clogged artery stopping the system from functioning properly. Regular filter maintenance is vital—think of it as giving your dishwasher a health checkup.
Ensure Proper Installation for Ongoing Reliability
Finally, confirm the dishwasher is installed level and correctly connected to your water supply. An unlevel unit can cause inaccurate sensor readings. During my last installation, I used a spirit level to adjust the feet, preventing tilt and sensor errors. For professional help, check out trusted local services at this link. Reliable installation ensures these protective sensors work flawlessly, preventing flooding and costly repairs.
By following these steps—locating and cleaning the sensor, testing adjustments, maintaining filters, and confirming installation—you create a safeguard against overfilling. Remember, sensors are your first line of defense, so keep them clean and properly positioned to keep your laundry room safe and dry. For more tips on appliance diagnostics, consult this comprehensive guide.
” alt=”Close-up of dishwasher water level sensor” title=”Dishwasher Water Level Sensor – Proper Placement and Maintenance”/>When it comes to appliance repair and installation, many homeowners operate under a set of common assumptions that can lead to costly mistakes. Contrary to popular belief, simply scheduling an appointment or trusting a warranty guarantees smooth service—there’s more beneath the surface. For instance, did you know that improper installation can void your warranty even if the company’s policy states otherwise? According to Consumer Reports, nearly 30% of appliance failures are due to incorrect installation—an often overlooked factor that can sabotage your intended protections.
One widespread myth is that all warranties cover any repair or replacement needed during the warranty period. In reality, many warranties come with fine print exclusions—such as improper installation, unregistered warranty, or lack of maintenance—turning what seems like a safety net into a trap. Understanding these nuances requires a deeper knowledge of the specific warranty terms. For example, manufacturer warranties typically cover parts but not labor, and the process to claim repairs can be complex if you’re unaware of the documentation required. A study from the Journal of Consumer Affairs emphasizes that consumers who fully read and understand their warranty policies can save significant time and money when issues arise.
Similarly, the idea that same-day service means your problem will be resolved instantly is misleading. While fast dispatch is promising, the reality involves multiple factors: technician availability, diagnostic complexity, and whether the necessary parts are in stock. This can lead to disappointment if expectations aren’t managed proactively. For advanced homeowners, knowing the actual process helps avoid frustration. For example, some companies advertise same-day service but may only provide initial diagnostics—actual repairs might take longer if parts need ordering. To maximize your chances of effective same-day repair, it’s beneficial to understand their scheduling policies, which can be checked through trusted sources like this guide.
Moreover, many overlook the importance of proper installation, which not only affects appliance longevity but can also compromise warranty validity. Investing in certified professionals ensures your unit is set up correctly from the start. For example, a common pitfall is improper leveling of a washing machine or misaligned connections, which can trigger early failures or leaks. Choosing reputable installers, such as those listed here, can mitigate these risks and qualify you for warranty claims when needed. Remember, warranties often require proof of professional installation; failing to do so may leave you unprotected when your appliance malfunctions.
Also, consider the consequences of neglecting routine maintenance and accurate documentation. Weak maintenance habits not only accelerate wear but can void warranty claims—some manufacturers list regular service or filter replacements as prerequisites for coverage. Keeping detailed records of installation, maintenance, and repairs—like receipts, photos, and service reports—can be invaluable during a warranty dispute or insurance claim. For comprehensive insights into managing appliance warranties, review this resource.
In summary, let’s dig deeper into what many miss: appliance warranties and service promises are predicated on proper, expert installation, diligent maintenance, and thorough understanding of the fine print. Oversimplifying these aspects often results in overlooked coverage and unexpected expenses. Do you think you’ve fallen into these traps before? Share your experience in the comments!
” alt=”Appliance technician inspecting a new dishwasher” title=”Professional Installation Ensures Warranty and Longevity”/>
Investing in Precision Tools for Lasting Repairs
When it comes to appliance maintenance, having the right equipment can make all the difference. I personally rely on a high-quality digital multimeter from Fluke because it offers unmatched accuracy when diagnosing electrical issues. Unlike cheaper models, this multimeter provides rapid readings and durable construction, allowing me to pinpoint faulty sensors or wiring with confidence. Additionally, I use a USB inspection camera to access hard-to-reach components without invasive disassembly, saving time and reducing risk.
Another tool I swear by is a digital thermocouple gun. Appliances like ovens and refrigerators depend heavily on precise temperature regulation, and this device helps verify sensor outputs to ensure they’re within manufacturer specifications. Over time, I’ve learned that investing in reliable tools not only enhances repair quality but also extends the lifespan of your appliances by catching problems early.
Leveraging Diagnostic Software for Accuracy
Beyond hardware, I recommend utilizing appliance diagnostic apps provided by manufacturers or third-party developers. These software tools connect to smart appliances via Wi-Fi, offering detailed error codes and troubleshooting pathways. They can dramatically cut your diagnostic time—something especially useful if you’re managing multiple appliances or complex systems. For example, LG’s ThinQ app offers real-time alerts and maintenance reminders, helping prevent issues before they escalate into costly repairs.
Looking ahead, I predict that as smart devices become more prevalent, integrated diagnostic platforms will evolve into comprehensive maintenance assistants, simplifying upkeep for both technicians and homeowners. Keeping abreast of these technological advancements can help you stay proactive—saving money and stress.
How do I maintain appliances over time? These proactive habits are key:
Consistent cleaning of filters and drains prevents buildup that can sabotage sensors and mechanical parts. For instance, regularly removing lint from dryer vents reduces overheating risk and improves efficiency. Scheduling annual inspections by certified technicians ensures components like capacitors or thermostats are functioning optimally, extending your appliance’s service life and honoring warranty terms.
Don’t forget to keep a detailed maintenance log—tracking dates, parts replaced, and issues noticed. This documentation proves invaluable during warranty claims or legal disputes, ensuring you’re covered when unexpected failures occur. Remember, investing in quality tools and following a disciplined maintenance routine empowers you to keep your appliances running smoothly for years to come.
Start integrating these tools and habits today—try calibrating your temperature sensors with a digital thermocouple and observe the improvements in your appliance’s performance. Being proactive is the secret to avoiding expensive repairs and ensuring long-term reliability.
” alt=”Close-up of digital multimeter testing appliance wiring” title=”Using a Digital Multimeter for Accurate Diagnoses”/>
The Hidden Lessons that Changed My Appliance Maintenance Approach
One of the most impactful lessons I learned was the importance of proactive sensor maintenance. I used to ignore those tiny water level sensors, assuming they were foolproof. But neglecting their cleanliness and proper placement caused overflows and costly repairs—a costly oversight that taught me to inspect and clean sensors regularly, much like checking essential safety devices. Additionally, I realized that detailed documentation of installation and maintenance routines isn’t just bureaucratic—it’s a shield during warranty claims and repairs. Keeping records of service dates, parts replaced, and adjustments made empowered me to act swiftly and confidently when issues arose. Finally, trusting manufacturer-recommended tools and diagnostic apps has been a game-changer; they enable me to diagnose problems accurately and avoid unnecessary expenses, ensuring appliances serve longer and safer. These insider insights have transformed my approach from reactive to preventative, saving time, money, and stress in the long run.
Tools and Resources That Make a Difference
My top tool for appliance diagnostics is a high-quality digital multimeter from Fluke. Its precision helps me identify electrical faults that faulty sensors or wiring cause, which is crucial for avoiding overflows or burnout. I also rely on an inspection camera—tiny and flexible—to access hard-to-reach components without invasive disassembly, saving me time and minimizing damage. For temperature-related sensors, a reliable digital thermocouple gun has helped me verify calibration accuracy, preventing issues before they escalate. Additionally, I consult detailed manufacturer guides and trusted online resources such as this comprehensive repair guide, which offers step-by-step instructions tailored to different appliance brands and models. These tools and trusted sources equip me to handle repairs confidently, ensuring longevity and safety for my appliances.
Embrace Your Role as Your Appliance’s Best Defender
Taking charge of appliance maintenance isn’t just about fixing problems—it’s about nurturing your home’s safety and efficiency. My advice is to start with small, consistent actions: regularly clean sensors, keep detailed maintenance logs, and use quality diagnostic tools. These steps may seem simple but pack a powerful punch in preventing overflows, breakdowns, and warranty issues. Remember, your proactive care can dramatically extend your appliances’ lifespan and safeguard your home from costly damage. Embrace the challenge with confidence—your home’s comfort and safety depend on it. What’s the first small step you’ll take today to improve your appliance care routine? Share your plan below and join a community committed to smarter, safer living.