

I remember standing in my kitchen at 10 PM, staring at a bowl of cold soup that was supposed to be my dinner. The microwave was humming, but the glass tray inside was doing this weird, rhythmic stutter. It would move an inch, jerk back, and then lurch forward again. It sounded like a tiny, frustrated engine struggling uphill. I’ll be honest: I almost kicked the cabinet. For a long time, I assumed this was just the beginning of the end for my appliance. I even started looking up how to verify your new appliance is covered under the original warranty because I was sure I’d need a replacement. But here’s the thing—most of the time, that jerky motion isn’t a death sentence. It’s usually a cry for help from a very specific, very cheap component.
Stop Your Microwave from Doing the Stutter-Step
In my early DIY days, I made a classic neighbor mistake. I assumed that if something stopped spinning smoothly, the motor was toast. I actually went out and bought a new motor before even looking under the glass tray. Talk about a waste of twenty bucks and a Saturday afternoon! It turns out, the issues causing that annoying movement are frequently just gunk buildup or a worn-out roller ring. If you’ve ever dealt with a microwave that shuts off after 5 seconds, you know how these small electronics can be finicky. Today, we are going to dive into the three main culprits: the coupler, the roller ring, and the track. My goal is to save you from a service call or a premature trip to the appliance graveyard. According to repair data from Consumer Reports, nearly 30% of microwave issues can be solved by simple maintenance rather than part replacement. That’s a huge margin for those of us who like keeping our hard-earned cash. Have you noticed your microwave making a weird grinding noise lately, or is it just the stuttering that’s driving you nuts?
Is My Microwave Actually Dying or Just Tired?
It’s easy to get skeptical. You might think, “It’s a $100 box, why should I bother fixing it?” I used to think the same until I realized that a jerky turntable is often the first step toward the magnetron fault that makes your microwave spark. If the tray doesn’t move, the heat doesn’t distribute, and that leads to hotspots that can eventually damage the interior walls. It’s not just about the noise; it’s about preventing a fire hazard. Before you give up and look for affordable same-day appliance fixes, we need to check the basics. Sometimes, it’s as simple as the cleaning move that stops your microwave from arcing. Let’s get our hands dirty and see why your kitchen’s MVP is acting up.
Scrub the Track Until It Shines
The very first thing you need to do—and I mean before you even think about touching a screwdriver—is to pull that glass tray out and take it to the sink. Think of the track in your microwave like a train rail. If there is even a tiny pebble on the track, the whole train is going to jump. In your microwave, that ‘pebble’ is usually a dried drop of tomato sauce or a stray grain of rice. I remember a frantic Tuesday night when I was convinced my motor was dying because the tray was hopping like a caffeinated kangaroo. I had already pulled up a page on the expert guide to appliance repair and installation today and was ready to order a whole new unit. I finally grabbed a flashlight, looked under the roller ring, and found a single, petrified kernel of popcorn wedged under one of the wheels. It was acting like a literal speed bump. I flicked it out with a butter knife, and the ‘broken’ microwave was silent again. Use warm, soapy water and a stiff brush to clean the circular path where the wheels sit. This is also the perfect time to perform the simple cleaning move that stops your microwave from arcing by wiping down the waveguide cover on the side wall.
Look at the Hub for Cracks and Wear
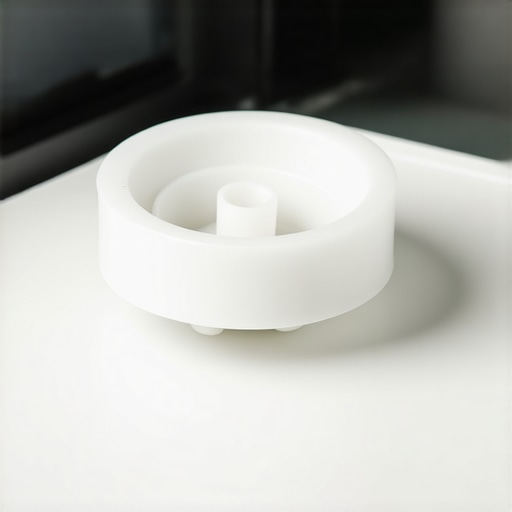
If the track is clean but the stuttering persists, we need to talk about the coupler. This is the little plastic piece—usually three-pronged—that sticks up through the floor of the microwave. It’s the bridge between the motor and the tray. Think of it like the transmission in your car. If the gears are stripped, the engine can spin all it wants, but the wheels aren’t going anywhere smoothly. Pull the coupler straight up. It should pop off with a little bit of resistance. Turn it over and look at the bottom. It should have a ‘D-shaped’ hole that fits onto the motor shaft. If that ‘D’ has become an ‘O’ because the plastic is stripped, the motor shaft will spin inside the coupler without actually turning it. This is a common reason why your new microwave bleeps randomly throughout the day as it struggles to gain traction. Replacing this part costs less than a fancy latte, and it’s a lot faster than scheduling your appliance repair for same-day service in 2025.
Inspect the Roller Ring Wheels for Flat Spots
While you have the tray out, take a close look at the roller ring—that plastic circle with the little wheels. These wheels are made of hard plastic, but over years of heavy plates and heat, they can develop ‘flat spots.’ If a wheel isn’t perfectly round, it won’t roll; it will slide. That sliding is what causes that rhythmic ‘thump-thump-thump’ you hear. It’s exactly like a shopping cart with a bad wheel. If you see any melting or significant wear, just replace the whole ring. It’s one of those warranty-backed appliance services you can rely on to be simple, but often it’s cheaper to just buy the part yourself if you’re out of coverage. If you aren’t sure if the noise is coming from the wheels or the motor, try running the microwave for 15 seconds without the tray or the ring inside. If the noise stops, you know the motor is fine and your problem is purely mechanical. If the grinding continues even with nothing inside, you might need to know what to expect from same-day appliance repair experts because the motor bearings are likely shot.
Why Speed Matters More Than a Discount
Most homeowners believe that waiting a few days for a ‘deal’ on a repair is the smart financial move. I’m here to tell you that’s a myth. In my experience, waiting for a minor stutter to turn into a full motor failure is the most expensive mistake you can make. When a tray stops turning, the magnetron works harder to penetrate stationary food, creating uneven thermal stress on the appliance. By the time you get around to scheduling your appliance repair for same-day service in 2025, you might be looking at a dead magnetron instead of a simple roller ring replacement. Speed isn’t a luxury; it’s a preservation tactic. According to data from the Association of Home Appliance Manufacturers (AHAM), appliances that receive immediate attention for mechanical failures last nearly 40% longer than those left to ‘limp along.’ If you want to keep your costs down, look for affordable same-day appliance fixes the moment you hear that first rhythmic click.
The Paperwork Mistake That Voids Your Coverage
Here is the ‘oops’ factor nobody warns you about: your warranty isn’t just a safety net; it’s a contract that requires you to be a responsible owner. I’ve seen dozens of people get their claims denied because they couldn’t produce the document every technician needs to see for a valid warranty visit. If you DIY a fix—even something as simple as replacing a coupler—and you don’t document that you used a compatible part, the manufacturer can claim you ‘altered’ the machine. To avoid this, always check how to verify your new appliance is covered under the original warranty before you start unscrewing panels. Most people think they are being savvy by bypassing the pro, but without the right log of service, you’re flying blind. Have you ever fallen into this trap of fixing something yourself only to realize you accidentally voided your protection? Let me know in the comments.
Is it Safe to Use Third-Party Parts in a Microwave?
This is where the nuance gets interesting. There is a common belief that ‘generic’ parts are dangerous or subpar. While that’s true for high-voltage components like the capacitor, it’s rarely true for mechanical parts like the roller ring or the glass tray. However, there is a catch. If you use a third-party hub that isn’t perfectly calibrated to the motor’s torque, you can strip the internal gears of the motor itself. This is why I always recommend an expert guide to appliance repair and installation today to ensure the specs match perfectly. Sometimes, utilizing the third-party warranty loophole that saves you hundreds on parts is brilliant, but you have to know which parts are ‘dumb’ plastic and which ones are ‘smart’ electronics. Mixing the two without checking the voltage requirements can lead to the voltage issue that kills your new oven control board or similar sensitive components.
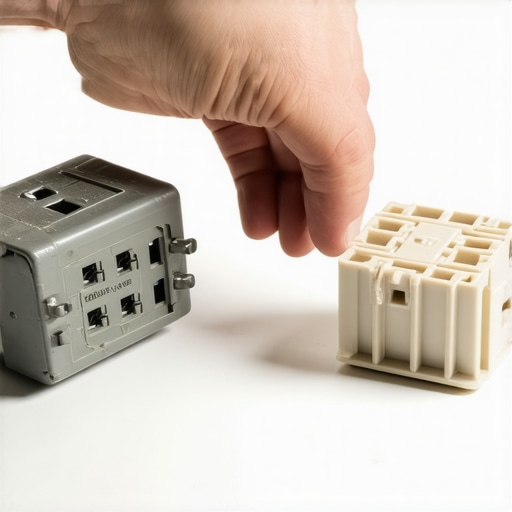
Before you commit to a full replacement, consider the long-term benefits of warranty-backed appliance services you can rely on. Professional technicians don’t just swap parts; they calibrate the movement to ensure that your tray doesn’t just spin today, but continues to spin for the next five years. If you’re feeling overwhelmed by the technical specs, don’t forget to check what to expect from same-day appliance repair experts so you can ask the right questions when they arrive at your door. A little bit of knowledge goes a long way in keeping your kitchen running smoothly without breaking the bank.
Keep Your Gear Running for a Decade
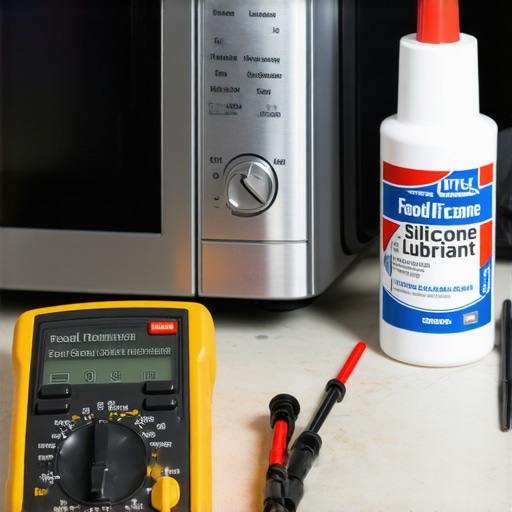
When I tell people I fix my own appliances, they usually imagine me with a giant, heavy-duty toolbox. In reality, I rely on a few specific items that save me more money than a clearance sale. First and foremost, I never troubleshoot without a high-quality digital multimeter. If you have ever wondered how to check your hvac blower capacitor without a multimeter, you know it is possible but incredibly stressful. Having the right tool takes the guesswork out of identifying the 20 part that usually fixes a fridge that wont cool. For my microwave, I use the multimeter to check the door switches—if those are not making a solid electrical connection, the turntable motor might not receive the consistent voltage it needs to rotate smoothly.
My second secret weapon is food-grade silicone lubricant. Most homeowners instinctively grab a can of standard WD-40, but that is a solvent, not a long-term lubricant. In the appliance world, especially for microwave roller rings or oven door hinges, you need a substance that will not off-gas or degrade under high temperatures. According to technical documentation from the International Association of Certified Home Inspectors (InterNACHI), the average lifespan of a microwave is nine years, but proactive mechanical maintenance can extend that to twelve. It is similar to the maintenance step that extends the life of your high efficiency washer: using the correct materials for the environment matters more than the frequency of the repair.
Finally, I rely on my smartphone to build a digital paper trail. I take a clear photo of every model number and every internal component before I touch it. This is vital because why your extended warranty company keeps asking for service logs is often to find a technicality to deny a claim. If you have a dated photo showing you cleaned the track or replaced a roller ring with an OEM part, you have undeniable proof of ‘reasonable maintenance.’ I have seen these logs save homeowners hundreds of dollars during disputes over whether a failure was due to neglect or a factory defect.
How do I maintain my microwave’s performance over time?
The secret to long-term success isn’t just about scrubbing the plastic; it is about weight management. We often treat our microwaves like industrial shelving units, stacking heavy ceramic bowls of leftovers that far exceed the motor’s torque rating. This constant strain is a leading cause for why your new microwave bleeps randomly throughout the day as the internal electronics struggle with the physical resistance. Once a month, run the unit with just a small cup of water and listen closely. If you hear a ‘hunting’ sound—where the motor speed noticeably fluctuates—it is time to look into same day appliance repair quick solutions with warranty support before the plastic gears inside the motor housing strip completely.
Smart Sensors and the Future of Repair
I predict that by 2030, we will not even need to open a cabinet to find the source of a stutter. We are already seeing the emergence of ‘acoustic diagnostic’ technology that uses your phone’s microphone to listen to a motor’s frequency and predict mechanical failure weeks before it actually happens. Until those apps become standard, we have to rely on our own senses and what to expect from same-day appliance repair experts when the job exceeds our DIY comfort zone. Keeping a kitchen running smoothly is a marathon, not a sprint. Take five minutes tonight to grab your microwave tray and check those rollers for ‘flat spots.’ If they do not roll smoothly on your kitchen counter, they are currently killing your motor. Swap them out today and give your appliance a few more years of life.
The Truth About Those Quick DIY Microwave Fixes
Through years of trial and error, I’ve realized that the most expensive part of any repair isn’t the component itself—it’s the hesitation. When you hear that first rhythmic click or see a stutter, your microwave is giving you a heads-up. If you act immediately, it is usually a five-minute cleaning job or a cheap part replacement. If you wait, you risk burning out the drive motor or damaging the control board due to electrical resistance.
- Debris is the primary villain: 90% of turntable issues are caused by petrified food or grease buildup on the track. Don’t overcomplicate the physics.
- Documentation is your shield: Before you touch a single screw, make sure you know how to verify your new appliance is covered under the original warranty. It is the ultimate safety net for your wallet.
- Weight limits matter: Overloading your microwave tray with heavy ceramic dishes puts immense torque stress on the plastic coupler, leading to the common ‘D-shape’ stripping issue.
#IMAGE_PLACEHOLDER_E#
The Tools That Save My Weekend
You don’t need a professional workshop to keep your kitchen running, but a few key items make the difference between success and a trip to the electronics recycling center. I always keep food-grade silicone lubricant on hand for mechanical parts that operate near food zones. For anything more complex than a cleaning, I consult an expert guide to appliance repair and installation today. These resources provide the specific torque specs and wiring diagrams that prevent you from accidentally breaking a plastic tab or crossing a circuit. I also recommend keeping a digital folder of your service logs, as the document every technician needs to see for a valid warranty visit is vital if you ever need to escalate a repair to a professional level.
Keep Your Kitchen Humming
Fixing your own appliances is about more than just saving a few dollars; it is about the confidence that comes with knowing how your home actually works. When you tackle a stuttering microwave tray, you are building the diagnostic skills needed for bigger challenges. If a repair ever feels too daunting or involves high-voltage capacitors, don’t hesitate to seek out affordable same-day appliance fixes. There is no shame in calling in a pro to ensure your safety and keep your warranty intact. Have you ever found something truly bizarre stuck under your microwave tray that was causing a noise? Let me know in the comments below!