
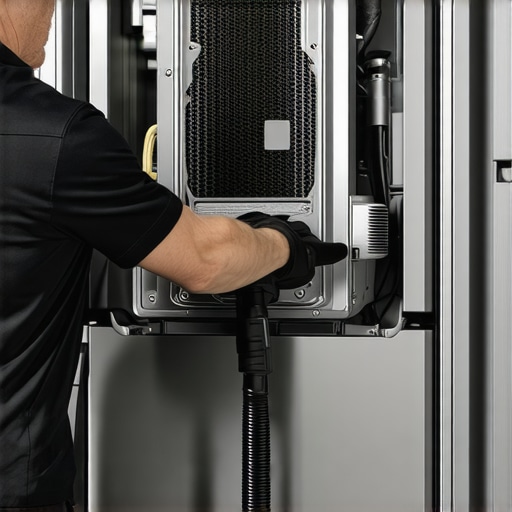
Ever peeked into your kitchen and heard that faint humming from your fridge, only to realize it’s louder than it should be? That was me a while back—frustrated, wondering why my appliance seemed to be working overtime and costing me extra on the energy bill. One day, while trying to troubleshoot, I had a lightbulb moment: maybe I was neglecting a simple yet crucial maintenance step.
Why Your Refrigerator Might Be Working Too Hard and What You Can Do About It
Refrigerators are marvels of modern engineering, quietly keeping our food fresh day after day. But they can become energy hogs if their condenser coils get clogged with dust and debris. It’s like trying to breathe through a clogged straw—your fridge has to strain more to do its job. I learned that cleaning these coils regularly can drastically improve efficiency and extend the lifespan of your appliance.
Problem was, I used to think a quick wipe-down was enough. Turns out, vacuuming is the real game-changer. When I finally took the time to properly vacuum the coils—using the right tools and technique—the difference was night and day. My fridge ran cooler, quieter, and I even noticed my electric bill shrinking. Experts agree that a clean condenser coil can reduce your fridge’s energy consumption by up to 10% — a significant saving that’s easy to overlook. For more details on how to maximize your appliance’s performance, check out this guide to same-day appliance repair.
Is Vacuuming Your Refrigerator Coils Really Worth the Effort?
Early on, I made the mistake of ignoring the importance of thorough cleaning, thinking that a quick dusting would suffice. Wrong! A partial clean only removed surface dirt, leaving dust embedded deep in the coils where it reduces heat transfer. This mistake cost me extra energy and wear on my compressor. Trust me, making sure you vacuum those coils properly makes all the difference. Want to learn how to do it right? Stay tuned—I’m about to share the step-by-step process to keep your fridge running smoothly without spilling into your budget or risking damage to your appliance.
Locate Your Refrigerator Coils
First, unplug your fridge to ensure safety. Move the appliance away from the wall carefully, using a dolly if needed, to access the back panel. Identify the coils—these are typically at the rear or underneath the unit and often look like a series of metal tubes or fins. Mark the area so you know exactly where to focus your cleaning efforts.
Gather Your Cleaning Tools
Equip yourself with a vacuum cleaner with a brush attachment, a coil brush or old paintbrush, and a damp cloth. Using the right tools is like giving your fridge a physical check-up—precision matters. For tight spaces, a narrow nozzle attachment helps dislodge deep-seated dust. Remember, safety is key—always disconnect power before starting.
Remove Debris and Dust
Start with the vacuum’s brush attachment to gently remove loose dust and cobwebs from the coils. Use the coil brush or a stiff-bristled brush to scrub in between the fins, similar to cleaning a radiator—gently but thoroughly. During my last clean, I found sticky dust build-up deep inside, which I carefully dislodged. This process took about 10 minutes but made a noticeable difference in efficiency afterward. For more in-depth tips, check out this detailed guide on appliance maintenance.
Wipe Down and Reassemble
After removing debris, wipe the coils with a damp cloth to catch any leftover dust or grime. Be cautious to avoid bending delicate fins—think of it as gardening; gentle strokes yield better results. Once clean, reconnect the power cord, push the refrigerator back into place, and let it settle for a few hours. I once rushed to reconnect my fridge without letting it sit, causing minor temperature issues—don’t make that mistake.
Monitor and Repeat Regularly
Set a reminder to perform this cleaning every six months. Regular maintenance like this not only cuts energy costs by up to 10% but also extends your appliance’s lifespan. My energy bill saw a drop just after my first thorough coil cleaning, proving how simple upkeep adds up. For quick scheduling, consider booking same-day professional service—sometimes, a quick expert touch saves time and effort.
 When it comes to appliance repair and maintenance, many homeowners operate under misconceptions that can cost them time and money. One prevalent myth is that if an appliance works, it doesn’t require professional attention. However, subtle issues often lurk beneath the surface, and neglecting them can lead to costly breakdowns later. For example, a small refrigerant leak might not affect operation immediately but can cause severe compressor damage if left unaddressed—a nuance that only seasoned technicians recognize, emphasizing the importance of regular professional inspections.
Another common mistake is assuming that warranties cover every repair or damage. Many users overlook the fine print, believing that replacing a part or hiring a technician automatically falls under their plan. In reality, warranty coverage can be limited, excluding damages caused by misuse or improper installation. This misconception can result in unexpected expenses during emergencies, which is why understanding your warranty’s scope and limitations is crucial. To maximize your coverage, consult detailed guides like this resource on warranty optimization.
Furthermore, during installation, a widespread misconception is that DIY setups are sufficient for all appliances. While some minor tasks are manageable, improper installation—such as incorrect leveling, inadequate power connections, or poor ventilation—can compromise safety and efficiency. Advanced mistakes, like misaligning delicate components in high-end units, can lead to premature failure. Professional installation isn’t just about plugging in; it’s about ensuring adherence to manufacturer specifications, which experts like those at this guide on expert installation describe in detail.
The importance of same-day service often gets underestimated, with many assuming it’s a luxury rather than a necessity. Delaying repairs can cause minor issues to escalate, leading to more extensive damage. Common pitfalls include attempting temporary fixes or ignoring warning signs, which might save a few dollars upfront but cost significantly more later. For instance, postponing a refrigerant recharge can overwork your compressor, decreasing its lifespan, a nuanced point highlighted in recent industry studies.
Have you ever fallen into this trap? Let me know in the comments.
Being aware of these advanced nuances and myths enables you to approach appliance maintenance with a clearer understanding, ultimately saving you money and extending your appliance’s life. Remember, leveraging professional services and understanding your warranty can make all the difference. For trusted, fast, and warranty-backed assistance, explore this reliable same-day repair service.
Investing in Reliable Equipment and Skills
When it comes to keeping your appliances running smoothly over the years, having the right tools and knowledge is essential. I personally rely on a quality digital multimeter—specifically the Fluke 115—it’s durable, accurate, and covers most diagnostic needs I encounter. Using a reliable multimeter allows me to quickly verify voltage, continuity, and resistance in components, saving time and preventing unnecessary part replacements.
In addition, I recommend carrying a high-quality toolset tailored for appliance repair. This includes insulated screwdrivers, needle-nose pliers, and precision tweezers. These tools help me access tight spaces and handle delicate parts without causing damage. For more advanced diagnostics, I utilize a combined infrared thermometer and leak detector. Not only do these tools help identify temperature anomalies and leaks promptly, but they also empower me to address issues proactively—preventing small problems from escalating.
Software and Record-Keeping for Consistency
Beyond physical tools, keeping detailed records of repairs and maintenance routines helps me track patterns and anticipate future issues. I maintain a digital log using simple spreadsheet software to document the date, nature of the problem, parts used, and other observations. This habit has proven invaluable during warranty claims or when consulting with professionals. Additionally, I stay updated with software tools like manufacturer diagnostic apps, which can be connected directly to smart appliances for real-time data and troubleshooting tips.
Predicting and Preparing for Future Trends
As appliances become smarter, integrating IoT devices and remote diagnostics will likely become standard. Staying ahead of this curve means investing in tools that can interface with smart systems and understanding how to interpret the data they generate. Leveraging these advancements will streamline maintenance and reduce unexpected breakdowns, especially when combined with professional services—like those available through same-day repair providers. Expect the trend toward more connected appliances to continue, emphasizing importance of ongoing training and updated diagnostic tools.
How do I maintain tools and skills over time?
Regularly calibrate your multimeter and inspect your tools for wear and tear. Personally, I set quarterly reminders for tool checks and firmware updates for diagnostic apps. Participating in online forums or local repair workshops also keeps my skills sharp and exposes me to the latest industry techniques. Remember, the investment in proper tools and continuous learning pays dividends—extending your appliances’ lifespan and saving you money in the long run. Don’t hesitate to try out the high-accuracy infrared thermometer I mentioned; it’s a game-changer for quick diagnostics, especially during seasonal maintenance sessions. For detailed guidance on appliance troubleshooting, explore this expert resource.
Three Lessons Only Experts Tend to Share
- Early in my repair journey, I learned the hard way that skipping routine coil cleaning can severely shorten your fridge’s lifespan—those unseen dust layers cause hidden wear and tear. Now, I schedule dedicated maintenance every six months to avoid costly breakdowns.
- I once believed that a simple DIY vacuum was enough, but using the proper tools and techniques—like a coil brush and careful fin alignment—makes all the difference. Investing in quality repair tools like insulated screwdrivers has saved me countless headaches.
- Knowing the limits of warranties can be tricky; I used to overlook small print, only to be surprised by out-of-pocket expenses during emergencies. Now, I regularly review my coverage—and consult resources like this guide—to ensure I get full protection.
Tools and Resources That Elevated My Repair Game
- My trusty digital multimeter, the Fluke 115, is worth every penny—its reliability gives me confidence diagnosing electrical issues quickly. It’s a game-changer for avoiding unnecessary part replacements.
- A high-quality infrared thermometer helps me spot temperature inconsistencies early, preventing small issues from escalating. Combining it with a leak detector, I can proactively catch problems like refrigerant leaks before they cause failures.
- Books such as “The Household Appliance Repair Manual” deepen my understanding of complex systems, saving time during troubleshooting. Pairing these with online forums and trusted industry websites keeps me updated on latest repair techniques—like expert repair insights.
Your Role in Shaping the Future of Appliance Care
The more I learn, the more I realize that proactive maintenance and professional support are vital to longevity. Embracing smart tools and staying informed empower me to handle repairs confidently, but I also know when to call in the pros at same-day appliance repair services—something I treasure when time is tight. The future of appliance care is about combining expert knowledge with innovative technology, and I’m excited to see how this evolves. What’s the biggest lesson you’ve learned about keeping your refrigerator in top shape? Let me know in the comments below.