Ever tried to push your washer and dryer into a tight laundry nook, only to realize the stack is unstable—causing noise, wobbling, or worse, risking a costly accident? I remember the moment I first stacked my appliances without proper guidance; my heart sank when the whole setup wobbled just during a spin cycle. That lightbulb moment made me realize how crucial correct stacking is—not just for convenience, but for safety and the longevity of your appliances.
Today, I promise to share the proven techniques I’ve learned over years of personal experimentation to help you stack your washer and dryer the right way. No more guesswork, no more wobbles—just a solid, safe setup that keeps your laundry routine smooth and hassle-free.
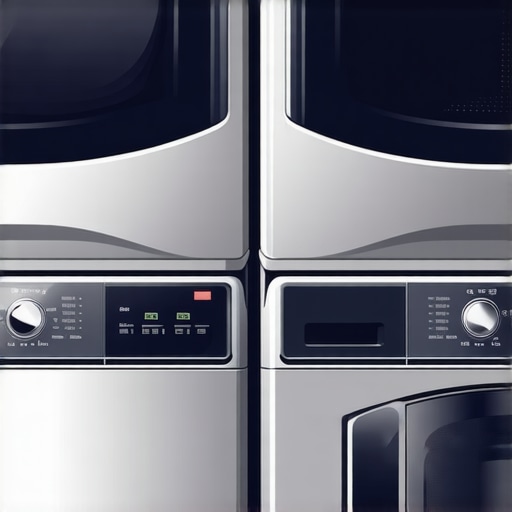
Why the Proper Stack Matters More Than You Think
Think about it—you’re hauling laundry baskets and battling that tiny, crowded laundry space. A well-stacked washer and dryer can save you precious room and make your chores easier. But improper stacking can lead to appliance damage, noise disturbances, and even safety hazards. Did you know that unstable stacking can cause the units to fall or shift over time? According to experts, overloads and poor installations account for most appliance accidents in homes.
To avoid these pitfalls, I initially overlooked the importance of following manufacturer guidelines, opting instead for quick fixes. Early mistakes included not securing the units properly, which nearly resulted in a toppled dryer during a high-spin cycle. For more details on common errors, check out this comprehensive guide to appliance safety.
If you’re facing similar frustrations or concerns, you’re not alone—and this post will walk you through the best practices for stacking your washer and dryer safely and efficiently. Now, let’s dive into how to set up your appliances right the first time. And if you’ve experienced issues with your top-load washer not agitating properly, I highly recommend reviewing this troubleshooting article for quick fixes.
Prepare Your Workspace Efficiently
Start by clearing the area around your laundry space. Remove any clutter that might interfere with the stacking process. Place a mattress pad or a soft cloth on the floor to prevent scratches on your appliances and make lifting easier. Ensure your appliances are unplugged and clean to avoid dirt or debris interfering with stability.
Assemble the Necessary Tools and Parts
Gather your stacking kit, which typically includes a stacking kit or brackets, leveling feet, and sometimes additional rubber pads for vibration absorption. Verify compatibility with your specific washer and dryer models by consulting the manufacturer’s instructions. Using the right parts is like choosing the correct puzzle pieces—precision makes all the difference.
Level the Appliances Correctly
Proper leveling is crucial. Use a bubble level to check the front-to-back and side-to-side balance of each unit. Adjust the leveling feet accordingly—turn clockwise to raise parts or counter-clockwise to lower. Think of it as balancing a teeter-totter; even a slight tilt can cause wobbling or tipping over time. I once failed to level my dryer, and during a high-spin cycle, it wobbled so violently that I had to redo the setup entirely. This alone highlights the importance of this step. If your washer or dryer has adjustable legs, make sure they are securely tightened after leveling. < >
>
Secure the Units with the Proper Stacking Kit
Attach the stacking kit brackets to your washer and dryer according to the manufacturer’s instructions. Typically, this involves bolting or clipping the brackets onto specific points on the units. This step is like anchoring a ship—it keeps everything grounded and prevents accidental topples. Ensure the brackets are tightly secured, as loose fittings can compromise safety. When I did this for the first time, I made the mistake of skipping tightness checks; the entire setup shifted during operation. Double-check all connections before moving to the next step.
Position the Dryer Safely onto the Washer
Carefully lift the dryer onto the washer, aligning it with the stacking brackets. Use proper lifting techniques—bend your knees, keep your back straight, and lift with your legs to avoid injury. It’s similar to stacking boxes carefully—you want everything aligned perfectly without dropping or tilting. Having a second person can make this step much easier and safer. Once in place, tighten all screws and locking mechanisms to secure the dryer firmly atop the washer. I remember the first time I attempted this alone; it was a near disaster, but patience and proper technique saved the day.
Verify Stability and Test the Setup
After assembly, gently push each appliance to test for wobbling or shifting. If movement occurs, double-check the leveling and the tightness of the brackets. A stable stack is like a well-built house—firm and resilient during operation. Run a short cycle on your washer or dryer to observe vibrations. If you notice excessive movement, revisit the leveling process or consult your appliances’ manuals. Remember, safety is paramount; an unstable setup can lead to appliance damage or accidents. For further insights into appliance troubleshooting, check out this guide on washer agitation issues.
While many believe that appliance repairs are straightforward and can be tackled with basic tools, the reality is far more nuanced. A widespread misconception is that warranty coverage always favors the consumer, but in truth, many warranties exclude accidental damage or improper installation. For example, some homeowners assume that calling a local technician guarantees quality, yet not all technicians are certified or experienced with specific brands. Always verify their credentials, as you wouldn’t trust just anyone with your high-end appliances.
What Advanced Signal Do Modern Appliances Use for Diagnostics?
Most people overlook that many contemporary appliances utilize smart diagnostics, which transmit detailed error codes and even suggest solutions. Understanding these signals can prevent unnecessary service calls. For instance, a washing machine displaying a specific error code might be misinterpreted as a minor issue when, in fact, it indicates a failing suspension spring—more serious and requiring prompt attention. Check out this guide on signs of suspension spring failure for more details. One common mistake is relying solely on online troubleshooting tips without understanding the appliance’s specific diagnostic signals. This can lead to misdiagnosis or overlooking essential safety precautions, especially with high-voltage units like ovens and HVAC systems. Remember, safety first: always consult manufacturer guidelines or qualified technicians when in doubt. Furthermore, many underestimate the importance of proper installation procedures. For example, improper leveling not only causes uneven wear but also voids warranty coverage in some cases. To avoid this, always refer to detailed installation manuals, or better yet, hire certified professionals. Not doing so can cause persistent issues, such as ongoing leaks in refrigerators or uneven heating in ranges. Finally, regarding same-day service, it’s tempting to assume that quick fixes save money, but rushing through repairs can lead to overlooked details, resulting in future failures. Reliable service providers prioritize thorough diagnostics over speed and have access to OEM parts, ensuring long-term reliability. Don’t fall for the trap of superficial fixes; trust experts who understand the hidden complexities of appliance systems. If you’re interested in avoiding common pitfalls, you might find it helpful to review how to troubleshoot specific issues, such as repairing leaks in your fridge or fixing agitation problems in washing machines. Remember, knowledge is your best defense against costly mistakes—equip yourself and question assumptions that might seem obvious at first glance. Have you ever fallen into this trap? Let me know in the comments.
Mastering the Art of Maintenance with the Right Tools
Keeping your appliances running smoothly over the years requires more than just occasional cleaning—you need the right tools and a systematic approach. I personally swear by a digital multimeter, such as the Fluke 117, for diagnosing electrical issues. Its precision allows me to verify voltage levels quickly, ensuring safety and accuracy before proceeding with repairs. For checking continuity in elements like your oven’s bake coil, a high-quality multimeter is indispensable.
Another essential tool I rely on is a set of precise screwdrivers, particularly insulated Phillips and flat-head types. These help in disassembling components without risking electrical shocks or damaging delicate parts. I’ve also found that a compact, cordless corded drill with adjustable torque saves immense time when removing or tightening mounting screws, especially in tight spaces.
For more detailed diagnostics, I use appliance-specific apps connected via Wi-Fi, like LG’s ThinQ or Samsung SmartThings. These apps often provide error codes, firmware updates, and troubleshooting guides—reducing unnecessary service trips. As technology advances, appliances are becoming smarter, and integrating diagnostic tools into my toolkit keeps me ahead of potential issues.
In the near future, I predict that IoT devices and machine learning algorithms will revolutionize how we maintain appliances. Imagine sensors that monitor component wear in real-time and notify homeowners before issues occur, or automated diagnostic drones inspecting hard-to-reach areas. Staying updated with these trends ensures I can offer the most efficient solutions for my clients and minimize downtime.
How do I keep my appliances in top shape for the long haul?
Consistent and proactive maintenance is key. Regularly cleaning filters, checking seals, and scheduling professional inspections at least once a year extend the life of your units. For example, ensuring the water inlet valve in your refrigerator is free of mineral buildup prevents leaks and costly repairs—more details on simple water dispenser fixes. Additionally, rotating and balancing your washing machine periodically, as shown in this guide on agitation issues, prevents uneven wear and mechanical failures.
Adopting a maintenance schedule that includes checking power supply stability, especially with devices connected to surge protectors like these protective devices, preserves your investments. Also, periodically inspecting and tightening bolts or brackets—particularly when moving appliances—can prevent wobbling and internal damage.
Don’t forget the importance of using manufacturer-recommended replacement parts. For example, when replacing oven heating elements, verify compatibility and quality—using subpar parts might save money initially but often leads to higher costs down the line. As per the industry experts, choosing OEM parts guarantees longevity and safety.
What about scaling your maintenance efforts as your household grows?
As families grow and appliances see more use, it’s wise to implement routine checks more frequently. Setting calendar reminders for filter replacements, inspecting seals, and running diagnostic tests helps catch issues early. Investing in a reliable appliance management software can also streamline scheduling and record keeping, ensuring no detail gets overlooked. Remember, long-term results come from diligent, informed care—don’t wait until a small issue becomes a major repair. For example, regularly testing your washing machine’s suspension springs, as discussed here, can save you from extensive damage and costly fixes.
What the Hidden Lessons in Appliance Stacking Taught Me
One of the toughest yet most valuable lessons I learned was how a tiny misstep during stacking can lead to significant safety risks or damage over time. I once ignored the importance of proper leveling, thinking a quick fix would suffice, only to watch my dryer wobble dangerously during a high-spin cycle, risking a fall. That experience taught me that patience and precision are essential, especially when dealing with heavy appliances. Remember, every small detail—from securing brackets to ensuring stability—contributes to a safe, durable setup.
Another insight was that manufacturer guidelines are gold standards. Skipping steps or substituting parts might seem tempting but can void warranties or cause performance issues later. I found that investing time in understanding specific model requirements saved me stress and money in the long run, especially when troubleshooting. Knowledge is your best tool in ensuring your appliances operate smoothly and safely.
The most eye-opening lesson was how proper appliance maintenance, combined with correct installation, greatly extends equipment lifespan. Regular checks, like examining suspension springs or cleaning filters, prevent unexpected failures. For instance, proactive inspection of washing machine components can reveal early signs of wear, saving you costly repairs. When it comes to your appliances, think of prevention as the best form of protection—your peace of mind depends on it.
Tools and Resources That Changed My Approach to Appliance Care
- Digital Multimeter (like the Fluke 117): Reliable electrical diagnostics are fundamental. It’s my go-to for verifying voltage and continuity, ensuring safety before proceeding with repairs.
- High-Quality Screwdriver Set: Insulated and precise screwdrivers prevent damage and shocks, especially when working with live components.
- Appliance-Specific Apps: Apps such as LG ThinQ or Samsung SmartThings provide error codes, troubleshooting tips, and firmware updates, making diagnostics more straightforward.
- Professional Manuals and Industry Guides: Staying informed with detailed manuals helps me avoid common missteps and understand nuanced installation procedures.
Together, these tools form a comprehensive toolkit that empowers me to identify issues early, perform repairs confidently, and extend appliance longevity. Don’t underestimate the power of quality equipment—it’s an investment that pays off in safety and efficiency.
Take Action and Keep Things Running Smoothly
The key to lasting appliance performance is consistent care combined with confident troubleshooting. Remember, proactive maintenance not only prevents accidents but also maximizes your appliances’ lifespan. Whether you’re stacking your washer correctly or checking your refrigerator’s seals, each step brings you closer to a safer, more reliable home environment. Embrace the learning curve, ask questions, and don’t be afraid to get your hands dirty—your appliances will thank you for it.
What’s the most surprising thing you’ve learned about appliance maintenance? Share your experiences below, and let’s keep the conversation going!
,