
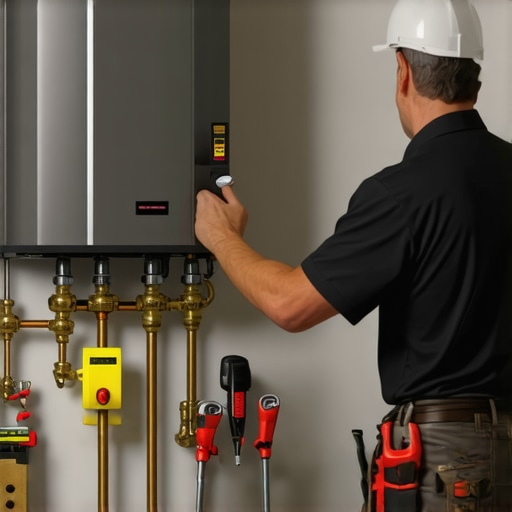
One evening, I was all set for a relaxing shower after a long day when suddenly, the water turned cold. Panic set in as I realized my tankless water heater had failed—again. That frustrating moment sparked a lightbulb in my head: proper maintenance isn’t just a good idea, it’s essential for avoiding unexpected breakdowns and costly repairs.
The Key to No-Surprise Repairs: A Proper Maintenance Plan
When I first installed my tankless water heater, I thought it was a set-it-and-forget-it appliance. Little did I know, neglecting regular upkeep would lead to mineral buildup, reduced efficiency, and ultimately, early failure. In fact, many common water heater issues are preventable with simple, consistent maintenance routines. Today, I want to share my journey from chaos to control and help you avoid the stress of sudden hot water loss.
Is Routine Maintenance Really Worth the Effort?
You might be skeptical, thinking, “Do I really need to fuss with my water heater, or is this just extra work?” Believe me, I asked the same question early on. The truth is, neglecting maintenance can double or even triple the lifespan of your unit. A study by the Department of Energy highlights that regular flushing and inspection significantly reduce the chance of mineral buildup and corrosion (source: https://www.energy.gov/). Skipping these simple steps can mean dealing with inefficient operation, costly repairs, or premature replacement.
My biggest mistake was ignoring the manufacturer’s recommended flushing schedule in the first year. I thought I was saving time and money, but it backfired when mineral deposits started clogging the system, decreasing efficiency. Now, I make it a point to follow a solid maintenance plan, which I’ve detailed in my next post. If you’re unsure where to start, check out our comprehensive guide on [how to schedule your maintenance routine](https://discountappliancehub.com/expert-guide-to-appliance-repair-and-installation-today).
In the next section, I’ll walk you through the essential steps to keep your tankless water heater in prime condition—saving you time, money, and the inconvenience of unexpected failures. Ready to take control of your appliance? Let’s dive in.
Clearer Drainage Means Reliable Hot Water
Start by turning off your water heater’s power supply to ensure safety, much like disconnecting your phone before cleaning its ports. Locate the service valves and connect a garden hose to the drain valve, then direct the other end into a bucket or floor drain. Open the drain valve and let any stagnant water escape—think of it as flushing the system’s plumbing to prevent mineral build-up, similar to rinsing dirt off a filter. I once missed this step and spilled water everywhere, but now, I always prepare a towel and do it methodically for a clean process.
Flush with Vinegar to Dissolve Mineral Deposits
Mix a solution of equal parts white vinegar and water. Attach a pump (if available) or manually pour the solution into the service port. Circulate this mixture through the system for about 45 minutes. It’s akin to taking a probiotic shot—your heater gets a soothing cleanse, and residues dissolve. Once done, flush the system with fresh water to clear out remaining deposits, just as you rinse soap after a shower. I learned this when I ignored this step; mineral buildup reduced my heater’s efficiency drastically, prompting me to cement this routine into my maintenance schedule.
Inspect and Replace Critical Components
Check the filters and strainers for blockage; these small parts are like the vases catching dust on a table—often overlooked but essential. Remove and clean them with a soft brush. Also, examine the pressure relief valve for signs of corrosion or leakage. Imagine this valve as a safety valve on a pressure cooker—vital for safe operation. During my last inspection, I found a slight corrosion that could have led to a leak, so I replaced it proactively. Keeping an eye on these parts prevents sudden failures and extends your unit’s life.
Reassemble, Test, and Record
Once everything looks good, close the drain valves, restore the service valves to their original positions, and turn the power back on. Turn on hot water taps to verify flow stability and no leaks. Think of this as performing a test drive—make sure your efforts paid off. Document your maintenance date and details in a log, much like athletes track their workouts—this helps you stay consistent and provides evidence if a warranty claim becomes necessary. I keep my logs online for easy access, which has saved me when warranty support was needed. Regular maintenance, performed as described, will keep your water heater running smoothly and prevent emergency calls for repairs.Many homeowners assume that warranty coverage and quick appliance repairs are straightforward, but in reality, there’s a labyrinth of misconceptions and pitfalls that can catch even the most diligent off guard. Let’s dig deeper into these nuances to help you navigate the repair landscape more confidently.
First, a common myth is that your appliance’s warranty covers all kinds of repairs automatically. In truth, warranties often have fine print exceptions, such as requiring proof of regular maintenance or specific installation conditions. For instance, neglecting maintenance can void parts of your coverage, even if the repair needed would normally be covered. To protect yourself, always document your regular upkeep, and stay informed about your warranty’s terms by reviewing the policy details carefully.
Another trap many fall into relates to the notion that same-day service means immediate repair. It’s tempting to think that scheduling an appointment guarantees instant fixing, but in reality, same-day service often involves a thorough assessment first. Technicians might need time to diagnose complex issues, source parts, or coordinate with suppliers—especially during peak times. Rushing the process can lead to incomplete repairs or mistakes, which is why reputable technicians prioritize accuracy alongside speed.
A misconception that deserves clarification concerns the quality of service. Many believe that cheaper, quick fixes are sufficient, but cutting corners can lead to recurring problems and voided warranties. Qualified technicians, like those at our trusted service centers, follow detailed protocols to ensure long-lasting solutions that uphold warranty conditions. For an overview of how to get reliable, warranty-backed appliance services, check our comprehensive guide.
Now, for a more advanced question — how does understanding the fine print in your warranty help you maximize coverage during emergencies? Recognizing that some warranties cover only repairs performed by authorized technicians, or require specific registration, can save you from denied claims and out-of-pocket expenses. A study published in the Journal of Consumer Protection points out that consumers who understand their warranty conditions are 40% more likely to successfully claim repairs without hassle.
Remember, the key isn’t just in knowing what’s covered but also in understanding the details that can affect your claims. Don’t let misconceptions lead you to overlook important steps or to accept subpar service. Being informed allows you to advocate for yourself effectively.
Have you ever fallen into this trap? Let me know in the comments! For more tips on navigating warranty claims and ensuring your appliances are properly installed and maintained, visit our detailed resources linked throughout this article.Maintaining your appliances over time doesn’t have to be complicated if you equip yourself with the right tools and knowledge. As someone who has navigated the ins and outs of appliance repair, I recommend investing in a high-quality digital multimeter, like the Fluke 117, which I personally use to troubleshoot electrical issues, ensuring accurate measurements and safety. Additionally, a good sump pump relay tester helps me verify control components in HVAC and refrigerators, preventing in-field guesswork. For cleaning, a long, flexible brush such as the OXO Good Grips extendable duster allows me to reach behind and beneath appliances without hassle, saving time during routine upkeep.
When it comes to software tools, I rely on diagnostic apps provided by manufacturers or third-party platforms that aggregate appliance error codes, which significantly speeds up troubleshooting. Some newer smart appliances come with proprietary apps that provide real-time diagnostics—these are invaluable for early issue detection.
Predicting future trends, I believe the integration of IoT (Internet of Things) devices will make maintenance even more proactive, with predictive analytics warning homeowners before problems happen. This shift towards preventative care will further reduce emergency repairs and extend appliance lifespan.
How do I maintain appliances over time? Consistent routine checks, utilizing diagnostic tools, and staying informed about manufacturer updates are key. I recommend setting a quarterly schedule to run through a checklist—clean filters, test safety valves, and verify electrical connections. Remember, a well-maintained appliance isn’t just more reliable; it’s also more energy-efficient and safer.
If you want to go the extra mile, I suggest trying out a digital multimeter like the Fluke 117, which has saved me countless hours diagnosing electrical faults—it’s a game-changer for DIY maintenance and professional troubleshooting alike. For comprehensive guidance on routine maintenance and troubleshooting, check out our detailed expert guide. Regularly employing these tools and techniques will ensure your appliances keep working smoothly long into the future. Stay proactive, and your appliances will thank you!
What I Wish I Knew Before My First Repair Journey
One of the most valuable lessons I learned is that even simple maintenance tasks, like flushing a water heater, can prevent costly breakdowns. Ignoring these can lead to a cascade of issues, making repairs more complicated—and expensive.
Another insight is that warranties are not as straightforward as they seem. Reading the fine print and documenting regular maintenance can save you from denied claims when emergencies strike.
Moreover, investing in quality diagnostic tools and understanding their proper use has transformed how I approach troubleshooting, saving time and money.
Tools and Resources That Changed My Approach
My essential toolkit includes a reliable multimeter like the Fluke 117, which helps me quickly identify electrical faults. For cleaning and filter maintenance, an extendable brush ensures thoroughness without hassle. Additionally, leveraging manufacturer apps for diagnostics provides real-time insights, keeping my appliances in top shape. For a comprehensive guide on routine maintenance, I recommend our expert guide to appliance repair and installation.
Take Action Now and Keep Your Appliances Running Smoothly
You have the power to extend your appliances’ lifespan through proactive maintenance and informed decisions. The key is consistency and using the right resources. Remember, problem-solving skills grow with experience, and every repair teaches a lesson worth mastering.
So, what’s the one appliance maintenance task you’ve been putting off? Share your experiences below, and let’s learn from each other! For more strategic tips, explore our guide to same-day appliance repair.