
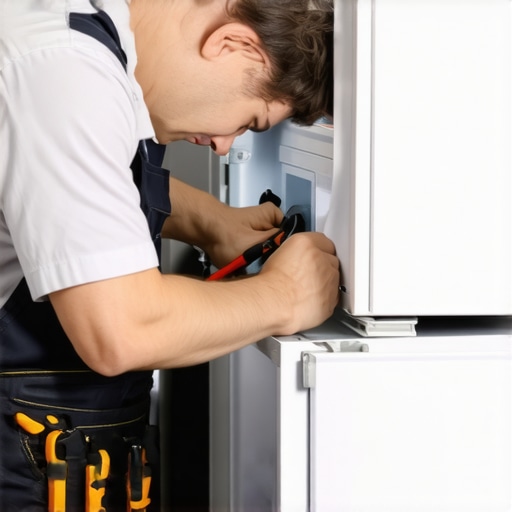
It was a hot summer afternoon when I opened my fridge to grab a cold drink, only to find everything warm and miserable inside. My stomach sank—I’d just realized my trusty refrigerator had betrayed me. Seriously, nothing ruins a day quite like a warm fridge when you’re expecting a cool sip or fresh leftovers. Have you ever faced that panic moment when your appliance suddenly stops doing its job? Well, I’ve been there, and I learned the hard way just how frustrating and confusing it can be. But here’s the good news: you don’t need to wait for a pricey repair service or replace the entire unit.
Today, I’m going to walk you through my experience with an emergency fix that saved my groceries and sanity. No, I won’t just tell you what went wrong; I’ll show you exactly how I diagnosed and fixed my fridge myself. If you’re tired of shivering in front of a warm fridge and want a practical, low-cost solution you can try today, you’re in the right place. After all, household appliances are the backbone of daily life, and understanding even a little DIY know-how can be a game-changer.
Why It’s Crucial to Keep Your Fridge Cold and How to Act Fast
When a refrigerator stops cooling unexpectedly, it’s more than just an inconvenience. Food safety experts warn that bacteria can multiply rapidly in warm environments, risking foodborne illnesses. According to the CDC, unrefrigerated leftovers should be discarded after just two hours in hot weather—the stakes are high, and timing matters. This is where quick, effective troubleshooting becomes your best friend. Instead of panicking or rushing to replace your fridge, I found that a little knowledge and a few handy tools can help you identify and address the problem promptly.
Is it really worth trying to fix your fridge yourself?
Initially, I hesitated. I wondered if I’d end up causing more damage or voiding my warranty. Here’s the thing—I made that mistake early on: I blindly called a repair service without even examining the problem. Turns out, many fridge issues are simple fixes that don’t require a professional—and that can save you a significant amount of money. If you’re curious about what to expect from same-day appliance repairs, you can check out this guide. But more important, I’ll share my step-by-step process to get your fridge back to cool in a pinch, based on personal experience and trusted tips.
Check the Power Before Anything Else
First, ensure your fridge is plugged in properly. I once spent an hour troubleshooting only to realize I’d accidentally unplugged the cord while cleaning. Confirm the outlet has power by plugging in a lamp or using a multimeter. If there’s no power, reset the circuit breaker, or replace the blown fuse. This simple step often fixes the issue without further fuss.
Inspect the Temperature Settings
Set the thermostat to the recommended 37-40°F (3-4°C). Sometimes, accidental bumps or power surges alter settings. I once found my fridge set to ‘Off’ after a storm, causing everything inside to warm. Adjust the controls and wait a few hours to see if cooling resumes. If settings were fine, proceed to examine the compressor and coils.
Locate and Clean the Condenser Coils
Dirty coils hamper heat exchange. Turn off the fridge, then find the coils at the back or beneath the unit. Use a vacuum and a coil brush to remove dust and pet hair. I once cleaned my coils and immediately noticed the fridge cooling better. Regular maintenance prevents overheating and ensures efficient operation.
Test the Evaporator Fan
Open the freezer and listen for the fan noise. If silent, it might be broken. Spin the fan blades gently; if they wobble or are obstructed, clear debris or replace the fan motor. I replaced my fan with a compatible part, restoring proper airflow and cooling. This fix is straightforward but crucial for proper fridge function.
Examine the Start Relay and Compressor
The relay energizes the compressor; a faulty relay can cause warm fridge temperatures. Unplug the fridge, locate the relay on the compressor, and gently shake it. If it rattles, replace it. You can buy a replacement relay online and swap it out by disconnecting the old one. This is a common cause of warm fridges that many DIYers overlook.
Replace the Relay and Test
After installing the new relay, plug in the fridge and listen for the compressor starting up within a few minutes. If it fires up, good job—your fridge should cool again soon. If not, the compressor itself may be faulty, and professional help might be needed. Also, consider if your warranty covers repairs, or explore warranty benefits for faster support.
Verify the Defrost System
Malfunctioning defrost components can lead to frost buildup and poor cooling. Check the defrost timer, heater, and thermostat for continuity with a multimeter. I once replaced a broken defrost heater, which solved my fridge’s warmth issue. This process requires some technical skill but can save you a service call.
Consult Professional Services When Needed
If after these steps your fridge remains warm, it’s time to contact a professional. Look for a reputable, warranty-backed repair service like here and consider scheduling a same-day appointment. When calling, describe the troubleshooting you’ve already done to expedite the diagnosis.
Many assume that appliance warranties automatically cover every repair need, but the reality is more nuanced. A common misconception is that warranties are a catch-all safety net, yet they often have fine print exclusions—like specific parts or types of damage—limiting their true coverage. Some also believe that installation services are included in the warranty, which isn’t always the case; proper installation might require separate scheduling with trusted professionals. Overlooking the importance of correct installation can lead to early appliance failure or voided warranties, so consulting experts like those at professional installers can save you time and money. Additionally, many think that same-day repair services are just for urgent situations, but they often include routine maintenance or minor fixes that prevent bigger issues down the line. Beware of the trap of assuming that all repair services are equal; some providers may offer quick fixes that are temporary or untrained, risking further damage or additional costs. Advanced issues, such as faulty compressor relays or complex electrical faults, require specialized diagnostic skills—don’t fall into the trap of trying to fix these yourself without proper tools or knowledge. Instead, consider consulting experienced technicians by reaching out here. For the sophisticated homeowner, understanding the nuances of warranty coverage and repair options can extend the lifespan of appliances significantly. Remember, a warranty is a contract with specific terms, often requiring proof of regular maintenance or certain installation standards—missteps here can leave you unprotected during critical failures. So, always read the fine print, keep thorough records, and trust qualified professionals for installation and repairs. Want to learn how to maximize your warranty benefits or book timely repairs? Visit this page for comprehensive insights. Have you ever fallen into this trap? Let me know in the comments.Maintaining household appliances over time requires the right tools and a disciplined routine. One of my favorite investments is a high-quality multimeter, which I personally use to troubleshoot electrical components like thermostats and relays. For example, when diagnosing a refrigerator that isn’t cooling properly, checking the compressor’s start relay with a reliable multimeter can save hours of guesswork. Additionally, I rely on a flexible coil brush to clean condenser coils efficiently, preventing buildup that can impede heat exchange and cause premature failure. Regular use of compressed air also keeps vents and fans free from dust, ensuring optimal airflow.
Investing in the right software can streamline maintenance schedules. Using apps like HomeMaintenancePro helps me track routine tasks, warranties, and even schedule professional service appointments. For quick repairs, I keep a digital library of service manuals—many manufacturers provide detailed PDFs online—which allows me to reference specifications during troubleshooting.
Looking ahead, I predict that smart diagnostic tools will become even more accessible to homeowners, enabling remote monitoring of appliance health. Devices that connect to Wi-Fi can alert you to issues before they become serious, reducing downtime and repair costs.
**How do I keep my appliances running smoothly over the long term?** Consistent maintenance, including cleaning coils regularly, checking electrical connections, and updating firmware on smart appliances, is key. Also, scheduling periodic professional inspections can catch problems early, especially for complex systems like HVAC units. For instance, a certified technician might identify refrigerant leaks or faulty sensors that are not obvious to the untrained eye. Many appliance failures are preventable with proactive care.
Finally, always use high-quality replacement parts and tools recommended by manufacturers. When in doubt, consulting trusted professionals via this contact page ensures your repairs are reliable and backed by warranty. For example, when replacing a defrost heater or testing electrical continuity, using certified components ensures compatibility and longevity.
Ready to enhance your appliance maintenance routine? Try calibrating your smart thermostat using manufacturer guidelines—it’s a simple step that can lead to significant energy savings and extend the lifespan of your system. For more detailed procedures, consider reviewing this expert guide to appliance upkeep.
What I Wish I Knew About Warranties and Repairs from the Start
One of the biggest lessons I’ve learned is that not all warranties are created equal. Sometimes, they have fine print that leaves you high and dry when you need them most. Reading the warranty policy thoroughly and keeping detailed repair records has proven to be a game-changer, ensuring I get the coverage I deserve during emergencies. Additionally, I underestimated the value of proper installation; a task that might seem simple can actually make or break your appliance’s lifespan. Working with qualified professionals, especially for complex setups, prevents costly issues down the line.
My Favorite Tools and Resources for Hassle-Free Repairs and Maintenance
The right toolkit can make difficult repairs manageable. I swear by a good multimeter for electrical diagnostics—it’s invaluable for testing components like relays and thermostats. A coil cleaning brush helps maintain condenser efficiency, preventing overheating that leads to breakdowns. When I started documenting my appliance’s manuals digitally, troubleshooting became much faster. For comprehensive guidance, I highly recommend checking out this expert guide. It’s helped me understand complex repairs without unnecessary guesswork. Lastly, smart diagnostics tools are becoming more affordable, offering remote alerts that warn you before small issues escalate into costly repairs.
Why Taking Charge Shaped My Appliance Longevity
Stepping up and learning basic DIY fixes prevented small problems from turning into big disasters. It boosted my confidence knowing I could handle issues like replacing a faulty start relay or cleaning coils—a few simple steps that extended my appliance’s life. Investing in maintenance routines and quick repairs not only saved me money but also kept my household running smoothly. Remember, a proactive approach turns frustrating breakdowns into manageable tasks, empowering you to maintain your appliances rather than waiting for professional help every time. Curious about how to integrate these habits into your routine? Reach out here for personalized advice.