
Ever found yourself in the sweltering heat, thermostat set low, only to feel warm air creeping out of your vents? I’ve been there—frustrated and thinking, “Did I miss something?” That uncomfortable realization hit me like a ton of bricks during a midsummer heatwave, when my AC suddenly started blowing lukewarm air. It was a wake-up call that something was wrong, but I didn’t know exactly what. Turns out, it’s a common sign of a failing evaporator coil, and catching it early can save you from costly repairs and being left in the heat.
Why You Should Not Ignore the First Signs of a Bad Evaporator Coil
The evaporator coil is like the unsung hero of your air conditioning system. It’s responsible for absorbing heat from your indoor air, helping your home stay cool and comfortable. When this coil starts to fail, it doesn’t just stop working overnight—there are warning signs. Over time, neglecting these can lead to reduced airflow, increased energy bills, or even more serious damage to your AC unit. I learned this the hard way when my system began to cycle on and off more frequently and started emitting a musty smell. Had I caught the signs earlier, I could have avoided the big repair bill.
According to HVAC experts, a failing evaporator coil can be caused by corrosion, freezing, or leaks, all of which compromise the coil’s ability to do its job effectively. Recognizing the early signs, like reduced cooling capacity or ice build-up, is key to addressing the problem before it spirals out of control. For trusted guidance, I found this detailed expert guide helpful in understanding common HVAC issues and repairs.
Could this be happening in your home right now?
Have you noticed your AC struggling during the hottest days? Is the air coming out less chilly than usual? Or perhaps you’ve detected a musty or moldy smell near your vents? If so, it might be time to look a little closer at your evaporator coil. Addressing these signs early can prevent more extensive, expensive repairs later on.
Next, I’ll share practical steps to identify if your coil is indeed the culprit and what actions you should take. Because trust me, catching it early is the difference between a quick fix and a major headache. If you’re unsure about the state of your system, professional help can ensure you get reliable, warranty-backed service—because no one wants to sweat through the season struggling with a faulty AC.
Inspect Your Airflow and Cooling Performance
Begin by verifying if your air conditioning system is delivering less airflow or weaker cooling than usual. Turn on your AC and feel the air coming from the vents. If it’s weak or warm, it suggests an issue with the evaporator coil. Once, I noticed my rooms weren’t cooling properly despite the unit running continuously; this was my first sign to investigate further.
Check for Ice Buildup or Frost
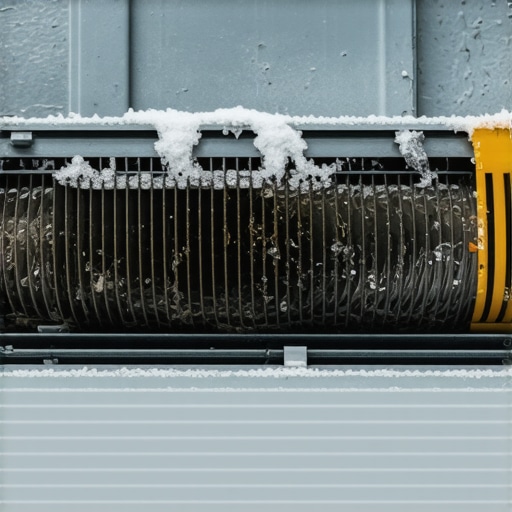
Next, turn off your AC and look at the indoor unit’s vents and coil (if accessible). Ice or frost accumulation indicates the coil is freezing, often caused by refrigerant leaks or airflow problems. Remember, I once discovered ice on the coil after a long day of troubleshooting, which pointed me toward refrigerant issues rather than simple dirt buildup.
Assess for Unusual Odors or Leaks
Smells like mold or mustiness near the vents can signal microbial growth due to moisture buildup from coil leaks. Additionally, refrigerant leaks may produce hissing sounds or oily spots around your HVAC components. I learned that these subtle hints are often overlooked but critical for early detection.
Perform a Visual Inspection
Access the coil — usually located in your furnace or air handler. Carefully look for signs of corrosion, damage, or debris blocking airflow. If you find corrosion or darkened areas, it’s a clear indicator the coil needs professional attention. I recommend wearing gloves and a mask to avoid contact with dust or mold spores during inspection. Trust me, a messy coil can cripple your cooling efficiency.
Test for Refrigerant Pressure and Leaks
This step requires a professional, but recognizing the signs—such as ice formation or hissing sounds—can prompt swift action. When I suspected a refrigerant leak, I contacted an HVAC expert who confirmed the low pressure and repaired the leak, preventing further damage.
Schedule Professional Repair or Replacement
If your inspection reveals damage or leaks, hire certified technicians to diagnose and fix the problem. Reliable service providers can ensure the job is done correctly and backed by warranty, saving you from future expenses. I found that choosing a trusted repair service, like those offering warranty-backed repairs, offers peace of mind and ensures lasting results.
Consider Preventive Maintenance
Once repaired, schedule regular HVAC maintenance—cleaning coils, replacing filters, and checking refrigerant levels—to extend the lifespan of your evaporator coil. I set a semi-annual maintenance routine, which significantly improved system efficiency and reduced unexpected breakdowns. Remember, timely inspections can prevent costly repairs and improve indoor air quality.
For more detailed guidance on reliable appliance care, visit this resource.
When it comes to appliance installation and repair, many homeowners rely on common assumptions that can lead to costly mistakes. One widespread misconception is that choosing the cheapest or most convenient service guarantees quality. In reality, rushing into same-day service or opting for unlicensed technicians often results in subpar work, voided warranties, and even safety hazards. For example, improperly installed appliances can cause leaks, electrical issues, or reduce efficiency, ultimately forcing you to pay more to fix the damage later.
A significant oversight many make is neglecting the importance of verifying whether the technician or repair shop is factory-authorized or adheres to manufacturer standards. According to industry experts, improper installation or repair using generic parts not only voids warranty clauses but can also jeopardize the safety and longevity of your appliances. Always ensure your service provider follows manufacturer guidelines; for instance, professional installation often includes calibration and safety checks that untrained personnel might overlook.
Another common myth is that extended warranties cover all repair costs seamlessly. While warranties are designed to offer peace of mind, most have fine print — exclusions and requirements that can catch homeowners off guard. A study by Consumer Reports highlights that many consumers assume warranties cover accidental damages or misuse, which is not always the case. Therefore, understanding your warranty coverage, including what’s covered and what’s not, can save you surprises during repairs.
Is same-day appliance repair truly worth it? The truth is, not all urgent services are equal. Rushing to get an appliance fixed without proper diagnosis can lead to temporary fixes that cause more significant issues down the line. The key lies in choosing reputable, warranty-backed services that offer quick response times but also thorough, long-lasting solutions. Expert guides, such as those found on this resource, recommend balancing speed with quality.
For advanced homeowners seeking to optimize their repairs, understanding the nuances of installation procedures can be transformative. For example, proper leveling of a refrigerator ensures consistent door seals and prevents vibrations, which many overlook during DIY installs. Similarly, installing appliances with the correct electrical wiring and outlets—not just plugging them into any socket—can prevent electrical fires and damage.
Make sure to avoid the trap of assuming that all repair providers are equally qualified. Always ask for certifications, review previous work, and verify whether they use genuine parts. If in doubt, professional consultation and verification can be done through trusted industry resources like the expert guides.
Have you ever fallen into this trap? Let me know in the comments. Remember, smart choices about appliance installation and repair not only save money but also ensure safety and efficiency—don’t overlook these hidden nuances.
Maintaining your appliances and HVAC systems over time requires the right set of tools and a strategic approach. I personally rely on a few key pieces of equipment that have saved me time and money during repairs and regular maintenance. One indispensable tool is a digital multimeter, such as the Fluke 115, which allows me to quickly verify electrical connections, test continuity, and diagnose faulty components. Its accuracy and durability make it a staple in my toolkit, especially when checking circuit boards or thermostats.
For refrigerant-related issues, I recommend a manifold gauge set with a built-in leak detector. This enables precise measurement of pressure levels in the system, helping identify leaks or refrigerant depletion early. I also keep a set of high-quality insulated screwdrivers and torque wrenches handy. Proper torque application during repairs prevents over-tightening or stripping delicate components, ensuring long-term reliability.
Another essential item is an infrared temperature gun. With this, I can quickly identify uneven cooling, frozen coils, or hot spots on electrical panels without invasive procedures. It provides immediate insights, allowing me to target specific issues like refrigerant leaks or faulty sensors. For more advanced diagnostics, I use a laptop with specialized HVAC diagnostic software, which I connect via USB or Bluetooth to read error codes and monitor system parameters in real time.
To keep track of maintenance schedules and repairs, I utilize a digital task management app that helps me stay organized and document all service history. This is crucial for warranty claims or when planning long-term upgrades. The software can send reminders for filter replacements or semi-annual inspections, ensuring nothing slips through the cracks.
Predicting future trends, I believe integration of smart diagnostic tools with IoT sensors will revolutionize appliance maintenance. Imagine systems that notify you proactively when a component starts to degrade, long before it fails. This proactive approach can dramatically extend appliance lifespan and efficiency.
How do I maintain appliance functionality over time?
Regular preventive maintenance is key. I schedule semi-annual inspections, including coil cleaning, filter replacements, and refrigerant checks, guided by the manufacturer’s recommendations. Using tools like a multimeter and infrared camera helps me catch issues early, avoiding costly repairs. I also stay updated with industry best practices by consulting expert guides, such as this comprehensive repair guide. Incorporating smart diagnostics into your routine can further enhance longevity. For example, installing IoT-enabled sensors in critical systems can send alerts directly to your smartphone about potential problems, enabling proactive fixes before minor issues turn into major breakdowns.
For complex repairs or long-term concerns, professional assistance backed by warranty offers peace of mind. Always verify that your service provider uses genuine parts and follows manufacturer standards to ensure lasting performance. Exploring reliable service options, such as those highlighted in warranty-backed repairs, guarantees quality and support for years to come.
What I Wish I Knew Before Diving Into Repairs
One of my most eye-opening lessons was realizing that not all repair advice applies universally. For example, I once tried a quick fix based on online tips, only to find I was complicating the problem further. Trusting professionals early on, especially when dealing with refrigerant leaks or electrical issues, saved me both time and money.
Another insight was the importance of verifying whether my technician was factory-authorized. This small step before scheduling repairs ensured genuine parts and proper calibration, which dramatically extended the lifespan of my appliances. Skipping this step can turn a simple job into recurring problems down the line.
I also learned that rapid same-day service isn’t always the best solution. While immediate help can be comforting, ensuring the technician thoroughly diagnoses the issue and adheres to warranty standards prevents future breakdowns. Rushing often leads to temporary fixes that hide underlying problems.
My Go-To Resources for Appliance Success
Over the years, I’ve curated a set of tools and information sources that genuinely make a difference. For comprehensive guidance, I highly trust the expert repair guide. It covers everything from diagnosing problems to choosing the right service providers. My digital multimeter, like the Fluke 115, has been invaluable for electrical diagnostics—trust me, knowing how to test circuits can save big repairs.
For refrigerant issues, I rely on a professional-grade manifold gauge set with leak detection capabilities. This helps me monitor system pressure accurately before calling in help. Additionally, an infrared temperature gun lets me spot uneven cooling or electrical hotspots, preventing minor issues from becoming major failures.
Lastly, I keep a detailed service log using a handy app. Staying organized with maintenance dates and repair history not only prolongs appliance life but also strengthens warranty claims. Exploring industry-approved technicians from trusted parts dealers ensures I get warranty-backed service, providing peace of mind that my investment is protected.
Empowering Your Next Move in Appliance Maintenance
Your appliance and HVAC systems are vital to daily comfort—approach their care with confidence. Regular inspections, smart diagnostics, and working with reputable technicians transform maintenance from a dreaded chore into an empowering routine. Don’t wait for a sudden breakdown; proactive care ensures longevity and efficiency. Remember, each step you take today builds resilience for tomorrow’s challenges. Have you ever tried a DIY repair that turned out better than expected? Share your experience below and let’s learn together.