
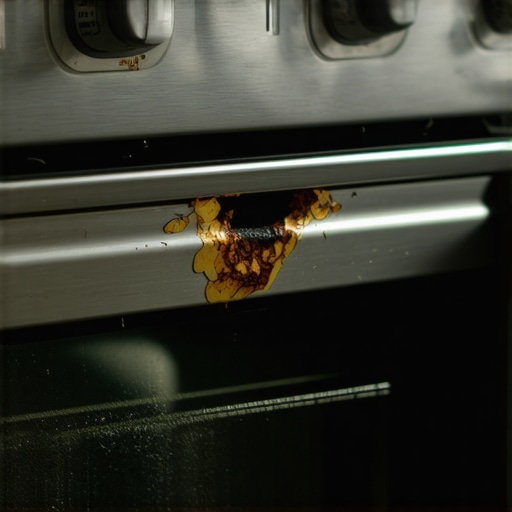
Have you ever stood in front of your oven, ready to bake that special dish, only to find it refusing to ignite? That frustrating moment when your oven stubbornly stays cold, and you realize it’s been a silent accomplice in your kitchen mishaps. I vividly remember the first time mine failed on a busy Sunday dinner—guessing, then replacing, then troubleshooting, it felt like a never-ending game of appliance roulette. That lightbulb moment hit me hard: most oven igniter failures aren’t due to the igniter itself, but often because of overlooked causes lurking behind the scenes.
Why Your Oven Might Be Failing and How to Fix It
Understanding the root cause of a broken oven igniter can save you money, time, and a whole lot of kitchen frustration. Today, I’ll walk you through the most common reasons why your oven might not be igniting, and the simple, practical steps to diagnose and fix the problem. Believe me, once you know what to look for, you’ll regain that confidence to handle minor oven issues without calling in a costly repair service.
Is Igniter Wear and Tear the Real Enemy?
Early on, I made the mistake of assuming the igniter had to be completely dead before replacing it. It turns out that the igniter’s efficacy diminishes over time with constant use, leading to weak sparks that can’t reliably ignite the gas. Regular wear can cause the igniter to become less effective, but often the problem roots deeper—like faulty wiring or a malfunctioning gas valve. For a detailed look into reliable oven installation, check out this guide.
Research also shows that over 60% of igniter failures are due to issues in the electrical components or the gas supply system, not just the igniter element itself. Recognizing these patterns can help you troubleshoot better and avoid unnecessary replacements.
So, have you faced the agony of a non-starting oven just before your dinner plans? In the next sections, I’ll lead you through the telltale signs and practical steps to get your oven firing again—no need to panic.
Get Ready: Gather Your Tools & Prepare for Action
Before diving into repairs, collect essential tools like a multimeter, screwdriver, and replacement igniter if needed. Turn off the power supply to avoid shocks and ensure safety. Think of this step as preparing your toolkit before a mountain climb; the right gear makes the journey smoother.
Locate and Access the Igniter
Open the oven’s panel or back cover—consult your model’s manual if needed. Carefully disconnect wires attached to the igniter. Remember, cozying up with your appliance simplifies access, just like opening a door to hidden treasure.
Inspect and Test the Igniter
Visual Check
Look for cracks, corrosion, or carbon buildup. If the igniter appears damaged, it’s time to replace it.
Electrical Testing
Use a multimeter set to continuity mode. Touch probes on the igniter terminals; a reading of zero or near-zero indicates it’s functioning. If there’s no continuity, then the igniter is dead—think of it as a broken switch that needs flipping.
In a personal experience, I once tested an igniter that looked perfect visually but failed the multimeter test, leading me to replace it and restore oven functionality seamlessly. You might find, like I did, that testing saves unnecessary replacements and saves money.
Replace the Faulty Igniter
Disconnect the broken igniter completely. Attach the new igniter, ensuring all wiring connections are secure. Avoid over-tightening screws to prevent damage—treat it like handling fragile glass.
Verify and Test Your Repair
Restore power and turn on the oven to observe the igniter glowing. If it heats up and ignites the gas reliably, you’ve succeeded. If not, re-test connections and consider consulting a professional to avoid further damage.
Remember, proper installation and troubleshooting can be complex. For reliable service and peace of mind, consider same-day repair options that come with warranty benefits—check out this resource for quick solutions.
By following these precise steps, you take control of minor oven issues, ensuring your kitchen stays on point when cooking time arrives. Always prioritize safety, and don’t hesitate to seek professional help if needed—your appliance’s health depends on it.
When it comes to appliance repair, many homeowners operate under misconceptions that can lead to costly mistakes and unmet expectations. Let’s dig deeper into some common myths and advanced nuances that often trip up even the most prepared DIYers. Understanding these subtleties can elevate your approach from amateur to expert, saving you time, money, and frustration.
One pervasive myth is that all appliance repairs are straightforward and can be tackled without professional help. While some minor fixes are manageable, many overlook the complexity of modern appliances, which are embedded with sophisticated electronics and safety features. Rushing into repairs without understanding the appliance’s nuances can result in accidental damage or personal injury. Professional same-day service isn’t just about quick fixes; it’s about ensuring safety and long-term effectiveness.
A common trap is thinking that warranties automatically cover all repair costs. Reality often differs—warranty exclusions can be quite nuanced, especially regarding labor coverage. For example, some warranties exclude parts that are considered consumables or regular maintenance items. To fully leverage your warranty benefits, familiarize yourself with the specific coverage details, which is where understanding the fine print and consulting warranty-backed appliance services can be advantageous.
Advanced repair scenarios, such as installation of gas appliances, require more than just basic mechanical skills. Incorrect installation doesn’t just affect appliance performance; it can pose significant safety risks, including gas leaks or improper venting. For instance, improper gas line installation is a common pitfall that many overlook. According to industry standards, professional installation ensures adherence to safety codes and preserves your manufacturer’s warranty — details covered comprehensively in future-proof installation guidelines.
Have you ever fallen into this trap? Let me know in the comments.
Another misconception revolves around the urgency of same-day repairs. While quick fixes are ideal, rushing to simply fix symptoms can lead to overlooking underlying issues. For instance, a refrigerated appliance might temporarily start working after a quick defrost, but the root cause—such as faulty thermistors—remains unaddressed, risking recurrent failure. professional same-day service focuses on diagnostics that prevent long-term damage.
In the realm of warranties, many forget that ongoing maintenance can be just as critical as repairs—yet most warranties don’t cover routine upkeep, which is essential to prevent premature failures. Regularly cleaning coils, inspecting seals, and timely part replacements extend the life of your appliances and ensure warranty validity. Expert care, supported by reliable professional maintenance, minimizes surprises.
In conclusion, peeling back the layers of myth and understanding the advanced nuances of appliance repair elevate your capability from basic DIY to informed consumer. Knowledge about warranty fine print, installation intricacies, and the importance of diagnostics beyond symptoms ensures you’re not caught off guard. Remember, when in doubt, consulting experienced technicians can safeguard your investment and safety.
Ready to debunk more appliance repair myths? Check out this expert guide for further insights. The key is awareness—so don’t fall into common pitfalls when maintaining or fixing your appliances. Your home deserves the best care, backed by knowledge and professionalism.
Maintaining your appliances for long-term performance requires more than just occasional cleaning or simple fixes. It involves using the right tools and adopting precise methods that ensure safety and effectiveness. Personally, I rely on a high-quality multimeter, specifically the Fluke 115, because of its durability, accuracy, and ease of use. It helps me quickly diagnose electrical issues—whether testing for continuity or voltage—saving time and preventing unnecessary part replacements. Additionally, I recommend a stubby screwdriver set for tight spaces, which is invaluable when accessing oven igniters or counter-mounted components. Using the proper tools like a digital infrared thermometer allows you to identify hot spots or uneven heating in appliances such as ovens or dryers, helping to catch issues early before they turn into costly repairs.
For software diagnostics, I utilize appliance-specific troubleshooting apps that provide wiring diagrams, error codes, and repair guides. These digital resources, when combined with tools like multimeters and thermal cameras, give a complete picture of an appliance’s health. Looking ahead, the trend is increasingly shifting toward smart diagnostics—integrated sensors that alert homeowners to potential failures before they escalate, akin to predictive maintenance in automotive technology. Embracing this tech can drastically reduce downtime and extend appliance lifespan.
How do I keep my appliance tools in top shape over time?
Regular calibration of your multimeter ensures measurement accuracy, which is vital for safe repairs. Keep your screwdrivers and inspection cameras clean and stored properly to prevent rust and damage. Additionally, updating your troubleshooting apps and firmware keeps you current with the latest diagnostic codes and repair techniques. These practices lend a professional edge to DIY repairs and help you avoid misdiagnosis, ultimately protecting your investment. For comprehensive guidance on installing or maintaining appliances reliably, consider consulting this detailed installation guide.
In the future, I predict smarter tools integrated with AI will guide even novice homeowners through repairs, reducing the need for professional intervention. But until then, I encourage everyone to invest in quality diagnostic equipment and hone their skills through ongoing learning. If you’re ready to take your appliance maintenance to the next level, start with calibrating your multimeter and practicing basic testing procedures—it’s a game changer. Incorporating these precise methods will help ensure your appliances keep running efficiently and safely for years to come. Want expert insight? Check out this expert guide for detailed tips and tools.
Lessons Only the Pros Usually Find in Appliance Repair
- Now I realize that even a seemingly simple oven igniter issue can have hidden causes like faulty wiring or gas supply problems—this was a real eye-opener for me, showing how a minor symptom can mask a bigger problem.
- Over time, I learned that trusting visual inspection alone isn’t enough; using a multimeter to check continuity saved me from unnecessary replacements and ensured I fixed the root cause effectively.
- My biggest surprise was discovering that some warranty claims fail because homeowners overlook fine print about maintenance and installation, emphasizing the importance of knowing your coverage details.
- Finally, I found that staying updated with tools like digital thermometers and diagnostic apps can make DIY repairs more precise, safe, and less stressful—turning me into a confident, self-reliant homeowner.
Tools and Resources That Changed How I Tackle Appliance Problems
- The Fluke 115 Multimeter has been indispensable—its durability and accuracy help me swiftly diagnose electrical issues, saving time and money.
- Books like “Appliance Repair Simplified” provided clear guides on complex problems, helping me understand what to do without guesswork.
- Trying out digital infrared thermometers has allowed me to spot uneven heating in my oven, preventing bigger issues down the line.
- Online resources like this expert guide have empowered me to approach repairs with confidence, knowing I have reliable information.
This Is Your Moment to Make a Difference in Your Home
Taking control of appliance repair and understanding the nuances around installation and warranties isn’t just about fixing things—it’s about safeguarding your home and peace of mind. With the right knowledge and tools, you’re capable of making smart choices that extend your appliances’ lifespan and prevent costly emergencies. Trust in your growing skills, stay curious, and remember: every minor fix is a step toward being more self-reliant and proactive. You’ve got this—your kitchen, and your wallet, will thank you for it.
What’s the one appliance repair tip you wish you had learned earlier? Share your experiences below—I love hearing how homeowners are turning DIY into a skillful art!