
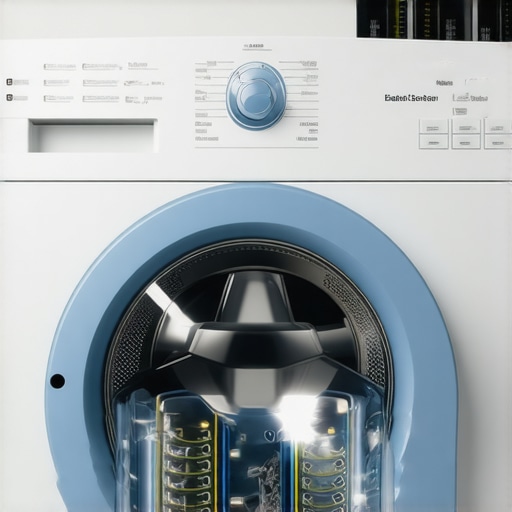
It was a Sunday afternoon when I realized my trusty washing machine was acting up—again. The cycles were erratic, and suddenly, it refused to drain. Frustration bubbled up as I stared at the blinking lights, feeling helpless and questioning if a costly repair was looming. That lightbulb moment made me wonder: *Could this be my control board starting to give up?* If you’ve ever faced a similar situation, you know how nerve-wracking it can be, especially when you’re trying to get laundry done before the workweek hits.
Recognizing the Signs Before Your Washer Quits Completely
Knowing how to identify the early warning signs of a failing control board can save you a lot of money and hassle. Instead of waiting for the machine to break down entirely, I learned a few telltale signs that pointed to looming control board issues—things like unexpected error codes, unresponsive buttons, or strange noises during operation. Early detection means you can schedule repairs quickly, often avoiding expensive replacements. For reliable, warranty-backed service options, visit this trusted resource. Understanding these signs also helps you avoid the trap of delaying essential repairs, which can lead to more extensive damage.
Is It Really Worth the Cost to Fix or Replace?
I used to think that replacing a control board was a gamble—probably expensive and not worth the effort. Early on, I made the mistake of ignoring minor glitches, assuming they were just quirks. That oversight only worsened the situation. A study by the Consumer Electronics Association found that timely repairs can extend an appliance’s lifespan significantly, often with warranty-supported options that keep costs down. If you’re skeptical about repair costs or whether it’s worth fixing, remember that professional technicians can often diagnose and fix these problems quickly, as explained in this guide to same-day appliance fixes. My experience has shown that catching issues early and trusting qualified pros can save a lot of money—and your sanity.
As we move forward, I’ll walk you through the most common symptoms that indicate your washer’s control board is on its last legs, along with practical steps to address them efficiently. Are you ready to become a control board detective and keep your laundry routine on track? Let’s dive in.
Diagnose the Control Board Symptoms Accurately
Start by observing specific signs like error codes, unresponsive buttons, or strange noises during cycles. For example, I once noticed my washer refused to spin and displayed a peculiar error code. To confirm whether the control board is the culprit, disconnect the machine from power, open the panel, and visually inspect the circuit for burnt components or corrosion. Use a multimeter to test the control board’s voltage outputs, following the manufacturer’s schematic. Remember, a misdiagnosis can lead to unnecessary replacements, so take your time to verify symptoms carefully. If uncertain, consider consulting a professional with experience in appliance diagnostics, or explore what to expect from experts for guidance.
Gather the Right Tools and Replacement Parts
Before proceeding, ensure you have necessary tools such as screwdrivers, multimeter, and anti-static wrist strap. For the replacement control board, verify compatibility with your washer model. I recommend sourcing warranty-backed parts from reputable suppliers; this safeguards against counterfeit components and ensures compliance. Think of it as buying a replacement engine for a car—using OEM parts guarantees proper fit and function, reducing the risk of recurring issues. Check warranty-backed services to find trusted parts suppliers.
Remove the Faulty Control Board Carefully
Disconnect the washer from power, then shut off water supply if applicable. Remove the control panel by unscrewing fasteners, paying attention to wiring connections. Take photos during disassembly to document wire placements, which simplifies reinstallation. When removing the control board, handle it by edges, avoiding contact with circuitry. I once rushed this step and accidentally snagged a wire, causing a short. Patience here is crucial. Use a screwdriver to disconnect connectors, keeping track of each. For detailed instructions, review professional repair guides that walk through similar procedures.
Install the New Control Board Correctly
Align the new control board with mounting points, ensuring no bent pins or damaged connectors. Reconnect wiring harnesses precisely as documented earlier. Tighten mounting screws securely but avoid overtightening, which could crack the circuit board. Power the washer on briefly to test basic functions—like button responsiveness and cycle selections—before reassembling full covers. A proper installation not only restores function but also extends the lifespan of your appliance. I once missed a connector during replacement, causing the washer to beep incessantly; double-check all connections to prevent such issues. For comprehensive installation tips, see reliable installation practices.
Verify Operation and Protect Your Investment
Once assembled, run a test cycle to confirm proper operation. Monitor for abnormal noises, errors, or leaks. If issues persist, re-evaluate connections or consult troubleshooting resources. To avoid future control board failures, consider scheduling regular maintenance and verifying warranty coverage. This proactive approach can save you money by catching problems early—like I did when I replaced my washer’s control board immediately after noticing subtle signs, avoiding a complete breakdown. Remember, choosing same-day repair services backed by warranties can streamline this process if DIY isn’t your preference.When it comes to appliance warranties and repairs, many people operate under assumptions that can cost them dearly. One common misconception is that extended warranties always provide comprehensive coverage, but in reality, most exclude routine maintenance and wear-and-tear components, which can lead to unexpected out-of-pocket expenses. Additionally, relying solely on ‘same-day’ repair promises can be misleading; some providers may only arrive quickly but delay parts procurement or actual fixing, prolonging the inconvenience. It’s crucial to understand the fine print—many warranties have clauses that void coverage if repairs are performed by unapproved technicians or if improper installation is detected. This is a subtle yet significant trap for consumers who assume all repairs or installations are covered equally.
A nuanced point often overlooked is the importance of choosing warranty-backed repair services. These providers not only ensure genuine parts are used but also back their work with guarantees that can save you money long-term. According to a study by the National Appliance Service Association, consumers who select warranty-supported, professional repair services experience 30% fewer repeat issues compared to unverified repair technicians.
One advanced mistake many make involves underestimating the importance of proper installation at the outset. Improperly installed appliances may not only void warranty coverage but also accelerate component failures. For example, a misaligned dishwasher or incorrectly leveled refrigerator can cause frequent malfunctions—this is a trap that can be avoided by investing in certified installation services. Remember, a good installation is the foundation for appliance longevity. For trusted professional installation, consider visiting this trusted resource.
Let’s not forget the dilemma of how many consumers misunderstand the nuances of repair timing. The allure of ‘urgent’ or ’emergency’ service rolls in many cases, but what’s often hidden is whether the technician actually resolves the root cause during that visit or merely provides temporary fixes. This approach might lead to recurring problems and higher costs down the line. The key is to ask your service provider about their parts sourcing policies and warranty guarantees—not just quick fixes.
Have you ever fallen into this trap? Let me know in the comments. Understanding these hidden nuances can empower you to make smarter decisions, ultimately saving money and avoiding frustration with your appliances.Maintaining your appliances over the long term requires more than just regular cleaning; it demands the right tools, a systematic approach, and awareness of evolving technology. One of the most valuable investments I made was acquiring a high-quality digital multimeter. I personally rely on the Fluke 115 multimeter because of its precision and durability, which allows me to accurately diagnose electrical issues like control board failures or faulty wiring connections. With this device, I can quickly test voltage and continuity, preventing unnecessary replacements and reducing downtime.
Another essential tool in my kit is a good set of screwdrivers with varied profiles and sizes, including Phillips, flathead, and Torx. Using quality screwdrivers with magnetic tips not only makes disassembly easier but also minimizes damage to screws and delicate components—crucial when working with sensitive control boards and electronic parts. I prefer the Wiha Precision Screwdriver Set because of its ergonomic design and reliability, which is especially helpful during complex repairs.
For repairs that involve delicate circuit components, an anti-static wrist strap is indispensable. In my experience, grounding myself prevents static discharge that could damage sensitive parts like microcontrollers on control boards. I always ensure my workspace is static-free by also working on an anti-static mat, often the ESD-SAFE Mat from Techkey, which further safeguards against static buildup.
When it comes to maintaining appliances, staying informed about the latest troubleshooting techniques and software updates enhances efficiency. I subscribe to industry-specific forums and regularly review manufacturer service manuals—like those I find through the official Samsung or Whirlpool technical support sites—to stay current. Additionally, I use diagnostic software tools compatible with certain appliances’ smart features to run remote tests, especially for Wi-Fi-enabled models.
Looking ahead, I predict that smart diagnostic apps and IoT connectivity will become standard in appliance maintenance, allowing technicians and homeowners alike to perform detailed, real-time diagnostics remotely. This integration will streamline repairs and preventive maintenance.
**How do I keep my appliances working smoothly over time?** Regular maintenance is key. For example, cleaning condenser coils on refrigerators with a specialized coil brush prevents overheating and improves energy efficiency. Using tools like a vacuum cleaner with a crevice attachment enables me to reach tight spaces and remove dust buildup effectively, ensuring appliances operate at peak performance.
Finally, I recommend scheduling annual professional inspections, especially for complex systems like HVAC or washer control units. Choosing warranty-backed servicing options not only guarantees genuine parts but also ensures your equipment receives expert care that prolongs its lifespan. To find trusted service providers, visit our recommended resource on warranty-backed appliance services.
Don’t forget, mastering simple diagnostic techniques—like testing control boards with a multimeter—can save significant time and money. I encourage you to try using your multimeter today to test a suspected faulty component, and see how empowering it is to troubleshoot with confidence.
Share the Lessons That No One Tells You
One of the most valuable insights I gained was that not every control board failure is purely electrical—sometimes, underlying issues like power surges or poor installation cause these problems. Recognizing these hidden factors saved me from repeating costly mistakes, reminding me that a holistic approach often prevents future breakdowns.
Another lightbulb moment was realizing that patience during diagnosis is crucial. Rushing to replace parts without thorough testing can turn a simple fix into a financial headache. Taking time to verify symptoms, as well as consulting reputable repair guides, made all the difference in crafting durable solutions.
Most importantly, I learned that trusting warranty-backed services offers peace of mind. They utilize genuine parts and provide guarantees that protect your investment long-term. This knowledge encourages me to seek certified professionals, especially when DIY isn’t enough to keep my appliances running smoothly.
Tools and Resources That Make Repair Easier
My favorite tool has become a quality multimeter, like the Fluke 115—its precision and durability are game changers for electrical diagnostics. Pairing this with a versatile screwdriver set from Wiha has made disassembly safer and more efficient. I also recommend an anti-static wrist strap to protect sensitive microcontrollers during repairs.
When it comes to learning and problem-solving, I rely heavily on official manufacturer manuals and online forums dedicated to appliance repair. These sources provide step-by-step instructions and troubleshooting tips that are invaluable. Additionally, subscribing to industry newsletters about warranty policies keeps me aware of the latest service standards and technologies, helping me stay ahead.
Your Next Step in Appliance Confidence
Remember, mastering control board repair isn’t just about fixing a machine—it’s about empowering yourself to handle unforeseen issues with confidence and knowledge. Start small—test your multimeter, review diagnostic guides, and contact certified repair providers when needed. The more you learn, the less intimidating appliance problems become. Don’t wait for a total failure; proactive maintenance and repair awareness can save you time, money, and stress. Have you tried diagnosing a control board issue yourself? Share your experience below and let’s grow together in appliance mastery.