
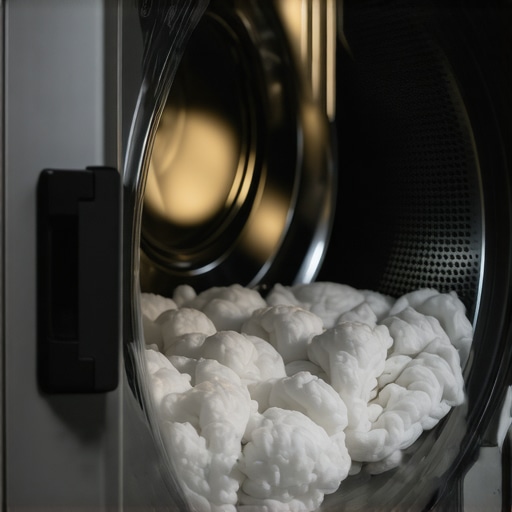
I stood there at 10 PM. Damp jeans in hand. I was ready to quit. My favorite pair of denim felt like it had been caught in a light drizzle, even though the dryer had just finished a full hour-long cycle. I’d already cleaned the lint trap three times, yet the machine kept shutting off early, leaving me frustrated and confused about why a perfectly good appliance would suddenly fail me. I was about five minutes away from searching for same-day appliance repair just to get through the work week. It felt like a total betrayal. I’ve spent years tinkering with home gear, but this specific failure almost had me beat until I realized I was looking in all the wrong places.
The Invisible Film Ruining Your Laundry Day
Early on in my homeownership journey, I made the classic rookie mistake of thinking the lint screen was the only maintenance point that mattered. I’d scrub that mesh until it shone, convinced I was a maintenance pro. I even started spiraling into worries about why your dryer drum is overheating because the machine felt hot to the touch, yet the clothes stayed stubbornly wet. Here is the truth I finally learned after a very expensive service call: your dryer isn’t a mind reader. It relies on two tiny, unassuming metal bars called moisture sensors. Over time, those dryer sheets and fancy fabric softeners you love coat these bars in a waxy, invisible film. The sensors essentially go blind; they think the air is dry because they can no longer “feel” the moisture in your tumbling clothes. The result? The brain of the machine thinks the job is done and kills the heat way too soon.
Does a Simple Wipe Down Actually Beat a Full Repair?
You might be skeptical that a thirty-second fix could solve a problem that feels like a mechanical catastrophe. I certainly was. But according to the U.S. Department of Energy, clothes dryers are among the most energy-intensive appliances in the typical American home. When they run inefficiently—or worse, when you have to run them three times for a single load—you are literally burning through your monthly budget. I quickly realized that cleaning the screen is not enough to keep a modern, high-efficiency machine running at its peak. Have you ever pulled out a load of towels only to find the center of the pile is still cold and damp? It is a massive waste of time. Before you start questioning why your new dryer needs a rigid metal vent or looking for a replacement, you need to address the sensor film. Today, I’m going to show you exactly how to locate these sensors and the specific household item that cleans them perfectly so you can get back to dry clothes on the first try.I remember kneeling on my laundry room floor, flashlight in my mouth, looking like I was performing surgery on a space station. I was determined to find the sensor that stops your dryer from heating up after five minutes. If you open your dryer door and look just inside the rim—usually right next to the lint filter housing—you’ll see two thin, silver-colored metal bars. They look like staples for a giant. Those are your moisture sensors. They work by completing an electrical circuit through the damp fabric of your clothes. If they’re coated in a layer of dryer sheet wax, they can’t detect the water, and the machine assumes everything is bone-dry. 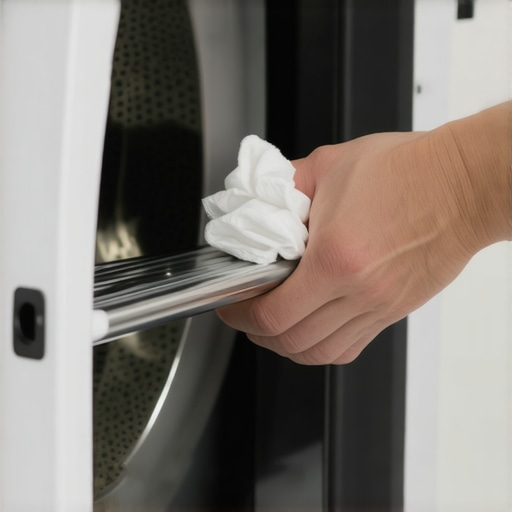
Look Inside the Drum for These Two Bars
Locating these sensors is the first step toward reclaiming your Saturday afternoon. Most modern machines from the last decade have them positioned right where the air exits the drum. I remember the first time I tried to fix this. I went in with a heavy-duty steel wool pad because I thought clean meant shiny and scratched. I ended up ruining the surface of the sensors, and they started catching every stray thread of lint, which made the problem even worse. It was a messy, loud mistake that almost cost me a new drum. Instead, you should be gentle. Treat them like delicate electronics, not a greasy engine part.
Dissolve the Fabric Softener Film
Don’t reach for the heavy-duty degreasers. Instead, grab a bottle of common rubbing alcohol or white vinegar. Dampen a soft cloth—not soaking wet—and give those two bars a firm wipe. You probably won’t see much on the rag, but you’re removing a microscopic layer of paraffin wax. It’s the same logic behind the refrigerator coil trick; a little bit of surface cleaning goes a long way toward efficiency. If you’ve been using a lot of fabric softener, you might need to repeat this twice. Once the metal looks dull and clean rather than shiny and greasy, you’re back in business.
Upgrade to a Rigid Vent for Better Airflow
While you’re in there, you have to look at the exhaust side of the equation. A sensor can only do so much if the hot air has nowhere to go. I’ve seen people use those flimsy foil slinky vents that crush at the slightest touch. This is exactly why your new dryer needs a rigid metal vent. A hard pipe prevents clogs and keeps the internal temperature from spiking, which prevents the machine from shutting off for safety reasons. Think of it like a straw; if the straw is crimped, you can’t breathe.
Keep Your Receipts to Win the Warranty Game
Sometimes, the problem isn’t a dirty sensor; it’s a failing control board. If you’ve cleaned the strips and checked the vent but the timer is still jumping around like crazy, you might be looking at scheduling your appliance repair for same-day service. This is where having your paperwork ready is a lifesaver. Before you pay out of pocket, check if you’re covered by an active policy. Knowing how to maximize your appliance warranty during emergency repairs can save you hundreds on a sensor replacement or a board swap. I always keep the maintenance receipt you must save for future claims in a magnetic folder on the side of the machine. It proves you haven’t neglected the unit if the manufacturer tries to dodge the bill. Understanding the warranty loophole that could save you hundreds on parts is just as important as knowing how to use a screwdriver when the big components finally fail.Most people believe that if they can’t fix a dryer with a simple lint cleaning, they are at the mercy of a two-week wait for a factory technician. I used to think the same until I realized that speed and expertise aren’t mutually exclusive. There is a common myth that you must wait for a brand-specific representative to keep your protection plan intact, but in reality, scheduling your appliance repair for same-day service with a qualified local pro can often be more effective and perfectly legal under consumer protection laws. In fact, many high-end brands outsource their overflow to the same local experts you see on Google. The nuance here is that ‘speed’ doesn’t mean ‘sloppy.’ A true expert doesn’t just swap parts; they look for the systemic failures, like the sensor film I mentioned earlier, which a rushed technician might overlook in favor of a billable control board replacement.
Don’t Fall for the Factory-Only Myth
The biggest trap I see homeowners fall into is the fear of ‘voiding the warranty.’ Everyone tells you that if you touch the machine, the manufacturer will walk away. While you shouldn’t be rewiring the motor yourself, simple maintenance like cleaning those sensors or clearing a vent is actually required by most contracts. If you neglect these, you are providing the company with the reason your warranty claim was denied. They will call it ‘consumer neglect.’ According to the Federal Trade Commission (FTC) and the Magnuson-Moss Warranty Act, manufacturers cannot void a warranty just because a third-party performed a repair or because you used a non-branded part, unless they can prove that specific part or service caused the damage. This is a massive win for the ‘Right to Repair’ movement. 
Can a third-party repair actually void my manufacturer warranty?
The short answer is no, provided the technician is qualified and doesn’t cause secondary damage. However, you must be smart about the ‘Oops’ factor: the lack of documentation. This is where most people lose the battle. If a local pro fixes a squeak, but two months later the drum cracks, the manufacturer might try to blame the local guy. This is why the maintenance receipt you must save for future claims is your most powerful weapon. It proves that the work was professional and unrelated to the new failure. Have you ever had a claim denied for a silly reason? Let me know in the comments below; I’d love to hear your experiences.
The Paperwork Trap That Costs You Hundreds
When you are maximizing your appliance warranty during emergency repairs, you have to read the fine print that voids your protection plan. Most people don’t realize that some warranties require you to ‘register’ the service within 30 days of it happening. If you don’t, that service record doesn’t exist in their system, and they can claim the machine wasn’t properly maintained. It is a cynical loophole, but knowing the warranty loophole that could save you hundreds on parts means you stay one step ahead. Always ask your repair person for a detailed, itemized invoice that notes the ’cause of failure’ was not consumer misuse. That one sentence is worth its weight in gold when you’re fighting for a free replacement part later on.
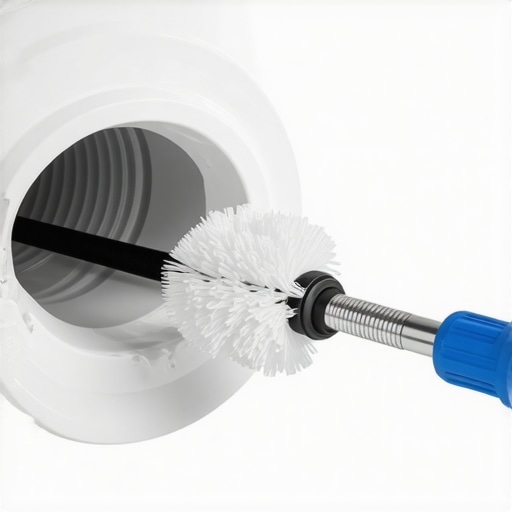
While keeping your paperwork in a magnetic folder is a genius move for administrative survival, it won’t stop your machine from physically failing when the lint starts to pile up. I’ve learned that the right tools are what actually separate a DIY enthusiast from someone who is constantly scheduling your appliance repair for same-day service. For me, the game-changer was a $20 flexible dryer vent brush kit that attaches to a cordless drill. I used to use a shop-vac, but suction alone can’t break loose the wet, packed-in lint that hides in the corners of your exhaust system. According to the National Fire Protection Association (NFPA), nearly one-third of dryer fires are caused by a failure to clean the equipment, making this more than just an efficiency issue; it’s a safety imperative.
The Drill Brush That Saves Your Heating Element
I specifically recommend a synthetic bristled brush with a long, multi-section flexible rod. Why? Because most dryer vents have at least two 90-degree turns before they exit the house. A standard vacuum hose just hits those corners and stops. When you use the drill-powered brush, it agitates the lint, turning it into a fine powder that you can then blow out with a leaf blower or the dryer’s own fan. This prevents backpressure, which is the leading cause of why your dryer drum is overheating and shutting off. If the air can’t escape, the heat stays trapped, and eventually, your thermal fuse will pop. Trust me, replacing a fuse is a lot more annoying than a ten-minute vent cleaning.
How do I keep my dryer running like new for a decade?
The secret to long-term reliability isn’t just cleaning; it’s the quality of the initial setup. I see so many people buy a high-end machine and then use a cheap, semi-rigid foil connector. This is exactly why your dryer vent needs a hard pipe upgrade. Smooth metal walls allow for maximum airflow and give the lint fewer places to snag. If you are moving into a new place, don’t skimp here. Seek out fast trustworthy appliance installation near you to ensure the transition from the machine to the wall is airtight and kink-free. Proper installation is the foundation of warranty-backed appliance services you can rely on, as it eliminates most of the ‘environmental’ factors that cause premature wear.
The Move Toward Self-Diagnosing Smart Sensors
Looking ahead, I predict we are going to see a shift where moisture sensors aren’t just passive metal bars but active optical sensors that can actually see the fabric’s texture. We are already seeing the start of this with firmware updates that keep your smart washer from crashing. In the next few years, your dryer will likely send an alert to your phone saying, ‘Hey, my sensor bars have a film on them, please wipe them with alcohol.’ Until then, you have to be the brain of the operation. If you start noticing even a slight increase in dry times, don’t wait for a total breakdown. Check your sensors and check your vent. If the DIY path feels overwhelming, don’t hesitate to look for same-day appliance repair quick solutions with warranty support. My challenge to you this weekend: find those two silver bars inside your drum and give them a quick wipe with a bit of rubbing alcohol. You might be surprised at how much ‘imaginary’ repair work you can avoid with just a cotton ball and a little bit of effort.
The Most Expensive Lesson My Laundry Room Taught Me
If there is one thing I have learned after years of troubleshooting, it is that appliances don’t usually break all at once; they fade. Most homeowners wait for a complete failure before they even look at the manual, but by then, the damage is often compounded. I once spent an entire Saturday trying to diagnose a motor issue when the real culprit was just a dirty sensor and a clogged vent. It taught me that keeping a simple maintenance log is just as important as the repair itself. I also learned to be wary of ‘too good to be true’ deals; you really need to know how to spot a fake extended protection coverage offer before you sign any long-term service contracts. Your machine is an investment, and treating it with a proactive mindset—rather than a reactive one—will save you thousands over its lifetime.
Tools That Actually Save Your Sanity
You don’t need a professional-grade workshop to keep your home humming along. My ‘laundry survival kit’ is surprisingly small. First, that drill-powered vent brush I mentioned is non-negotiable; it’s the difference between a real cleaning and just moving dust around. Second, a simple digital multimeter can tell you if a heating element is actually dead or just lacking power. Most importantly, I keep a physical folder—not a digital one—for my appliance history. It contains the document most people forget before calling service, which is the original installation invoice. If you’re ever in a position where you’re wondering how to spot a shady appliance repair quote, having your specs and history ready gives you the upper hand in the conversation. Knowledge is your best defense against overpaying for basic fixes.
Your Laundry Is Finally Under Control
You now have the exact roadmap to move from frustrated to empowered. Whether it is scrubbing those wax-coated sensors with a bit of alcohol or finally committing to a hard-pipe vent upgrade, these small wins add up to a machine that lasts twice as long. Don’t let a damp load of towels ruin your evening or your budget. If the problem ever scales beyond what you can handle with a screwdriver and a cloth, remember that same-day appliance repair quick solutions with warranty support are there to bridge the gap without leaving you stranded for weeks. You’ve got the tools, the logic, and the plan—now go get those sensors clean!
Have you ever found a strange object stuck in your dryer vent that was causing all your trouble? Let me know in the comments below!