
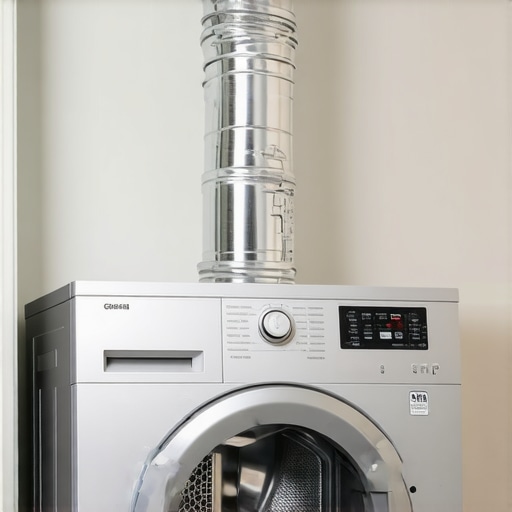
I was standing in my laundry room, staring at a pile of damp towels that had just finished their third sixty-minute cycle. The dryer was hot to the touch, the room smelled like scorched dust, but the clothes were still soggy. When I finally pulled the unit away from the wall, I saw the culprit: a crushed, lint-clogged foil slinky that looked more like an accordion filled with tinder than a vent. In my early days, I made the classic mistake of choosing convenience over safety, opting for that cheap flexible plastic because I wanted a five-minute reliable appliance installation. I didn’t realize I was creating a ticking time bomb. Today, I am going to show you exactly why swapping that flimsy hose for a rigid metal pipe is the single most important upgrade you can make for your home’s safety and your wallet’s sanity. [IMAGE_PLACEHOLDER]
Stop Relying on the Flimsy Slinky Behind Your Dryer
For years, I thought those semi-rigid foil vents were perfectly fine. They are sold in every hardware store, so they must be safe, right? Wrong. The problem lies in those accordion ridges. Every single bump in a flexible hose acts like a tiny shelf that catches lint. Over time, that buildup narrows the path for hot air, forcing your dryer to work twice as hard and run significantly hotter. This isn’t just about efficiency; why your dryer vent is a stealth fire hazard becomes very clear when you see how easily that lint can ignite. Have you ever noticed your laundry room getting unusually humid or smelled something faintly burning during a heavy load? If so, you are likely dealing with a restricted airflow issue that no amount of lint-screen cleaning will fix.
Is a rigid pipe actually worth the extra effort?
I get the skepticism because working with metal piping requires more than just a roll of duct tape. However, the benefits are undeniable. According to the National Fire Protection Association (NFPA), nearly 27 percent of dryer fires are caused by a failure to clean the equipment, often exacerbated by the restricted airflow of flexible venting. By switching to a smooth-walled hard pipe, you eliminate the places where lint loves to hide. My own dryer went from needing two cycles for jeans back down to just one forty-minute session. If you are struggling with performance issues, checking your vent is just as critical as knowing the sensor that stops your dryer from heating up. This upgrade is the foundation of a expert guide to appliance repair and installation. Let’s look at how we can get this done properly without losing your mind in the process.The goal is a straight-shot airflow. Think of your dryer vent like a high-speed waterslide. If the surface is smooth and the turns are gradual, the air zips right through. If the pipe has ridges and sharp turns, everything slows down, and the lint gets stuck in the corners. This is exactly why your dryer vent is a stealth fire hazard in your home when not addressed. First, you need 4-inch rigid aluminum piping. Avoid the cheap plastic stuff—it is essentially a fuse for a fire. If you are worried about the complexity, you can always look for fast trustworthy appliance installation near you, but for the DIY-minded, it starts with a clear path. Measure the distance from the back of the dryer to the wall outlet. Use as few elbows as possible. Every 90-degree turn you add is like adding five feet of straight pipe in terms of air resistance. When I first attempted this, I did not realize how sharp the edges of the metal were. I tried to force a piece into an elbow without crimping the end properly and sliced my thumb open. It was a mess. Now, I always use a pair of aviation snips to make clean cuts and a crimping tool to slightly narrow the end of the pipe that slides into the next piece. This ensures a tight fit that will not leak air. 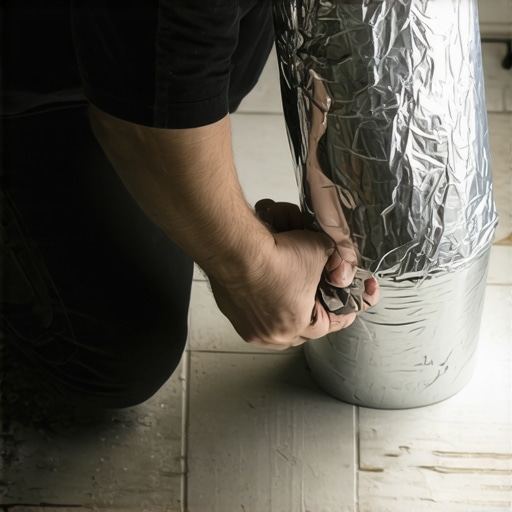
Assemble the Pipeline for Maximum Airflow
Once you have your lengths cut, it is time to join them. Here is a rule you cannot break: Do not use sheet metal screws to join the pipes. It is tempting because it feels more secure, but the tip of the screw will protrude into the pipe. That tiny point becomes a hook that catches every stray piece of lint passing by. Within months, you will have a massive clog. Instead, use high-quality UL-listed foil tape. This creates a permanent, air-tight seal without creating internal obstructions. This is a key part of any expert guide to appliance repair and installation today.
Make the Final Connection Without Crushing the Pipe
The hardest part is often the space behind the dryer itself. Most laundry rooms are not built with an extra three feet of clearance. If the dryer sits too close to the wall, a standard elbow might not fit without being crushed against the drywall. In these cases, look for a periscope vent. It is a rigid metal box that allows for a tight 90-degree turn in a very slim profile. Getting this right prevents the back of the machine from restricting the vent, which is a common reason why your dryer drum is overheating and shutting off mid-cycle. Finally, connect the rigid pipe to the wall exit and the dryer exhaust port. I usually use a quick-release stainless steel clamp on the dryer end so I can easily pull the machine out for annual cleaning. Remember, the lint trap trap is real—even with a perfect pipe, some fine dust gets through, so being able to disconnect and vacuum the line is essential for how to ensure reliable appliance installation in 2025. Why your new dryer needs a rigid metal vent for safety becomes obvious once you see the increased air volume coming out of the exterior wall vent.
If you have gone through the trouble of installing a rigid pipe like I just described, the last thing you want is for a service technician to tell you that your hard work actually voided your protection plan. Most people believe that scheduling your appliance repair for same-day service in 2025 guarantees a fixed machine by dinner time. In my experience, that is one of the most common misconceptions. While you can certainly get a pro to your door quickly, true same-day success depends entirely on part availability and the diagnostic accuracy provided over the phone. Real experts know that a ‘guaranteed fix’ without a model number is usually a marketing gimmick.
Does DIY venting actually risk your manufacturer warranty?
This is the question that keeps many DIYers up at night. The short answer is: it depends on the installation quality. Most manufacturers state that ‘improper installation’ is a valid reason for claim denial. If you use the wrong materials—like that foil slinkey we talked about—and the thermal fuse blows, the manufacturer can argue the failure was caused by your venting choice rather than a defect. This is the reason your warranty claim was denied for many homeowners who thought they were being helpful. To stay safe, always follow the specific ducting requirements in your manual. According to a study by Consumer Reports, nearly 30% of appliance repairs require a second visit because the specific, high-tech parts needed are not kept on standard service trucks. This is why what to expect from same-day appliance repair experts is often a diagnosis rather than a final solution.
The Paperwork Trap Most Homeowners Ignore
Here is the ‘oops’ factor I see constantly: homeowners throw away their installation receipts and maintenance logs. If you do not have proof that your vent was cleaned or that you invested in fast trustworthy appliance installation near you, a third-party warranty company might claim negligence. I always tell my readers to keep a dedicated folder for every major machine. This is the maintenance receipt you must save for future claims if you ever hope to have a major component like a motor or control board covered under an extended plan. 
Why Speed Sometimes Costs More Than You Think
Everyone wants a fast fix, but rushing into affordable same-day appliance fixes with warranty benefits can sometimes lead to ‘band-aid’ repairs. An advanced technician will look beyond the immediate error code and check your airflow and electrical grounding. If a tech arrives and doesn’t even look at your vent path, they are missing the forest for the trees. To truly maximize your appliance warranty during emergency repairs, you need a technician who understands that the machine is only as good as the environment it is installed in. Have you ever fallen into the trap of a ‘same-day’ promise that turned into a week-long wait for parts? Let me know in the comments below, and let’s discuss how to vet these companies better!
If you are serious about avoiding the stress of a breakdown, you need to stop guessing and start measuring. I spent years eyeball-checking connections until I realized that professional-grade results require professional-grade tools. For dryer work, I swear by a digital anemometer. It is a tiny handheld device that measures the speed of the air coming out of your exterior vent. If you do not see at least 1,200 feet per minute, you still have a restriction somewhere in that rigid pipe. This level of detail is exactly what to expect from same-day appliance repair experts who actually know their stuff. Along with the anemometer, I always keep a high-quality digital multimeter in my bag. Testing for continuity on a thermal fuse or checking the voltage at the outlet is the only way to avoid the ‘part-swapping’ trap that inflates repair bills. Even when seeking affordable same-day appliance fixes with warranty benefits, knowing the basic health of your machine’s electrical system puts the power back in your hands.
How can I maintain my venting system over time?
Maintenance is not a once-a-year event; it is a lifestyle for your appliances. Beyond just clearing the lint trap, you should be vacuuming the internal cabinet of the dryer every eighteen months. Lint often bypasses the internal screen and settles near the motor and heating element, creating a fire risk that a rigid pipe alone cannot solve. If you are not comfortable opening the casing, this is a prime reason to look into warranty-backed appliance services you can rely on to do the deep cleaning for you. I also recommend checking your washing machine simultaneously, as they operate as a team. Performing the maintenance move that extends your washer life for years—like cleaning the pump filter—prevents excess moisture from ever reaching your dryer in the first place. According to the International Residential Code (IRC) Section M1502, dryer exhaust ducts must be a minimum of 4 inches in diameter and have a smooth interior finish. Following these rigid standards is not just about being handy; it is about fire safety compliance that keeps your home insurable and your family safe.
#IMAGE_PLACE_HOLDER_D#
Precision Tools Prevent Warranty Denials
I have seen too many DIYers get frustrated because they lack a simple non-contact voltage tester or a set of nut drivers specifically for appliance hex-heads. Using a flathead screwdriver on a hex-head screw is a fast track to stripped metal and a ruined afternoon. If you want to maximize your appliance warranty during emergency repairs, showing a technician that you have used the right tools and maintained the machine according to code usually leads to a much smoother claims process. This proactive approach is one of the top tips for same-day service warranty coverage because it proves you have not been negligent. I also suggest performing the refrigerator thermostat test every diyer should know on your other appliances while you are in ‘maintenance mode.’ I predict that within the next five years, we will see AI-integrated sensors built directly into these rigid pipes to alert your smartphone the second airflow drops by even ten percent. Until then, you are the sensor. Grab an anemometer this weekend and test your vent’s output. If the numbers are low, do not wait for a cycle to fail—check the flow and fix it today.
After years of fixing clogged lines and overheated motors, I have realized that the vent is the most ignored ‘part’ of the dryer itself. It is the lungs of the machine. If it cannot breathe, it cannot work efficiently. [IMAGE_PLACEHOLDER]
The Hardest Lessons from the Lint Trenches
One thing I wish I had known earlier is that the exterior vent flap is just as important as the internal pipe. If that hood is stuck or blocked by a bird’s nest, you are creating back-pressure that can ruin your machine’s heating element in a single season. This is a common factor in the reason your warranty claim was denied because it counts as environmental neglect or improper maintenance.
Another ‘lightbulb moment’ for me was the realization that foil tape is the only way to go. Standard plastic-backed duct tape eventually dries out and peels off under the constant heat of heavy-duty cycles. By using UL-listed foil tape, you create a permanent, airtight seal that ensures you truly understand how to ensure reliable appliance installation in 2025.
Lastly, do not underestimate the power of a straight line. Every unnecessary curve in your venting adds friction and slows down exhaust. If you can move your dryer even six inches to shorten the path to the wall, do it. It is the difference between a forty-minute dry time and a ninety-minute ordeal.
The Gear That Makes the Difference
You do not need a professional’s van to do this right, but you do need these three specific items. First, a digital anemometer. This tiny tool lets you measure the actual airflow speed at the exit point, so you are not just guessing if the line is clear. Second, invest in aviation snips. They make cutting rigid metal pipe feel like cutting paper, which prevents the jagged edges that love to catch lint. Third, I highly recommend a periscope vent if you have a tight space. It is the only way to make a 90-degree turn without crushing the pipe and creating why your dryer vent is a stealth fire hazard in your home.
Stop the Ticking Time Bomb Today
Swapping out your old flexible vent is not just a weekend project; it is a vital investment in your home’s safety and your machine’s longevity. When you take the time to do it right, you move beyond the lint trap trap why cleaning the screen is not enough and into a zone of true energy efficiency. If the job feels too big for your schedule, do not hesitate to seek out warranty-backed appliance services you can rely on to handle the heavy lifting. Your dryer—and your peace of mind—will thank you for the upgrade. Have you checked behind your dryer lately to see what kind of hose you are using? Let me know what you found in the comments below!