
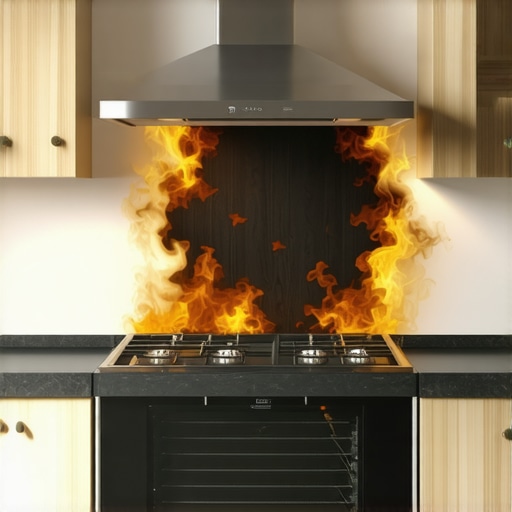
I remember the first time I installed a built-in oven in my kitchen, excited to upgrade my appliances and perhaps impress a few friends with my handy skills. But that excitement quickly turned to frustration when I noticed the cabinets directly above the oven started to scorch and discolor within just a few weeks. It was a lightbulb moment—one simple mistake during installation was causing it all.
Why Proper Installation Matters More Than You Think
Built-in ovens are sleek, efficient, and designed to blend seamlessly into your kitchen cabinetry. However, if they aren’t installed correctly, the consequences can be costly—literally. The culprit often lies in one overlooked detail: the installation clearance and support. I learned the hard way that insufficient space and improper support can trap heat, leading to scorching cabinets and even potential safety hazards.
Imagine spending thousands on a premium appliance only to see your beautiful cabinets fade or warp because of a preventable mistake. This is more common than you might think. According to industry experts, improper mounting and failure to adhere to manufacturer installation guidelines are leading causes of heat damage in built-in ovens (source: https://discountappliancehub.com/expert-guide-to-appliance-repair-and-installation-today). Troubles like these can be avoided with a little know-how and attention to detail.
Are you worried that you might have installed your oven incorrectly? Have you noticed signs of heat damage or uneven cooking? Don’t worry; you’re not alone. Many homeowners stumble upon this issue, but the good news is that it’s fixable and preventable.
In the next sections, I’ll guide you through the common installation mistakes and share proven tips to ensure your built-in oven is safe, efficient, and beautifully integrated into your kitchen. Whether you’re planning a new install or troubleshooting an existing setup, understanding these key points will save you time, money, and headaches.
Mark Your Space Before Unboxing
Start by measuring the cabinet cavity carefully. Use a reliable tape measure and double-check your measurements against the oven’s installation manual. During my last install, I realized I misjudged the clearance, which caused heat to get trapped and damage the cabinet. To prevent this, ensure at least 2 inches of space above and sides for ventilation. Think of it like planting a tree: you need enough room for growth and airflow to thrive.
Secure the Support Framework Correctly
Install a sturdy support frame or brackets that can hold the oven’s weight. My first attempt lacked proper support, resulting in sagging that affected the door seal. Use mounting screws recommended by the manufacturer, and ensure they anchor into solid cabinetry or wall studs. This is similar to building a stage; if support is weak, performance (or in this case, operation) suffers.
Use the Right Mounting Hardware
Never substitute screws or brackets. Check the manual for specific sizes and types. During one tricky installation, I mistakenly used shorter screws, which failed to engage the studs properly. This risked the oven falling or vibrating excessively. Remember, like using the right key for a lock, matching hardware ensures stability and safety. For detailed hardware specs, consult the installation guide or contact the manufacturer’s support.
Follow Ventilation Guidelines Meticulously
Proper ventilation prevents heat buildup. Install ventilation panels or space open areas as per manual instructions. In my experience, neglecting this step led to discoloration of adjacent cabinetry. Think of it like a car engine: without adequate cooling, it overheats and breaks down. Make sure vents are unobstructed and clean any filters regularly to maintain airflow.
Check Electrical Connections Systematically
Ensure the electrical supply matches the oven’s requirements. Disconnect power before handling wiring. During my last installation, I mistakenly connected the wrong voltage, triggering a circuit trip. Use a voltage tester to confirm, and if you’re unsure, hire a licensed electrician. This step guarantees both safety and proper operation, much like how a pilot verifies instruments before takeoff.
Test Your Setup at Every Step
After mounting, double-check alignment, support, and ventilation. Before fully closing the cabinet, power on the oven to observe heat emission and functionality. I remember plugging in my oven only to notice the display flickering, indicating loose wiring. Always perform a quick test to catch issues early, preventing costly repairs later. Think of it as a dress rehearsal—better to catch flaws now than during an actual show.
Secure the Final Panels and Finish
Attach cabinet doors or panels carefully, ensuring they don’t obstruct ventilation. During my last project, I overlooked this detail, and the door hinges pressed against the heat-sensitive areas, causing warping. Use manufacturer-recommended screws and supports to finalize the installation. Your goal: a seamless look that also maintains safety and efficiency. When done right, your oven will serve reliably for years to come.
While many homeowners believe that warranties and same-day service guarantees are foolproof protections, the reality is more nuanced. In my experience, a frequent misconception is that appliance warranties fully cover all repair costs and that service technicians arrive instantly when you need help. However, warranties often have loopholes, such as excluding certain damage types or requiring specific maintenance routines to maintain eligibility, which many owners overlook. For instance, neglecting regular cleaning or filter replacements can void parts of your warranty, leading to unexpected out-of-pocket expenses (source: https://discountappliancehub.com/maximize-your-appliance-warranty-during-emergency-repairs). Moreover, quick response times from service providers are sometimes overpromised; many companies prioritize cases based on severity, availability, and geographic location, so “same-day” often means within 24-48 hours rather than instant arrival.
How Can You Ensure Your Appliance Repairs Truly Meet Expectations?
This is a critical question for advanced homeowners aiming to optimize their appliance maintenance strategy. The key lies in understanding the fine print of your warranty coverage and establishing a solid relationship with trusted technicians. A common trap is assuming that your warranty covers accidental damage or misuse, but many warranties explicitly exclude such issues. Proactively documenting maintenance history, keeping receipts, and verifying service provider credentials can save headaches. Additionally, maintaining a detailed record of your appliance’s operation can help technicians diagnose issues more swiftly, often enabling them to complete repairs more efficiently—sometimes even on the same day (see https://discountappliancehub.com/same-day-appliance-repair-quick-solutions-with-warranty-support). Knowing the limits of your warranty prevents unwelcome surprises and ensures you’re not caught off guard when a repair is needed. Also, choosing a reputable service that specializes in your appliance brand increases the likelihood of effective, timely repairs. Remember, not all service providers are equals—researching reviews and asking for referrals improve your chances of fast, reliable assistance. Have you ever fallen into this trap? Let me know in the comments.Maintaining your appliances over the long term isn’t just about quick fixes; it’s about employing the right tools and methods to ensure durability and performance. **High-quality multimeters** are my go-to for verifying electrical connections before and after installations, helping me catch wiring issues early. I personally prefer the Fluke 117 because of its reliability and precision, which has saved me countless headaches during troubleshooting. When it comes to cleaning and maintenance, a **vacuum with a narrow nozzle attachment** is indispensable for clearing dust from vents and filters, especially in hard-to-reach areas. Regularly inspecting and cleaning filters can extend the lifespan of your devices significantly, reducing the risk of overheating or malfunctions. Another essential tool is a **digital thermometer**—for example, the ThermoPro TP-65. I use it to monitor temperature thresholds during oven and refrigerator servicing, ensuring they operate within optimal ranges. Predicting where appliance technology is heading, we can expect smarter, connected systems that monitor themselves and alert homeowners before issues arise. In the future, integrating IoT technology will make maintenance more proactive rather than reactive.
How do I maintain appliance performance over time?
Establishing a routine schedule for cleaning critical components such as filters, thermostats, and vents is key. Additionally, keeping detailed records of repairs and inspections allows you to identify patterns and plan for preventative maintenance. For instance, I set monthly reminders using an app like Todoist, which prompts me to inspect filters and run diagnostic tests, especially before peak usage seasons. A strong relationship with trusted technicians also plays a vital role; they can advise on specialized tools and techniques that are tailored to your specific appliances. It’s worth investing in a **professional-grade gasket scraper** for stubborn seal replacements or cleaning—this ensures you don’t damage delicate surfaces during maintenance. I recommend consulting expert resources, like the comprehensive guide on appliance repair, to stay updated on the best practices. As appliances become more integrated, tools that facilitate remote diagnostics and firmware updates will become crucial. Try adopting a digital multi-tool to check electrical integrity early; it can save you significant money and downtime. Remember, combining the right equipment with routine checks and professional support extends your appliances’ life, keeping them efficient well beyond the warranty period.
From my early days of DIY kitchen upgrades, I learned that even the smallest mistakes in appliance installation could lead to significant frustrations. The real breakthrough came when I realized that attention to detail doesn’t just prevent damage—it ensures your appliance performs at its best for years to come.
The Hidden Lessons Only Experts Share
- Overlooking Ventilation Can Cost You: Proper airflow isn’t just a guideline; it’s the secret to preventing heat damage and maintaining the aesthetic of your cabinetry. I once neglected this step, and my cabinets showed the scars of heat within weeks.
- I underestimated the power of precise measurements: A few millimeters off can trap heat and cause warping. Accurate measurements and double-checking the manufacturer’s instructions are your best allies.
- Support Matters More Than You Think: Without sturdy brackets and correct support, even a well-measured oven can sag and underperform. Using the right hardware isn’t a chore—it’s an investment in safety and longevity.
- Never Cut Corners on Safety Wiring and Electrical Connections: A loose wire can be a recipe for trouble. Confirming correct wiring with a reliable multimeter can save you from fire hazards or appliance failure. For trusted tools and safety tips, check out my recommended expert troubleshooting guide.
Tools That Changed How I Approach Appliance Repairs
- Quality Multimeters: The Fluke 117 became my go-to for electrical verification, saving time and preventing costly errors.
- Regular Vent Cleaning Kits: Knowing when to clean vents prevented overheating and kept the appliance running efficiently.
- Digital Thermometers: Monitoring temperature fluctuations helped me diagnose issues early, avoiding unnecessary replacements.
- Maintenance Log Apps: Keeping detailed records with apps like Todoist helped me stay on top of routine checks and repairs.
Embrace Learning and Connect with Pros
Long-term appliance care is as much about proactive maintenance as it is about knowing when to call in the experts. Building trust with certified technicians and understanding warranty nuances ensures you’re covered when issues arise. Don’t fall for the misconception that warranties are foolproof—regular maintenance and understanding your coverage make all the difference. For a smooth repair experience, consider scheduling your same-day repair early and verifying your coverage details.
Your Next Step Toward Appliance Confidence
Remember, mastery comes from experience and continuous learning. By paying attention to installation details today, you’re setting yourself up for reliable performance tomorrow. Curious about tailoring your appliance setup or troubleshooting common issues? I encourage you to explore expert resources and reach out when needed. Are you ready to turn your appliance maintenance into a confident DIY adventure? Share your thoughts or questions below. Have you ever caught a small mistake that saved your appliance from costly damage? Let me know in the comments!