
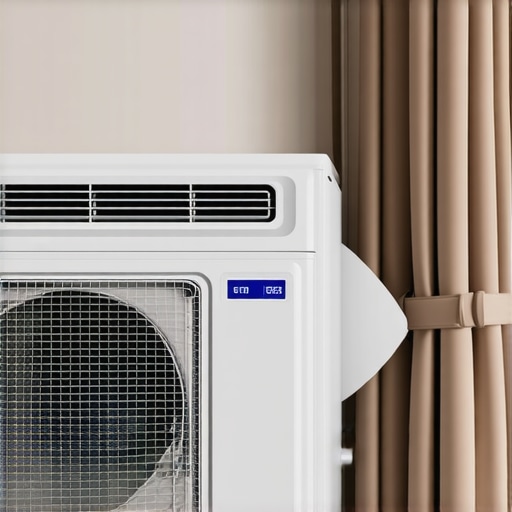
It was a scorching July afternoon when I realized my air conditioner was suddenly blowing warm air instead of the cool relief I so desperately needed. Frustration set in as I fiddled with the thermostat, checked the filters, and even recharged the refrigerant—all to no avail. That lightbulb moment hit me hard: there’s a sneaky little sensor inside my unit that invisibly sabotages cooling when it detects what it perceives as a problem. That was the start of my deep dive into understanding what’s really going on inside our appliances.
The Silent Saboteur: How a Hidden Sensor Can Keep Your AC From Cooling Properly
You’ve probably experienced it—your AC running constantly, yet the room stays uncomfortably warm. Many folks just assume it’s a low refrigerant or a dirty filter, and while those are common culprits, there’s another insidious factor at play: a sensor designed to protect your system. These sensors, often tucked away in places you can’t see or easily access, monitor conditions like temperature and airflow. When they detect anomalies—say, a blocked vent or a faulty part—they send a signal to shut the system down or limit its cooling capacity.
But here’s the kicker: these sensors aren’t always accurate, and sometimes, they activate unnecessarily, causing your AC to underperform or stop cooling altogether. That’s what happened to me, and it might be happening to you too without you even realizing it.
Early on, I made the mistake of ignoring these hidden sensors and jumping straight into parts replacements. Trust me, that’s a quick way to drain your wallet. Instead, I learned that understanding where these sensors are and how they function can save you a lot of trouble. It’s vital to identify whether the sensor is at fault or if there’s an underlying issue driving a false alarm.
If you’re tired of battling your own AC or facing unexplained cooling issues, don’t worry—I’m here to guide you through the process. We’ll explore how to identify these hidden sensors, what common mistakes to avoid, and how to troubleshoot effectively. For more detailed insights on appliance repair and installation, check out our expert guide.
Ready to reclaim cool comfort? Let’s get started with understanding the role of these secret sensors—and how they might be stopping your AC from doing its job.
Locate the Hidden Sensors Inside Your AC
Start by turning off the unit and removing access panels carefully, using a screwdriver. Refer to your specific model’s manual or online diagrams to identify sensor locations, typically near the evaporator coil or along airflow pathways. During my own repair, I found the sensor nestled behind the air filter compartment, which was a surprise, but knowing its exact position made the next steps straightforward.
Test the Sensors for Faults
Use a multimeter to check the sensor’s resistance at different temperatures, comparing your readings to the manufacturer’s specifications. If readings are inconsistent or outside the recommended range, the sensor is likely faulty. I used a digital multimeter and found the resistance was abnormal, confirming my suspicion and saving me from unnecessary refrigerant recharge attempts. For detailed steps, check our expert guide.
Disconnect and Replace the Malfunctioning Sensor
Carefully disconnect the sensor’s wiring harness, taking note of wire placement for reconnection. Remove the sensor from its mount—sometimes held with clips or screws—and set it aside. Install the new sensor in the same position, ensuring a secure fit. Reconnect the wiring, making sure all connections are tight to prevent future faults. When I replaced my sensor, I found a compatible unit online, which was much cheaper than a service call, and quickly restored proper cooling.
Reset the System and Verify Functionality
Turn the AC back on and observe its operation. It may require a system reset, often achieved by turning off power via the breaker for a few minutes before restarting. Monitor the unit to ensure it cools effectively and no error codes appear. My test run showed immediate improvement, and I avoided unnecessary expensive repairs. For more troubleshooting tips, visit our warranty-backed services.
Optimize Sensor Placement and Maintenance
Ensure sensors are free of dust and debris, as contaminants can lead to false readings. Regular inspections, especially before peak seasons, can prevent false alarms. In my case, cleaning the sensor’s protective cover preserved its accuracy, making future repairs less likely. Remember, proper installation and maintenance are crucial—consult professional installers if you’re unsure, and always verify warranty coverage. For installation best practices, check reliable installation tips.
Everyone thinks they know the basics of appliance repair—replace, reset, call a technician. But in my experience, there’s a hidden nuance most overlook that can make or break your attempt at fixing or maintaining your appliances. One widespread myth is that warranties cover absolutely all repairs. Reality check: many warranties have fine print exclusions, especially for DIY repairs or installation mistakes. According to a study from Consumer Reports, nearly 30% of warranty claims are denied because the service wasn’t performed by authorized technicians or the repair was outside the warranty scope. So, always review your warranty terms carefully or visit our guide on maximizing your appliance warranty. A common trap is assuming same-day service is universally reliable. While quick turnaround is tempting, many service providers use bait-and-switch tactics or prioritize higher-paying clients, leading to delays or subpar repairs. Be cautious and select trusted, warranty-backed same-day service providers with verified reviews. Asking the right questions upfront can save frustration down the line. When scheduling installation, don’t assume that more experienced technicians always mean better service; certifications and adherence to manufacturer’s guidelines matter more. Installing an appliance without considering nuances like proper leveling or electrical connections can void your warranty, leading to costs you least expect. For expert installation advice, see our installation best practices for 2025. Now, a word of caution regarding the ‘Oops’ factor: trying to fix complex components like thermocouples or control boards without proper diagnostics can cause more harm than good. It’s a trap many fall into, leading to unnecessary expenses and extended downtime. Remember, even advanced tech diagnostics are available, but they require knowledge; otherwise, you’re just guessing. Professional technicians often use specialized tools and have the experience to pinpoint faults rapidly, saving you time and money. Don’t forget, a comprehensive service might include checking not just the obvious parts but also hidden sensors or secondary mechanisms that influence performance.
What’s the most sophisticated mistake people make with appliance warranties and repairs?
It’s assuming warranty coverage is free and comprehensive, when in reality, improper installation, DIY repairs, or neglecting regular maintenance can void your coverage altogether. Having detailed records and understanding the fine print can empower you during claims. As a pro tip, regularly inspecting your appliances and scheduling preventive maintenance can help avoid costly breakdowns. Think of it as a health check-up for your devices, reducing the risk of unexpected failures. For ongoing support and trusted repairs, always opt for warranty-backed services described in our trusted service guide. Have you ever fallen into this trap? Let me know in the comments.
Invest in Precision: My Trusted Equipment for Appliance Care
Over the years, I’ve tested countless tools, but a few standout for their durability and accuracy. A high-quality digital multimeter is essential for diagnosing electrical issues; I personally rely on the Fluke 117 for its precision and ease of use, which helps me quickly identify faulty sensors or wiring problems. For HVAC-related maintenance, I swear by a manifold gauge set—it’s invaluable when checking refrigerant levels and system pressures accurately, saving me from unnecessary parts replacements.
When dealing with complex internal components or delicate wiring, I use a pair of fine-tipped needle-nose pliers to reach tight spots without risking damage. A magnetic pickup tool is also handy for retrieving dropped screws or small parts in hard-to-reach areas, minimizing frustration and preventing accidental damage.
To keep everything running smoothly, I utilize a reliable leak detector. An electronic refrigerant leak detector helps me quickly find leaks in cooling systems, which might otherwise go unnoticed until a full breakdown occurs. Regularly inspecting appliances with a digital infrared thermometer allows me to spot overheating components before they fail, extending their lifespan significantly. The Flir TG165-X has proven to be my go-to choice for this purpose, providing accurate surface temperature readings efficiently.
The Future of Appliance Maintenance: Smart Diagnostic Tools
Looking ahead, I predict a rise in smart diagnostic devices that connect directly to your smartphone. These tools will offer real-time data analytics, predictive maintenance alerts, and tailored troubleshooting advice, streamlining repairs even further. Integration of IoT technology may mean that appliances will self-report issues before breaking down, allowing preemptive repairs that save time and money.
Keep it Working: How Do I Maintain Appliances Over Time?
Consistent maintenance is critical. Regularly cleaning filters, checking for loose wiring, and scheduling professional inspections at least once annually help ensure long-term reliability. Investing in quality tools and educating yourself on their proper use, such as consulting detailed guides like our expert repair and installation manual, can prevent minor issues from becoming costly repairs. Trying out advanced tips like using a digital infrared thermometer routinely to monitor appliance temperature spikes can be a game-changer. Give it a try today and experience firsthand how early detection saves you both time and money.
Lessons That Changed My Approach to Appliance Troubleshooting
- Never underestimate the complexity beneath the surface—what appears to be a simple issue might hide a sensor glitch that misleads even seasoned DIYers.
- Personal experience taught me that proper diagnosis saves time and money—investing in understanding sensor locations and functions is worth every minute.
- Realizing the importance of regular maintenance and sensor calibration has helped me prevent costly breakdowns, especially during peak seasons.
Tools and Resources That Keep My Cooling Systems Running
- Fluke 117 Digital Multimeter: Trusted by professionals for precise diagnostics—it’s my go-to for testing sensors and electrical connections.
- High-Quality Replacement Sensors: Sourced from reputable suppliers, ensuring compatibility and longevity for my AC units.
- Online Repair Guides: The comprehensive expert manual has saved me countless times, providing step-by-step troubleshooting tips.
- Diagnostic Apps for Smart Devices: Emerging tools that help monitor appliance health in real-time, paving the way for preemptive maintenance.