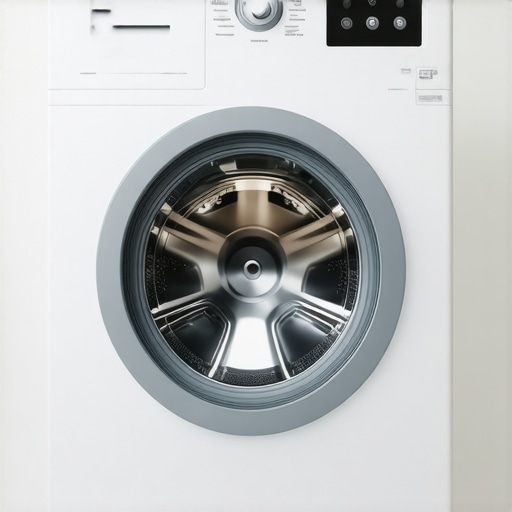
It was late at night when my smart washer suddenly stopped responding, flashing error codes that made me feel like I was missing some secret code. I had just moved into a new home, and everything seemed fine—until the washer acts up. That moment, I realized how little I knew about the grounding rules that prevent these appliances from shorting out and causing costly damages.
Why Proper Grounding Matters More Than You Think
I’ve learned the hard way that proper grounding isn’t just a safety checklist item; it’s the backbone of your appliance’s health. If your washer or any smart appliance isn’t properly grounded, even a tiny electrical hiccup can lead to malfunctions, or worse, fire hazards. And let me tell you, the last thing you want is to be left with a broken washer right before laundry day, all because of a simple grounding oversight. According to the National Fire Protection Association, electrical failures are one of the top causes of household fires, often linked to improper grounding or faulty wiring. So, ensuring your washer is correctly grounded is not just about protecting your device—it’s about safeguarding your home and loved ones.
Is Grounding Really That Important, or Just Overhyped?
Early in my DIY adventures, I made the mistake of assuming that grounding was something only professional electricians needed to worry about. Spoiler: That was a rookie mistake. I overlooked a simple grounding connection during an installation, which led to persistent errors and occasional outages. For instance, I didn’t realize that the grounding wire must be securely attached to the home’s grounding system. Ignoring this step might seem minor, but it’s foundational for your appliance’s safety and performance. Want to learn how to avoid such pitfalls? I’ll guide you through the essential grounding rule that keeps your washer from shorting out and causing unnecessary headaches.
Secure Your Grounding System First
Start by locating your home’s grounding system, usually a grounding rod outside or grounding busbar in your electrical panel. Turn off the main power before proceeding. Use a multimeter set to measure resistance to verify continuity between the appliance’s grounding wire and the grounding system. Ensure the wire is firmly attached to a grounding screw or terminal. During my own installation, I mistakenly skipped this step and faced intermittent errors with my washer. Once I connected the grounding wire correctly, error messages ceased, and performance improved.
Check the Grounding Wire and Connection Points
Inspect the grounding wire for any signs of wear or corrosion. It should be intact, free of breaks, and properly insulated where necessary. Attach the wire securely to designated grounding points, ensuring no loose ends. Use a screwdriver to tighten screws firmly—loose screws can cause voltage fluctuations that damage your appliance. I once found a grounding screw barely holding on, which when tightened, eliminated persistent error codes and prevented potential electrical faults. If your appliance’s ground wire is missing or damaged, replace it immediately with a proper gauge wire, and connect it to a grounding clamp or busbar. Learn more about grounding safety at this article.
Verify the Effectiveness of Your Grounding
After connecting, perform a quick test with your multimeter to measure resistance between the appliance’s metal body and ground. A reading close to zero indicates a proper ground. If resistance is high, recheck all connections and wiring integrity. If problems persist, consult a professional electrician to inspect the grounding system. Remember, improper grounding can lead to issues like short circuits or appliance failures, or even fires. Proper grounding not only protects your device but also your family. To avoid common installation pitfalls, review this guide for securing appliances correctly. Ensuring a solid grounding system is a straightforward step that can save you from costly repairs and hazards down the line.When it comes to appliance warranties and repair services, many homeowners operate under assumptions that can cost them dearly. A common misconception is that manufacturer warranties are a comprehensive safety net, covering all types of damage and repairs. In reality, most warranties exclude damage caused by improper installation, user negligence, or power surges, making it essential to understand the fine print before relying solely on warranty coverage. Additionally, many believe that same-day service guarantees immediate repairs; however, availability depends on technician schedules and parts inventory, which can lead to delays if overlooked. One frequent trap is assuming that DIY repairs won’t affect warranty status. Actually, attempting fixes without proper certification can void your warranty entirely, so always verify your contractor’s credentials and the manufacturer’s repair policies—this is crucial when planning urgent fixes like addressing a clogged pump on your smart washer, which you can learn more about here. Plus, many homeowners fail to realize that installation errors, such as incorrect spacing or loose connections, are often the real culprits behind appliance malfunctions, not the appliance itself. Ensuring professional installation can prevent costly issues down the line. For those choosing repair services, always clarify whether the technician is authorized by the manufacturer, and whether parts used are OEM. This nuance can make the difference between a temporary fix and a long-lasting solution. Also, consider the advanced knowledge that technicians trained in the latest appliance technology have—this is critical for smart appliances that require specialized handling, as discussed in this article. Remember, understanding the complexities behind warranties and repair services can save you money and prevent frustration. Don’t fall into the trap of oversimplifying these processes; instead, dig into the details—your appliances, home safety, and wallet will thank you.
Have you ever fallen into this trap? Let me know in the comments.
Keep It Running: Tools and Methods I Trust
Maintaining your appliances over the long haul requires more than just plug-and-play solutions. I rely heavily on a few key tools that make diagnostics and repairs straightforward and reliable. For instance, a high-quality digital multimeter is indispensable for measuring voltage, resistance, and continuity—parameters that are critical when verifying grounding connections or checking electrical components. I personally prefer the Fluke 115 model because of its durability and precision, which help me catch issues early before they turn into costly repairs.
Another tool I recommend is a set of precision screwdrivers, especially the magnetic Torx and Phillips types. These are perfect for delicate appliance parts, reducing the risk of stripping screws during disassembly. During my own repair sessions, using the right screwdriver has saved me from unnecessary hassle and potential damage. Additionally, a good pair of needle-nose pliers enables better grip when reconnecting wires or removing small components, especially inside tight spaces.
For software diagnostics, I use manufacturer’s proprietary apps combined with generic tools like Wi-Fi analyzers if your appliances are smart-enabled. These apps can reveal error codes and performance logs that aren’t always visible through the interface. For example, diagnosing a smart washer’s error related to a clogged pump becomes more straightforward when leveraging these software tools alongside physical inspections. I find that combining hardware and software diagnostics provides a comprehensive view of appliance health, allowing for quick and effective troubleshooting.
Looking ahead, I predict that the trend toward integrated diagnostic tools will continue to grow. Future appliances might come with built-in sensors that communicate directly with your smartphone, offering real-time health updates and even predictive maintenance alerts. To stay ahead, investing in compatible diagnostic hardware now will prepare you to handle the inevitable upgrades.
How do I maintain my tools over time?
Proper maintenance of your diagnostic equipment is crucial for long-term reliability. Regularly calibrate your multimeter according to the manufacturer’s instructions to ensure accurate readings. Keep your screwdrivers and pliers clean and free of debris; a light coating of oil on metal parts can prevent rust. Store your tools in a dedicated case or toolbox to prevent damage and loss. Periodically check power cords and connections for wear, replacing any frayed or damaged items promptly. This routine care extends the lifespan of your tools and ensures consistent performance during critical repairs. Want to learn more about advanced troubleshooting? Try integrating a multimeter with your appliance repairs, like verifying grounding connections—it’s a step that can save you from future headaches and unexpected failures. For example, you can verify that your appliance’s grounding wire is solid by measuring resistance to ground, which helps prevent dangerous electrical faults. Read more about this process in this article.
By investing in reliable tools and maintaining them properly, you’ll be better equipped to keep your appliances functioning smoothly. This proactive approach can significantly reduce emergency repairs and extend the life of your devices. Remember, a little effort now can prevent major headaches later—so gear up, stay consistent, and enjoy the peace of mind that comes with well-maintained appliances.
What I Wish I Knew About Warranty and Repairs Before Starting
One of the most eye-opening lessons I’ve learned is that warranties often come with fine print that can catch you off guard. Relying solely on a manufacturer’s promise without understanding what’s excluded—like damage from improper installation or user error—can lead to unexpected expenses. I also realized that attempting DIY repairs might void your warranty, so verifying your contractor’s credentials is essential. Moreover, rushing for same-day service doesn’t always mean immediate fixes; scheduling and parts availability play a significant role. Keeping these insights in mind has helped me approach appliance care more strategically and avoid costly pitfalls.
My Go-To Tools for Long-lasting Appliance Care
Over the years, I’ve come to depend on a handful of tools that make troubleshooting straightforward. My trusted digital multimeter (I prefer the Fluke 115 for its precision) helps verify grounding and electrical issues accurately. A quality set of magnetic screwdrivers speeds up disassembly while preventing damage to delicate parts. Needle-nose pliers are indispensable for reconnecting wires or accessing tight spaces. Additionally, apps from appliance manufacturers offer diagnostic insights that complement physical inspections. Investing in these tools has empowered me to identify issues early, saving money and extending the lifespan of my appliances.
The Power of Proactive Maintenance
Taking proactive steps now can dramatically reduce emergency repairs tomorrow. Regularly checking grounding connections, inspecting for corrosion, and keeping tools calibrated ensures your appliances operate safely and efficiently. For instance, verifying resistance with your multimeter between your washer’s chassis and ground can highlight potential issues before they escalate. This habit not only prevents malfunctions but also enhances your confidence as a homeowner. Remember, a well-maintained appliance isn’t just about longevity—it’s about peace of mind, knowing you’ve done all you can to protect your home and loved ones. Stay vigilant, stay prepared, and enjoy the comfort of a smoothly running household.