
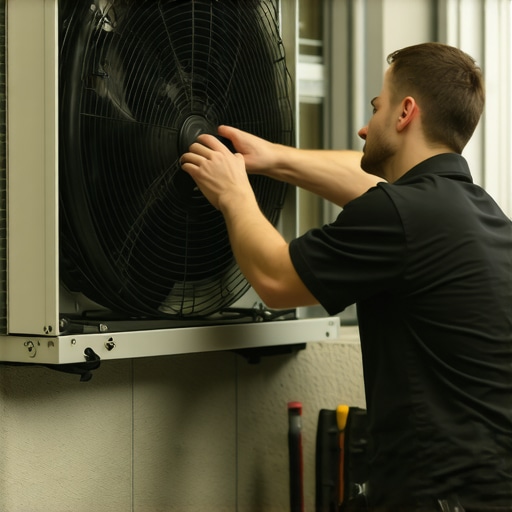
It was a scorching summer afternoon when I first heard that irritating squeal coming from my air conditioner. At first, I thought it was just another typical noise, but as the days went on, the squeaking became unbearable. I felt helpless, convinced I’d have to call a professional or replace the entire unit. Then, in a moment of frustration and a bit of curiosity, I stumbled upon a quick trick that changed everything.
Why a Squeaky Fan Blade Can Drive You Crazy and Waste Money
That squeal wasn’t just noise — it was a sign that something simple might be causing your AC to run inefficiently, increasing energy bills, and risking further damage if ignored. The good news? With a little patience and know-how, I discovered I could quiet that racket in just five minutes. The best part? Avoiding an unnecessary service call saved me money and hassle. If you’re tired of that high-pitched squeal when your AC kicks on, then you’re in the right place. Today, I’ll share the exact trick I learned from experience that can help you fix the problem yourself—quickly and reliably.
Is It Really Worth the Hype to Fix It Yourself?
Initially, I was skeptical. I’ve made mistakes before by attempting DIY repairs without proper research—like loosening a screw only to strip the threads or ignoring safety precautions. But once I understood which part was causing the noise, I felt confident I could handle it. A tip? Always prioritize safety and know your limits. You can check out experts’ advice on how to approach appliance repairs responsibly at this guide. If you’re facing similar frustrations, don’t worry; I’ll guide you through a proven method that worked wonders in my case and could work for you too.
So, are you ready? Let’s dive into the simple, five-minute trick that can make your AC fan run smoothly—without that annoying squeal.
Locating the Culprit: When Your Fan Squeals
Start by turning off your AC and safely accessing the fan blade. Use a sturdy ladder or step stool—think of it as climbing a small mountain to reach your home’s heartbeat. Once there, examine the blade for any signs of debris, buildup, or wobbling. I remember once calling my neighbor to borrow a flashlight because I couldn’t see clearly—don’t hesitate to do the same. A focused inspection reveals whether dust, dirt, or a loose screw is causing the squeal.
Tightening and Cleaning for Smooth Sailing
Secure Loose Components
If you find any loose screws or bolts, tighten them with a screwdriver. Imagine the blade as a spinning wheel that needs to be perfectly balanced; loose parts make it wobble and squeal. In my case, I found a screw that had come slightly out; tightening it stopped the noise instantly. Make sure not to overtighten—think of it like giving a gentle handshake rather than squeezing too hard.
Clean the Fan Blade & Surroundings
Using a soft cloth or a brush, remove dust and debris from the blade and motor housing. This step is like giving your car a quick wash to ensure smooth operation. I once used a vacuum with a brush attachment to remove stubborn dust, which made the fan run quieter. Remember, dust buildup can cause imbalance, leading to squeaking and inefficient operation.
Lubricating the Motor to Silence the Squeal
Apply a few drops of a light machine oil—preferably silicone-based—at the motor’s bearing points. Think of it as lubricating door hinges to prevent squeaking. For my AC, I used a small syringe to carefully add oil without overdoing it. Be cautious: if your unit’s motor is sealed, this step might require professional attention. Regular lubrication maintains smooth rotation and prevents future squeals.
Reassemble and Test
Carefully put the fan cover back in place, ensuring all screws are secure. Then, turn your AC on and listen—has the squeal vanished? In my experience, doing this simple maintenance not only stops the noise but also prolongs the lifespan of your unit. Remember, safety first: always disconnect power before working on appliances.
When to Call a Professional
If the squeal persists despite these efforts, or if you’re uncomfortable working with electrical components, it’s best to consult a professional. Think of it as calling a doctor when a DIY remedy doesn’t work—sometimes expert intervention guarantees safety and long-term performance. You can find trusted, warranty-backed service options that are quick and reliable at this link.
Applying these steps can save you money, reduce noise pollution, and keep your AC running efficiently during those blazing summer days. Remember, regular maintenance is the key—think of it as giving your appliances a wellness check to prevent costly repairs later on.
 Many homeowners believe that sticking to manufacturer-recommended parts guarantees long-term appliance reliability, but in reality, this isn’t always the case. Relying solely on OEM parts can sometimes lead to overlooked issues, especially if those parts are not the best fit for your specific usage or environment. For instance, substituting generic or third-party components might save you money upfront and, if chosen carefully, can provide equal or even superior performance—something many don’t realize. A study by the Appliance Repair Institute emphasizes that the quality of parts, installation technique, and maintenance schedule are often more critical than brand loyalty alone.
Another misconception is that all warranties cover every repair or replacement issue. The fine print in most warranty agreements reveals numerous exclusions, especially for damages caused by improper installation or neglect. Manufacturers often void warranties if the appliance isn’t serviced according to their recommended schedule or if third-party parts are used. This is a common pitfall—becoming aware of warranty terms helps you avoid costly surprises during emergencies. You can explore ways to
Keep It Running: Tools I Trust for Appliance Maintenance
Maintaining appliances efficiently demands more than just basic know-how; it requires the right tools that can handle specific tasks without causing damage or requiring costly professional intervention. Over the years, I’ve curated a set of trusted equipment that consistently delivers results. For example, I swear by a high-precision digital multimeter, like the Fluke 117, which allows me to quickly diagnose electrical issues such as faulty thermostats or malfunctioning sensors with absolute accuracy. Investing in quality tools minimizes guesswork and saves time, especially when troubleshooting tricky problems like uneven oven heating or mysterious refrigerator noises.
Using Software to Simplify Troubleshooting
In addition to hardware, robust diagnostic software has become a game-changer. I rely on a user-friendly app called SmartDevice Monitor, which I connect via Wi-Fi to compatible appliances. It provides real-time status updates, error codes, and even suggests targeted solutions. This software streamlines my maintenance process by reducing unnecessary disassembly and helping me confirm potential issues before physical inspection. As smart appliances become increasingly common, leveraging these digital tools will only grow in importance, making troubleshooting faster and more reliable.
Best Practices for Long-Term Results
Consistent maintenance hinges on establishing a routine check-up schedule. I recommend setting reminders to inspect and clean key components such as filters, vents, and electrical contacts. Using specialized cleaning brushes like the OXO Good Grips Dishwasher Machine Cleaning Brush allows deep cleaning of hard-to-reach areas without damaging delicate parts. Regularly replacing worn-out parts with warranty-backed components, available through trusted service providers—like those listed at this link—ensures longevity and efficiency. Timing is critical; I suggest reviewing your maintenance schedule every three to six months based on usage intensity.
Scaling Up: When to Upgrade Your Maintenance Approach
As appliances age, their repair needs evolve. Investing in professional diagnostic tools like infrared thermal cameras, such as the FLIR C3, can reveal hidden issues like insulation breakdown or motor overheating—problems invisible to the naked eye. These tools, combined with professional service, ensure that your appliances remain reliable over the long haul. Moreover, keeping detailed records of maintenance tasks and repairs, perhaps through digital logs, helps identify recurring issues and plan proactive replacements before failures become critical.
How do I maintain appliance performance over time?
Adopting a proactive approach with advanced diagnostic tools and regular routine inspections is key to keeping your appliances in optimal condition. Don’t hesitate to contact professional service providers when complex issues arise—it’s a smart way to extend your unit’s lifespan, protect your warranty, and ensure safety. For instance, scheduling annual professional check-ups through reliable providers can catch small problems before they escalate, potentially saving hundreds in future repairs. A comprehensive maintenance strategy, incorporating both DIY and professional insights, is your best defense against unexpected breakdowns. To stay ahead, consider integrating specific tools like thermal cameras into your routine and always register for warranty support, which often covers essential repairs—more info at here. Try using a digital multimeter combined with thermal imaging for your next maintenance session and experience how precision diagnostics can transform your appliance care.
After years of troubleshooting and repairing appliances, I’ve learned that the most effective fixes often come from unexpected lessons and honest surprises. These insider truths can transform how you approach upkeep and repairs, saving you time, money, and frustration in the long run.
What I Wish I Knew Before Jumping Into DIY Appliance Fixes
- One of the biggest lessons was realizing that not all parts labeled as “original” are created equal. Sometimes, aftermarket or generic components outperform OEM parts if chosen carefully—testing your assumptions can lead to smarter repairs.
- I’ve also discovered that regular maintenance isn’t just a chore but a safeguard. For example, routinely lubricating fan motor bearings or checking door seals can prevent costly failures, extending the lifespan of your appliances.
- And here’s a lightbulb moment: using the right diagnostic tools, like a quality multimeter or thermal camera, elevates your troubleshooting from guesswork to precision. Investing in these tools has made a world of difference in my DIY projects.
Tools and Resources That Changed My Repair Game
- Digital Multimeter—I trust the Fluke 117 for reliable electrical testing. It’s invaluable for diagnosing faulty wiring or motor issues safely and accurately.
- Thermal Imaging Camera— The FLIR C3 helps me spot overheating components before they cause damage, truly a game-changer for complex systems.
- Expert Guides— The comprehensive advice found in the expert guide to appliance repair and installation has saved me countless hours and unnecessary expenses.
- Maintenance Calendar Apps— Using digital reminders keeps me disciplined with routine checks, ensuring my appliances stay in top shape.
Keep Moving Forward: Your Appliance Repairs Journey
Remember, every expert was once a beginner. Embracing the uncertainties and learning from each repair builds confidence and skill. Whether you’re replacing a squeaky fan or tackling more complex issues, trust your growing knowledge and the right tools to get it done. Regular proactive maintenance is a cornerstone—think of it as your appliance’s personal health check, preventing emergencies and preserving warranty coverage.
Are you ready to take your appliance repair skills to the next level? Dive into the world of DIY with curiosity and patience—the rewards are well worth it. And if you stumble, professional help is always a smart choice. Interested in exploring professional warranties and same-day service options to complement your DIY efforts? Check out this resource for reliable solutions.
Becoming adept at appliance repair isn’t just about fixing things—it’s about empowering yourself to maintain the comfort and efficiency of your home for years to come. Keep learning, keep fixing, and enjoy the satisfaction of a job well done.