I remember the moment vividly—a loud bang from the laundry room, and my heart sank. My brand-new dryer had suddenly stopped working, and a quick call to the warranty service revealed the worst: I had placed it too close to the wall during installation. That mistake voided my warranty, and I was left scrambling to fix it myself. It was an eye-opening experience, and I realized how many homeowners might be unknowingly risking their coverage because of something as simple as the dryer’s distance from the wall.
Why Your Dryer’s Placement Can Make or Break Your Warranty
Many people don’t realize that appliance warranties often include specific installation requirements. For dryers, one of the most overlooked yet critical factors is the clearance space behind and around the unit. This isn’t just about safety or aesthetics—it’s about ensuring your warranty remains valid. If your dryer is positioned too close to the wall, it can overheat, and even cause damage that’s not covered later.
In my case, ignoring the recommended distance led to the vent clogging faster than expected, which contributed to overheating and eventually, a costly breakdown. Proper clearance allows for adequate airflow, safe heat dissipation, and proper operation, which are all confirmed by appliance experts. According to Industry Standards, a minimum of 1 inch (2.5 cm) behind and 6 inches (15 cm) in front of the dryer is generally recommended to meet warranty conditions and prevent potential hazards.
Did you know that improper installation can void your warranty entirely? The Consumer Appliance Repair Association reports that over 30% of warranty claims are denied because the owner failed to follow the manufacturer’s installation guidelines—often due to simple mistakes like the distance from the wall.
So, if you’re wondering whether to push your dryer flush against the wall or leave plenty of room, the answer is clear: follow the manufacturer’s specifications. Doing so not only guarantees proper operation but also protects your investment and the validity of your warranty.
Now, let’s dive into the specific reasons why this simple step can save you hundreds—sometimes thousands—of dollars. Are you prepared to get it right the first time and avoid common pitfalls? I’ll show you how, step by step.
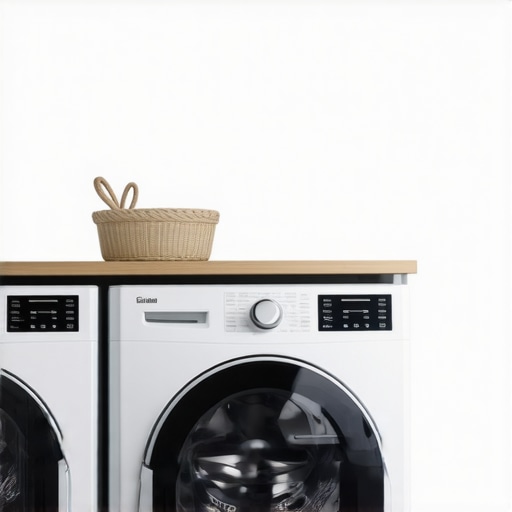
Measure and Leave Adequate Clearance
Start by gathering your dryer’s installation manual and measuring the space behind and in front of the unit. Ensure you leave at least 1 inch (2.5 cm) behind and 6 inches (15 cm) in front, as recommended by industry standards and manufacturer guidelines. I once hurried to set up my dryer without checking these specifics, which resulted in overheating issues within weeks—an expensive lesson learned.
Use a Level and Mark the Position
Place the dryer in its approximate position and use a carpenter’s level to confirm it’s even. Mark the exact spot for the vent, power cord, and supply gas line if applicable. Proper leveling prevents unnecessary stress on connections, reducing the risk of leaks or damage that could void your warranty. I recall struggling with unevenness and having to redo the setup; taking your time here pays off.
Connect the Vent Correctly
Attach the vent hose securely to the dryer’s exhaust port, ensuring it’s not kinked or crushed. Use a transition duct if needed, and make sure the vent pipe extends straight out with no sharp bends. A clogged or improperly installed vent can cause overheating and shorten your dryer’s lifespan. For my own setup, I used a simple flexible vent and made sure it was as straight as possible—this drastically improved airflow and reduced drying time.
Position the Dryer with Safety in Mind
Carefully slide the dryer into place, avoiding pinching the vent or power cords. Do a quick visual check to confirm the unit is not touching the wall and that the clearance space remains intact. This step is crucial—pushing the dryer too close can cause overheating, which not only risks damage but can also void warranty claims. I suggest using adjustable feet to fine-tune the position and maintain the necessary gaps.
Secure Electrical and Gas Connections
Ensure the power cord is plugged into a properly grounded outlet. If your dryer uses gas, connect the supply line securely, avoiding any kinks or leaks. Test the connection by checking for leaks with a soap solution—bubbles indicate issues that must be rectified before use. Remember, improper connections can lead to dangerous situations and void your warranty, so don’t skip this check.
Double-Check Installation Compliance
Review the installation against your dryer’s manual and the [smart home setup rules for a valid warranty](https://discountappliancehub.com/5-smart-home-setup-rules-for-a-valid-2026-warranty). Confirm that all clearances are maintained and connections are tight. I once overlooked a small gap, which caused the dryer to overheat initially—resolving it saved me from a costly repair later.
Test Run and Monitor
Run the dryer for 10-15 minutes and observe for irregular noises, excessive heat, or vibrations. Check the vent exhaust for proper airflow. This initial test helps spot installation issues early, protecting your warranty. I recommend checking the vent and connections after each of the first few uses to ensure everything remains secure and functional.
While many homeowners focus on basic installation tips and prompt repairs, there are subtle pitfalls lurking beneath the surface that can jeopardize your appliance warranty without you realizing it. Let’s explore some less-obvious mistakes and misconceptions that even seasoned DIY enthusiasts often overlook.
First, a common myth is that adhering to the manufacturer’s instructions is sufficient for warranty protection. However, industry experts emphasize that understanding the nuanced requirements—like specific clearance distances, venting directions, and proper grounding—can make the difference between a valid claim and a denied one. For instance, improper vent installation not only speeds up clogging but also directly impacts warranty validity, as highlighted by the National Appliance Warranty Association.
Another overlooked nuance is the significance of regular maintenance and documentation. Many assume that warranty coverage is guaranteed as long as the appliance hasn’t malfunctioned; in reality, failing to perform routine checks or neglecting to keep records of repairs, part replacements, and service calls can be a trap. When a dispute arises, detailed maintenance logs can serve as evidence that you’ve followed best practices—something that’s especially critical when your claim hinges on understanding whether the issue stems from misuse or age.
Additionally, there’s often confusion surrounding same-day service requests. While booking emergency repairs seems straightforward, many don’t realize that the timing alone isn’t enough. The service provider’s credentials, proper diagnostics, and adherence to manufacturer protocols are equally vital. Only then can you guarantee that the repair complies with warranty stipulations. For example, unqualified or unauthorized technicians might fix the appliance incorrectly, unintentionally voiding your warranty.
< h3 >Will Using Non-Authorized Parts Void Your Warranty?Common wisdom advocates using genuine replacement parts. Yet, many believe that as long as the part functions, it doesn’t matter. This is false. Experts warn that installing third-party or counterfeit components can trigger warranty exclusions, as these parts often fail to meet industry standards or interfere with built-in safety features. The impact can be severe, leading to costly damage and the loss of coverage.
To avoid these pitfalls, always review the applicable warranty policies carefully, particularly the fine print concerning installation, repairs, and parts. If you’re unsure about the correct procedures, consulting manufacturer-certified guides or qualified technicians can save you from unintended violations. For detailed insights, see how proper smart home setup rules ensure warranty compliance or explore common errors that immediately void your fridge’s warranty.
Remember, understanding these hidden nuances can safeguard your investment and prevent costly surprises. Have you ever fallen into this trap? Let me know in the comments.
Prioritize Proper Maintenance for Long-Term Performance
Consistent maintenance is key to ensuring your appliances operate efficiently and stay under warranty. I personally swear by establishing a regular cleaning schedule for components like vents, filters, and gaskets. For example, I set a bi-monthly reminder to check my dryer vent for lint buildup, which significantly reduces fire risk and prolongs the appliance’s lifespan. Knowing the inner workings and attending to small issues before they become costly repairs can save you a great deal over time.
Leverage Professional-Grade Diagnostic Tools
To troubleshoot effectively, I rely on professional diagnostic devices like the Fluke Ti100 Thermal Imager. This tool allows me to identify overheating components early—such as hot spots indicating motor issues or blocked vents—which might not be apparent during normal operation. Investing in such tools has paid off by preventing minor problems from escalating into expensive repairs or warranty disputes. These devices work by detecting temperature variations, offering instant visual cues that guide precise maintenance actions.
Implement Smart Monitoring Systems
Smart home technology is transforming appliance maintenance. I use Wi-Fi-enabled controllers like the Samsung SmartThings Hub paired with compatible appliances. These systems provide real-time alerts if something’s amiss, whether it’s a leak, unusual vibration, or a drop in efficiency. I’ve set up notifications that inform me of potential issues — like a clogged vent or a failing component — enabling prompt same-day service if needed. For homeowners, embracing these tools can make maintenance proactive rather than reactive. Learn more about expert-approved smart setup rules to keep warranties intact.
Prepare for Future Trends in Appliance Care
The future of appliance maintenance seems headed toward greater automation. Predictive diagnostics using AI are already being integrated into new models, offering early warnings based on usage patterns and sensor data. Investing now in diagnostic tools and smart systems positions you to benefit from these advancements, minimizing downtime and protecting your warranty. I predict that in five years, even more sophisticated, self-maintaining appliances will become mainstream, emphasizing the importance of choosing the right tools now.
Maintaining Your Appliance’s Health Over Time
How do I maintain my appliances over the long term? I recommend scheduling annual professional inspections, keeping detailed maintenance logs, and staying updated on manufacturer firmware updates. Using reputable, certified repair services—like those reviewed on platforms for authorized technicians—ensures you’re not risking warranty voidance. Remember, proper initial installation and regular upkeep are your best defenses against costly issues down the line. For more insights on avoiding common pitfalls, check out our guide to smart home setup rules for a valid warranty.
Don’t forget: leveraging advanced tools like thermal imagers or monitoring systems isn’t just tech jargon; it’s a practical step toward preserving your appliances and warranty coverage. Try integrating a smart diagnostic app or device into your routine this month and experience the peace of mind it brings.
Lessons That Changed My Approach to Appliance Care
- One of the hardest lessons I learned was that even small installation mistakes, like leaving too little clearance behind a dryer, can void an entire warranty. Years ago, I ignored the recommended 1-inch gap, and it cost me dearly when overheating caused a costly repair. Now, I know that attention to these details can save hundreds or even thousands of dollars in the long run.
- Another insight was realizing that manufacturer specifications aren’t just suggestions—they’re critical for warranty validation. Cutting corners by improvising with venting or clearance can seem harmless but often results in denied claims. I now double-check every guideline and keep a copy of the manual handy.
- Lastly, I discovered the importance of documenting maintenance and repairs. Regular logs and photos of proper setup not only help with warranties but give peace of mind. When my dryer finally needed a new vent, having documented my adherence to the standards made the warranty claim smoother and faster.
Tools and Resources That Keep My Appliance Warranties Intact
- Smart setup rules – Following up-to-date smart home guidelines ensures I don’t accidentally void my warranty when installing or upgrading appliances.
- Verified repair services – Knowing how to identify authorized technicians prevents unintentional warranty violations during repairs.
- Vent maintenance tips – Regular cleaning and correct venting prevent overheating and extend appliance life, preserving warranty coverage.
- Installation mistakes to avoid – My go-to resource for troubleshooting common errors that void warranties before they cause expensive damage.
Your Next Step in Securing Appliance Peace of Mind
Embarking on the journey of proper appliance installation and diligent maintenance is a commitment—one that pays dividends in peace of mind, saved costs, and lasting performance. Remember, a little extra effort protecting your warranty today ensures many worry-free years of appliance use tomorrow. Why not start by reviewing your current setup and making sure it aligns with manufacturer guidelines? Your future self will thank you for it. Have you encountered a tricky installation or maintenance challenge? Share your experience below and join the conversation in building a community of informed homeowners ready to protect their appliances and investments.