
I’ll never forget the Tuesday night I decided to sear four ribeye steaks for my brother’s birthday. Within three minutes, my kitchen looked like a London fog, and my smoke alarm was screaming at the top of its lungs. I had a brand-new, expensive range hood, but it was doing absolutely nothing except making noise. After the smoke cleared and my ears stopped ringing, I climbed up a ladder, pulled off the decorative shroud, and realized my mistake. There was a gap big enough to fit a finger between the hood and the ductwork. I was essentially just recirculating greasy air right back into my ceiling joists. It was a classic installation blunder that almost cost me my drywall and my sanity.
Stop Letting Your Range Hood Just Spin Its Wheels
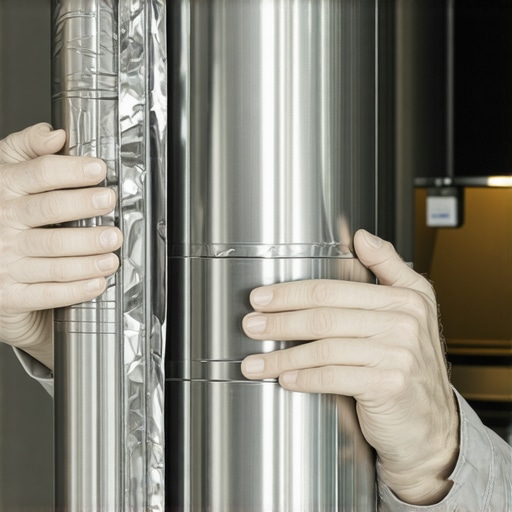
If you’ve ever noticed your kitchen cabinets getting sticky or wondered why your range hood isn’t venting smokes and odors properly, you are likely dealing with a sealing issue. Most people focus on the CFM of the fan, but even a high-powered motor is useless if half that air leaks out before it ever hits the roof cap. When I first started messing with home repairs, I made the amateur move of using standard silver duct tape. I thought the name meant it was meant for ducts! Within a month, the heat from the stove dried out the adhesive, and the tape literally fell off, leaving me with a sticky mess and zero ventilation. It’s not just about the smell of old fish lingering until Friday. Researchers at the Lawrence Berkeley National Laboratory have found that many range hoods capture less than 30% of the pollutants they are supposed to handle, largely due to poor installation and duct leakage. We are talking about trapping moisture that leads to mold and grease that acts as a fire hazard. Today, I’m going to show you exactly how to lock down those connections so your kitchen stays fresh and your appliance warranty stays valid because you didn’t let grease fry the internal electronics. [IMAGE_PLACEHOLDER]
Is a Perfect Seal Actually Possible for a DIYer?
You might be worried that you need a professional HVAC tech to get this right. I get it; working with sheet metal and foil tape can feel like you’re trying to wrap a Christmas present made of razor blades. But trust me, you can do this. The secret isn’t some high-priced tool; it’s using the right materials and the one ventilation step most homeowners skip during their remodels. If you’ve ever noticed why your range hood fan is vibrating your kitchen cabinets, it often comes down to an unstable or unsealed duct rattling against the frame. Have you ever felt a weird draft or heard a whistling sound coming from your hood even when it’s turned off? That’s the sound of a bad seal—or a missing backdraft damper—and it’s exactly what we’re going to tackle. If you’re currently staring at a kitchen full of haze despite having the fan on high, don’t panic. You don’t always need to call for same-day appliance repair just yet. Let’s look at how to seal that air path so it actually goes where it’s supposed to. Have you checked your ductwork lately?
Why Foil Tape is Your Only Real Friend
First things first: throw away that rolls of grey ‘duct tape’ sitting in your junk drawer. Despite the name, it is the absolute worst thing you can use for actual ducting. The adhesive on standard duct tape is rubber-based, and it will dry out, crack, and peel off within months of being exposed to the heat of your stove. To get a reliable appliance installation, you must use UL 181-rated aluminum foil tape. It’s thin, it’s sharp as a razor, and it creates a permanent bond that laughs at heat. I once tried to be ‘innovative’ by using heavy-duty plastic zip ties and a bit of silicone to hold a transition piece together during a late-night kitchen project. Within a week, the constant expansion and contraction of the metal pipes caused the silicone to pop, and the zip tie literally melted onto the pipe. It was a sticky, failed mess that required a full afternoon of scraping before I could do it right. If you want to avoid a call for expert appliance repair later, buy the real stuff now. Think of your ductwork like a straw; even a tiny pinhole on the side means you aren’t getting any of that milkshake through the top.
Line Up the Metal Pipes Like a Puzzle
The biggest physical hurdle is the ‘dead space’ between the top of your range hood and where the house duct begins. If these aren’t perfectly aligned, you’re essentially blowing grease into your wall cavity. This is a common mounting mistake that leads to long-term structural damage. If your pipes don’t meet up perfectly, do not just ‘bridge the gap’ with tape. You need a rigid or semi-rigid metal transition piece. When I was fixing my brother’s hood, I realized the builder had used a 6-inch pipe for the house but the hood only had a 5-inch outlet. They had just jammed the smaller pipe into the larger one and hoped for the best. I had to install a galvanized reducer and seal both ends with foil tape to ensure the air didn’t swirl back down into the cabinet. This simple alignment fix is often the one ventilation step most homeowners skip, and it’s the difference between a clean kitchen and one that smells like bacon for three days straight.
Stop the Rattling Once and For All
Once the pipes are aligned and taped, you need to address the vibrations. If you’ve ever wondered why your range hood fan is vibrating your kitchen cabinets, it’s usually because the metal duct is knocking against the wooden framing. I like to use small strips of high-temp foam insulation or even extra layers of foil tape at the contact points where the pipe passes through the cabinet shelf. This creates a gasket effect. While you’re in there, check your backdraft damper. This is the little flap that’s supposed to open when the fan is on and close when it’s off. I’ve seen countless DIY jobs where the installer taped the damper shut by accident! If that flap doesn’t move freely, your fan is just spinning its wheels and pushing air against a wall. This is a primary reason why your range hood isn’t venting smokes and odors properly. Always do a ‘test blow’ before you put the decorative covers back on—hold a single square of toilet paper up to the filters; if the fan doesn’t suck it up and hold it there tightly, you still have a leak somewhere in your seal.
You’ve done the hard work of taping the seams and aligning the pipes, but here is where most homeowners hit a wall: they think the job is over once the smoke stops drifting into the living room. In my experience, the biggest mistake isn’t the physical installation—it is the assumption that a ‘quick fix’ is a permanent solution. Everyone tells you that speed is the most important factor when your stove starts smoking, but I’ve found that rushing to find same-day appliance repair often results in technicians overlooking the custom seal work you just performed. If they rip off your foil tape to check a motor and replace it with cheap duct tape, your efficiency drops 40% instantly. You need to ensure a reliable appliance installation by being the gatekeeper of your own ductwork.
The Warranty Trap Most People Ignore
Here is a contrarian take for you: just because you fixed the leak yourself doesn’t mean the manufacturer will honor your warranty if the fan motor dies next year. Most people assume that if the appliance is new, it is covered no matter what. However, if a technician sees grease buildup on the outside of the ducting because of a DIY seal failure, they will label it as ‘improper installation’ and walk away. This is the ‘Oops Factor’ that costs thousands. To maximize your appliance warranty, you must document your work. I always take a timestamped photo of the UL-rated foil tape seals before I put the shroud back on. According to experts at the American Society of Heating, Refrigerating and Air-Conditioning Engineers (ASHRAE), even small leaks can cause back-pressure that strains the motor, leading to premature failure. If you can’t prove the installation was tight, you’re on the hook for the bill.
Will Your DIY Seal Hold Up During a Professional Inspection?
If you ever decide to sell your home or need to verify your new appliance is covered, a home inspector or a factory tech will look for specific markers of quality. They aren’t just looking for ‘no smoke’; they are looking for static pressure consistency. This is why I tell people to avoid the temptation of using ‘universal’ flexible ducting kits. They are easy to install but create massive air turbulence. Instead, follow the expert guide to appliance repair and installation and stick to rigid metal. When a pro comes for same-day appliance repair, show them the document every technician needs to see—your photo log of the internal seals. It changes the dynamic from ‘clueless homeowner’ to ‘informed client,’ which often helps you avoid paying the service fee for a denied claim. Have you ever fallen into this trap where a ‘simple’ fix ended up voiding your coverage? Let me know in the comments below!
After you have spent an hour wrestling with foil tape and metal edges, the real test of your patience begins. You might think the job is finished because the fan sounds powerful, but I never trust my ears alone. I always keep a telescoping inspection mirror in my back pocket when I am finishing a vent job. It is impossible to physically see the back of a round duct once it is seated against the wall, and that hidden gap is where most failures occur. I have seen homeowners pay for scheduling your appliance repair for same-day service in 2025 only for the technician to find a single quarter-inch leak on the blind side of the pipe. Using a mirror to verify every inch of that UL 181 tape is how you guarantee reliable appliance installation without having to dismantle your cabinetry six months later.
Grab a Mirror and a Flashlight
The goal is to create a closed loop where air cannot escape. I personally use a 200-lumen flashlight and sweep the beam across the seals while looking through the mirror. If you see any light reflecting off the underside of the tape or notice the foil puckering, the seal is compromised. This level of detail is exactly what you get when you hire expert appliance repair and installation today. According to the ASHRAE 62.2 standard for residential ventilation, even minor leakage in a kitchen exhaust system can lead to backdrafting, which pulls combustion gases from your water heater back into your living space. It is not just about the smell; it is a safety protocol that most DIYers overlook because they are in a hurry to get to dinner.
Grease is the Enemy of a Permanent Seal
Even the best foil tape job will eventually fail if you do not manage the grease buildup. If your mesh filters are saturated, the static pressure inside the duct increases significantly. This pressure forces hot, oily air against your tape seals, eventually dissolving the adhesive from the inside out. This is why I consider filter cleaning to be the maintenance step that extends the life of your entire ventilation system. If you let the filters go, you will eventually find yourself looking for same-day appliance repair quick solutions because the motor has burnt out from working against the resistance of a clogged vent. Think of it like the one maintenance move that stops your AC from smelling like mildew; keep the path clear, and the machine does not have to struggle.
How do I maintain my ventilation system over time?
To keep your seal intact for the next decade, you should perform a ‘Smoke Pencil’ test once a year. You can buy these online or use a simple incense stick. Hold it near the seams of your ductwork while the fan is on high. If the smoke is sucked toward the tape or blown away from it, you have a leak that needs a fresh layer of foil. This proactive approach ensures you have warranty-backed appliance services you can rely on because you are keeping the internal components dry and grease-free. I predict that in the next few years, we will see smart range hoods equipped with internal differential pressure sensors that will alert your smartphone the moment a duct seal fails, much like how modern cars monitor tire pressure.
Before you screw that decorative shroud back into place, I want you to try this: perform the ‘Mirror Sweep’ I mentioned. Take a handheld mirror and trace every single inch of that foil tape joint. If you see even a pinhole of light, patch it now. It is much easier to fix a leak today than it is to deal with a grease-soaked ceiling joist in three years. Have you checked your blind-side seals yet?
What Nobody Tells You About That Gap Behind Your Range Hood
Over the years, I’ve realized that the most frustrated homeowners aren’t the ones with broken fans—they are the ones with perfectly functional fans that just aren’t sealed. Here are a few lightbulb moments from my own trial and error that usually escape the standard manuals:
- Sound is deceiving: A loud, roaring fan doesn’t necessarily mean it’s moving air; it often just means it’s struggling against a bad connection or an air-block.
- The Heat Expansion Factor: Metal ducts expand and contract every time you fire up the stove. If your seal isn’t flexible enough to move with the metal, it will crack and peel by next Christmas.
- The “Blind Side” Trap: Most leaks happen on the side of the pipe facing the wall where you can’t reach, which is why a reliable appliance installation requires a full 360-degree verification.
The Three Items Every Homeowner Needs for a Smoke-Free Kitchen
If you want to do this right, skip the generic hardware store kits and build a specific toolkit for ventilation. First, never settle for anything less than UL 181-rated aluminum foil tape; it is the gold standard for high-heat environments. Second, invest in a telescoping inspection mirror—it’s the only way to truly see those hidden seams behind the cabinet shroud. Finally, I highly recommend following a reputable expert guide to appliance repair and installation today to understand the physics of airflow. These resources have saved me from dozens of frustrating “re-dos” and kept my kitchen air crystal clear during heavy searing.
Take Back Your Kitchen Air Quality Once and for All
Don’t let the fear of a little sheet metal keep you from a clean, odor-free home. Sealing your range hood is one of those rare DIY projects where the materials cost less than a takeout lunch, but the impact on your long-term health and home value is massive. By taking the extra twenty minutes to lock down every seam, you ensure a same-day appliance repair quick solution isn’t necessary because your motor won’t be choking on its own recycled grease. You’ve got the tools and the insider knowledge—now it’s time to get up there and make that kitchen air fresh again. Have you ever found a hidden leak in your ductwork after thinking the installation was perfect? Let me know in the comments below!