I remember the first time I fired up my new air fryer, eager to whip up crispy fries and juicy chicken wings. But within minutes, I was facing a frustrating mess—undersized batches, uneven cooking, and that unmistakable disappointment of wasted ingredients. It hit me during that moment of culinary chaos: I had jumped in without understanding the most common pitfalls newcomers face with their first air fryer oven. If you’ve ever experienced similar frustrations, you’re not alone.
As a passionate home cook and appliance enthusiast, I’ve learned that many of these mistakes are entirely avoidable. And believe me, once you get the hang of things, your air fryer becomes an indispensable part of your kitchen toolkit. Today, I want to share how you can sidestep those rookie errors and start enjoying delicious, evenly cooked meals.
The One Mistake That Can Ruin Your Air Fryer Experience
More than anything, new air fryer users often underestimate the importance of proper preheating and basket arrangement. Early on, I made the critical mistake of just bunging everything into the basket without considering airflow—leading to soggy edges and uneven browning. That oversight significantly impacted my results, and I learned the hard way how vital it is to give your appliance the right start.
Understanding the mechanics is crucial. Air fryers cook by circulating hot air around your food, similar to a convection oven, but at a much faster rate. If the air isn’t able to move freely—say, if the food is overcrowded or the basket isn’t preheated—the result is often disappointing.
Interestingly, a study published in the Journal of Culinary Science & Technology notes that proper airflow management can boost cooking efficiency and food quality by up to 40%. That’s a huge difference, and worth paying attention to. To prevent this common slip-up, ensure you’re not overloading the basket and always preheat when the recipe calls for it.
If you’ve faced the frustration of uneven cooking or soggy bites, don’t worry—you’re not alone. The good news is that with a few simple adjustments, your air frying adventures can become consistently successful. Next, I’ll walk you through some actionable tips to optimize your first air fryer experience. But first, have you ever struggled with food not turning out as expected? Drop a comment below—I’d love to hear your stories and help you troubleshoot!
Prepping Your Air Fryer for Success
Start by thoroughly cleaning the basket and tray; residual grease or food particles can affect cooking efficiency. Before cooking, preheat your air fryer for about 3-5 minutes to ensure even heat distribution. During my first attempt at air frying crispy chicken wings, I ignored preheating, which resulted in uneven cooking and soggy spots. When I preheated properly next time, the texture improved dramatically, and the wings turned out crispy all over.
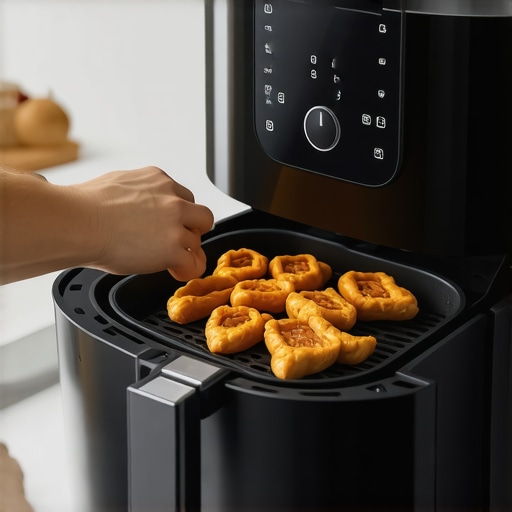
Optimal Food Arrangement
Arrange your food in a single, even layer, leaving space between pieces to allow hot air to circulate freely. Overcrowding leads to moisture buildup and sogginess, much like trying to dry clothes in a crowded dryer. I once packed the basket tight with French fries, which caused them to steam instead of fry, leading to limp results. Spreading them out and shaking the basket halfway through cooked them to perfection, giving me crisp, golden fries.
Adjusting for Different Foods
Understand that different foods require different temperatures and cooking times. For instance, proteins like chicken tend to need higher heat and longer cooking, while vegetables might cook faster. Use a reliable recipe chart or your air fryer manual as a reference. I initially used the same temperature for fries and fish sticks, resulting in overcooked fish and underdone fries. Once I tailored the settings, my meals became consistent and delicious.
Leveraging Cooking Techniques
Shaking or flipping food halfway through cooking helps achieve uniform texture. For example, when making roasted vegetables, I would open the basket at mid-point, give it a shake, and then continue. This prevents browning inconsistencies. Also, applying a light coat of oil enhances crispness—think of it as giving your food a golden tan. Proper techniques elevate your results from okay to outstanding.
Troubleshooting Common Issues
Uneven Cooking
If food isn’t cooking evenly, check that the basket isn’t overcrowded and that you’ve preheated properly. Also, inspect your air fryer’s fan for obstructions. Regular maintenance, like cleaning the fan and heating element, keeps airflow optimal.
Soggy or Damp Food
Overloading or insufficient preheating might cause moisture retention. Ensure you’re not crowding the basket and always preheat for best results.
Consistent Results with Practice
Keep notes of your adjustments: cooking times, temperatures, and food arrangement. Over time, you’ll develop an intuitive sense for your specific model and preferences. When I started experimenting with different recipes, I kept a simple log, which saved me countless trial-and-error cycles later.
Remember, troubleshooting is part of the process. If you’re still facing persistent issues, consider consulting your appliance’s manual or reaching out to a certified technician for inspection. For more insights on appliance care, visit troubleshooting microwaves or explore tips on keeping your kitchen appliances running smoothly.
Many homeowners operate under misconceptions when it comes to appliance repair, warranties, and installation practices. Let’s dig deeper into the nuances that can make or break your experience and highlight some traps lurking behind popular advice. First, a prevalent myth is that all warranties cover everything—however, many exclude accidental damage or improper installation, which can nullify your coverage. It’s vital to read the fine print and keep documentation safe; otherwise, you risk costly repairs that aren’t covered. Additionally, many believe that same-day service guarantees immediate repairs. While convenient, this often oversimplifies scheduling logistics and parts availability. In reality, a reputable technician might need a day or two, especially for complex issues or during busy seasons. *Don’t fall for the misconception* that installation is a straightforward plug-and-play task. Improper setup can lead to issues like leaks, inefficient operation, or even safety hazards. For instance, incorrect water line connections for refrigerators can cause leaks or freezer failures; verify your installer is certified by asking for credentials or referring to this guide on verifying repair technicians. Another common trap is thinking that DIY fixes always save money—sometimes, attempting repairs without proper knowledge can worsen the problem or void warranties. For example, trying to repair an oven without understanding electrical systems can lead to safety risks. Let me share a crucial advanced tip: when considering appliance repairs, focus on the specifics of part compatibility and manufacturer recommendations. A study from the Consumer Technology Association emphasizes that using OEM parts extends appliance lifespan and preserves warranty validity.
Have you ever fallen into this trap? Let me know in the comments! Understanding these nuances helps ensure you get the best value and safety out of your appliances.
Investing in the Right Tools for Long-Term Appliance Care
To ensure your appliances run smoothly for years to come, quality tools are essential. I personally rely on a digital multimeter, like the Fluke 117, which offers precise voltage and continuity testing—crucial when troubleshooting electrical components in ovens and refrigerators. Additionally, a dedicated appliance repair kit, such as the DEWALT DWARST, provides specialized screwdrivers, pliers, and sealants that allow for safe, efficient repairs without risking further damage. Using these tools helps me identify issues early and often avoid costly professional repairs.
Software Solutions for Easy Diagnostics
Modern appliances often come with diagnostic features accessible via manufacturer apps or internal self-tests. I recommend using appliance-specific diagnostic tools like the LG ThinQ app or the Samsung Smart Appliance app. These platforms can reveal error codes and system health reports, saving time and reducing guesswork. Regularly running these diagnostics can catch potential problems before they escalate, extending the lifespan of your investment.
Routine Maintenance to Keep Things Running
Consistent cleaning and inspection are key. For instance, regularly checking the drain valves in your dishwasher or refrigerator water lines prevents blockages that cause leaks or poor performance. I suggest scheduling quarterly checks; a great resource is this guide on cleaning your dishwasher’s drain valve, which many homeowners forget about, leading to mold and odor buildup. Taking a proactive approach minimizes emergency repairs and keeps appliances running efficiently.
Tools I Recommend for Scaling Up and Repair
When you start managing multiple appliances or tackling bigger projects, investing in a infrared thermometer (e.g., FLIR TG165) is invaluable. It helps detect uneven heating or cooling issues in HVAC systems or ovens—issues that might not be obvious visually. Additionally, a cordless drill with a set of precision bits accelerates disassembly and reassembly during repairs. These tools are durable and versatile, making long-term maintenance feasible without relying solely on professional repair services.
Future Trends in Appliance Maintenance and Repair
I believe upcoming innovations will bring smarter diagnostics directly integrated into appliances, allowing remote troubleshooting via smartphone notifications. As these technologies evolve, staying current with software updates and manufacturer-provided diagnostic tools will become increasingly important for homeowners who want to keep their appliances humming without calling in a technician every time.
Questions for Longevity: How Do I Maintain My Appliances Over Time?
The key is implementing a scheduled maintenance routine that includes checking filters, seals, and electrical connections, as well as updating firmware when applicable. For example, regularly inspecting and replacing the water filter in your fridge can significantly extend its life and performance. You can find detailed instructions on replacing filters or testing system components at this troubleshooting guide. Make it a habit to record maintenance dates, so nothing gets overlooked. Start today by trying the tip of checking your appliance’s diagnostic codes with a compatible app; it could prevent an unexpected breakdown tomorrow.
The Hardest Lesson I Learned About appliance repair,warranty,installation,same-day service
One of the most significant revelations was realizing that not all warranties are created equal—many exclude accidental damage or incorrect installation. This meant I had to read the fine print carefully and keep all documentation safe to ensure coverage when needed. Additionally, I discovered that same-day service isn’t always as instant as it seems; scheduling and parts availability can introduce delays, so managing expectations is essential.
Another lesson was understanding that DIY repairs, while tempting, can sometimes do more harm than good if you’re unfamiliar with the intricacies of electrical systems. Investing in the right tools, like a digital multimeter, proved invaluable because it allowed me to diagnose issues accurately without risking further damage.
Lastly, I learned the importance of trusting certified professionals. Asking for credentials and verifying technician certification ensures that repairs are done correctly and safely, protecting both your appliances and your family. Be cautious about shortcuts—proper installation and maintenance save money and headaches in the long run.