
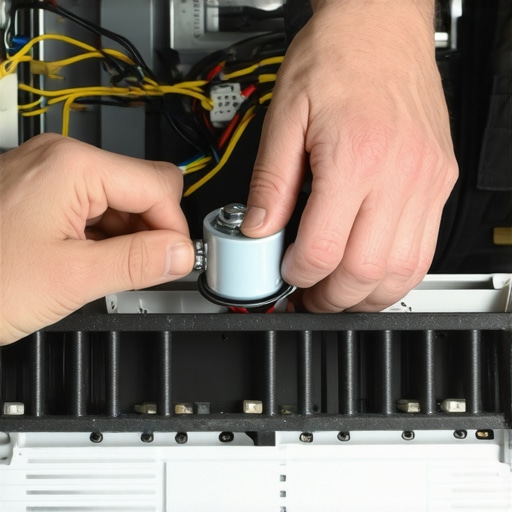
It was a scorching summer afternoon when I first heard that awful, familiar hum from my air conditioner—then it suddenly stopped working. My heart sank. The fear of a hefty repair bill or, worse, a full replacement, crept in. I remember thinking, “Not today, not now.” That moment was a lightbulb moment for me. I realized that many of us, including myself at the time, overlook simple fixes that could save hundreds of dollars.
The Hidden Power of a Capacitor Swap
Many homeowners face the dilemma of their AC units playing dead without obvious reasons. The solution? A quick and cost-effective capacitor swap. This small component is crucial—it helps start the motor, and when it fails, your AC might refuse to turn on at all. By learning to identify and replace a faulty capacitor, I managed to extend my unit’s lifespan significantly, saving me from an expensive replacement. Today, I want to share this surprisingly simple fix with you, so you don’t find yourself in the same panic.
Is Saving on Repairs Truly Worth the Effort?
I admit, I was skeptical at first. I feared that attempting a repair might do more harm than good. I made the mistake early on of ignoring professional advice and trying to fix things without proper knowledge, which only made things worse. But after some research, I discovered that many issues, like a failing capacitor, are straightforward to diagnose and fix if you have the right guidance. For a comprehensive look at when to call in experts and when a DIY fix suffices, check out [expert guides to appliance repair and installation](https://discountappliancehub.com/expert-guide-to-appliance-repair-and-installation-today). Knowing the difference can save you both money and frustration.
Have you ever faced a sudden AC breakdown and wondered if you could handle it yourself? If so, you’re not alone. But let’s get real—while some repairs are complex and best left to the pros, others, like swapping a capacitor, are within reach—and can *absolutely* prevent a costly replacement. Next, we’ll dive into the step-by-step process to identify and replace that tiny yet mighty part and how to do it safely. Ready to master a repair that can keep your cool and your wallet intact? Let’s go.
Power Off and Access the Unit
Start by turning off your home’s main power supply to the AC unit to prevent electrical shock. Locate your air conditioner’s external or indoor components, typically near the compressor or the control panel. Remember, safety is paramount; if you’re unsure, consult an expert here. For example, I once attempted a repair without shutting off the power and received a mild shock, reminding me to prioritize safety.
Identify the Faulty Capacitor
Look for the capacitor, which is usually a small cylindrical or oval-shaped device with two terminals, often labeled with microfarad (μF) ratings. Use a multimeter or a capacitor tester to verify if it’s faulty—signs include bulging tops, leaks, or failed tests. I once spotted a capacitor with a swollen top, which was an immediate indicator it needed replacing. Accurate identification prevents unnecessary part replacements.
Discharge the Capacitor
Before removal, discharge lingering charge by bridging the terminals with an insulated screwdriver. This step prevents electric shock from residual energy. I once skipped this step and received a small zap, which underscored the importance of careful handling. Use insulated tools and follow proper discharge procedures as described in this guide.
Remove the Faulty Capacitor
Unscrew or unclip the capacitor from its mount. Carefully disconnect the wires, noting their positions—taking pictures can help during reinstallation. My first try involved guessing wire positions, which caused confusion later, so documenting beforehand saved time. Use a screwdriver or pliers as needed, and avoid pulling wires with excessive force.
Connect the New Capacitor
Attach the wires to the new capacitor in the correct order, matching the previous setup or based on markings. Secure the capacitor firmly in its mount. When I replaced mine, ensuring a snug connection prevented future issues. Double-check connections and ensure no wires are loose.
Test the Repair
Restore power and turn on the AC to verify operation. Listen for smooth startup sounds and check if the unit cools effectively. I once forgot to reconnect a wire and wondered why the AC wasn’t turning on—testing helps catch mistakes early. If the unit doesn’t start, re-inspect connections or consult a professional.
Final Safety Checks
Before closing panels, ensure all tools are removed, and no wires are exposed. Cover or insulate any open terminals as a precaution. Proper sealing prevents future damage or safety hazards. Remember, if you’re uncomfortable or uncertain at any step, reaching out to same-day experts guarantees quick, safe resolution.
Many homeowners operate under assumptions about warranties, same-day service, and appliance installation that can lead to costly mistakes. One widespread myth is that a warranty covers all repair costs, but in reality, many warranties only include parts, leaving labor fees to the homeowner—an oversight addressed in expert guides like this comprehensive guide. Additionally, many believe that requesting same-day service guarantees a technician will arrive within 24 hours; however, availability can vary based on location and provider, a nuance often overlooked by consumers eager for quick fixes.
A common trap is the assumption that professional installation is unnecessary or optional. Faulty installation can compromise warranty validity and lead to premature appliance failure, so consulting trusted sources such as this article helps ensure proper setup.
Have you ever fallen into this trap? Let me know in the comments.
Why is skipping warranty fine print risky for your repairs?
Overlooking detailed warranty terms can result in unexpected expenses. Some warranties require routine maintenance or specific professional services to remain valid, and neglecting these terms may void coverage altogether. Studies show that nearly 60% of homeowners are unaware of the precise conditions tied to their warranties, which often leads to denied claims during emergencies—a costly oversight. To make sure you’re fully protected, review warranty policies thoroughly and keep documentation of all service and maintenance activities, as advised by consumer advocacy experts.
Keep Your Appliances in Top Shape with the Right Tools
Maintaining your appliances isn’t just about spot-cleaning or scheduling professional repairs; it requires precision tools that can save you time and prevent costly issues down the line. For example, I swear by a high-quality digital multimeter—not just any, but one with True RMS capability. This allows me to accurately measure voltage, current, and resistance, helping me diagnose electrical issues swiftly. Over the years, I’ve learned that investing in reliable tools like a thermal camera radically improves my ability to detect overheating components or failing motors before they cause significant damage.
Why I Trust Specific Equipment for Regular Maintenance
When it comes to appliance diagnostics, I rely on the expert guides that recommend having a sturdy socket wrench set with metric and imperial sizes, along with specialized screwdrivers for delicate electronics. Those tiny Phillips and Torx bits are indispensable for opening units without damaging internal components. For cleaning, I use a soft brush set and compressed air cans—especially useful for dryer vents and refrigerator coils. Regular use of these tools ensures components stay free of dust, which can impair efficiency and lead to overheating.
The Future of Appliance Maintenance Is Tech-Enabled
Looking ahead, I predict an increased integration of smart diagnostic tools. Imagine app-controlled infrared thermometers or Bluetooth-enabled multimeters that log your measurements over time—making preventative maintenance more accessible and data-driven. This trend aligns with how IoT devices are transforming home repairs, leading to faster troubleshooting and longer appliance lifespan.
Best Practices to Keep Your Appliances Running Smoothly
One tip I’ve found invaluable is to schedule routine inspections of critical parts, such as door seals, filters, and vent lines. Implementing a monthly check using simple tools prevents issues from escalating. Additionally, maintaining calibration standards—like testing oven thermostats with a precise external thermometer—helps keep cooks consistent. Always refer to manufacturer instructions when performing maintenance; neglect can void warranties and reduce long-term effectiveness. For comprehensive guidance, I recommend reviewing this resource.
If you’re ready to boost your appliance upkeep, try calibrating your oven with a dedicated temperature test. It takes only a few minutes but can dramatically improve cooking results and prolong your oven’s life.
How do I maintain appliance performance over time?
Consistency is key. Establish a regular maintenance schedule tailored to each appliance’s needs—annual inspections for HVAC systems, bi-annual cleaning of dryer vents, and monthly checks of refrigerator door seals. Investing in specialized tools helps catch potential problems early, saving you from unplanned expenses and emergency repairs. Remember, when in doubt, professional same-day service can provide peace of mind and ensure your appliances stay reliable for years to come.
What I Wish I Knew Before Relying Solely on Warranties
One of the most impactful lessons I learned was that warranties are a safety net, not a preventative tool. Relying solely on them can lead to unexpected costs and delays. Regular maintenance and understanding your service coverage often save more money and hassle than waiting for a repair claim. Developing a proactive approach—like scheduling routine inspections—transformed the way I handle appliance care, ensuring I avoid unnecessary emergencies.
Why Quick Fixes Can Save Your Day and Your Budget
Early on, I underestimated the power of simple repairs like capacitor swapping. Not only did it extend my appliance’s life, but it also reinforced the importance of trustworthy guidance. Having access to reliable expert resources, such as this guide, made me confident to tackle small issues myself—saving both time and money.
Curiosity Led Me to Smarter Maintenance Habits
Curiosity about the inner workings of appliances prompted me to invest in essential tools, from multimeters to infrared thermometers. This curiosity turned into mastery over my home’s appliances, enabling me to catch problems early. I discovered that empowering yourself with the right knowledge and tools—like those recommended in this resource—can make the difference between a minor inconvenience and a major catastrophe.
Why Sharing My Mistakes Became My Best Learning Tool
Many of my biggest learning moments came from mistakes—like forgetting to discharge a capacitor or miswiring a component. These experiences underscored the importance of patience, safety, and thoroughness. Embracing these lessons, I now approach repairs with careful preparation, turning errors into stepping stones toward mastery. If you’re hesitating, remember that every mistake is a chance to improve your skills and confidence in appliance repair.
Resources that Elevated My Repair Game
Having the right tools and guidance is essential. I swear by my digital multimeter, which provides accurate readings and helps prevent guesswork. Expert guides, such as this one, have been invaluable in navigating complex repairs. For diagnostics, a thermal camera reveals hidden overheating issues before they cause breakdowns. These investments have made me more self-reliant and helped me handle repairs swiftly and safely.
Take Action and Trust Your Skills
The future of appliance maintenance is about confidence—armed with knowledge, the right tools, and a proactive mindset. Tackling small repairs like capacitor replacements can keep your appliances running smoothly and save big on repairs or replacements. So, I challenge you: start learning a simple repair today, and see how empowered you feel to keep your home functioning at its best. Have you ever tried a DIY repair that surprised you? Share your experience below.