
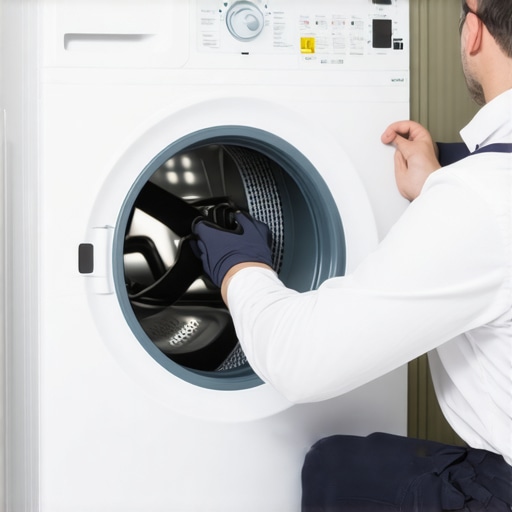
It was a chilly Saturday morning when my trusty dryer decided to make a racket loud enough to wake the neighbors. I could feel it thumping, rattling, and generally throwing a tantrum. My first instinct was panic—what did I do wrong? Turns out, I’d overlooked a simple part that had worn out over time: the dryer belt. That moment was a real lightbulb for me—sometimes, it’s just the belt, not a full-blown appliance crisis.
Why Getting to the Bottom of That Thump Matters More Than You Think
Dealing with a thumping dryer isn’t just annoying; it can lead to bigger issues if ignored. You see, when the belt wears out or slips, it affects the entire drum’s rotation, causing uneven wear and potential motor strain. I learned that a small problem like a worn belt can escalate into costly repairs or even shorten the lifespan of your appliance. Trust me, I’ve been there—early on, I made the mistake of ignoring that strange noise and hoping it would just disappear. Spoiler: it didn’t.
Getting ahead of these signs can save you money and frustration. That’s why I started digging into how to spot, replace, and even prevent belt issues. And believe me, it’s not as complicated as it sounds. In fact, a lot of times, it’s just a matter of being familiar with the common wear parts. Want to know how I tackled my problem? Stick around—by the end of this, you’ll be ready to handle your own dryer’s belt with confidence.
Will Replacing the Belt Really Save Me a Ton of Money?
I remember thinking, “Is it really worth the effort to replace that belt myself?” Well, initial fears held me back—what if I messed up, or what if I couldn’t find the right part? But I actually learned that DIY replacements not only save money but also give you a sense of accomplishment. According to appliance repair experts, many common issues like a thumping dryer are straightforward fixes if you have the right guidance. Plus, understanding these basics allows you to maximize your appliance warranty benefits—something you should definitely consider before calling in a pro. For more on how to make warranties work for you, check out [this helpful guide](https://discountappliancehub.com/maximize-your-appliance-warranty-during-emergency-repairs).
So, have you ever faced a similar issue where a minor problem turned into a major headache? If so, you’re not alone. But knowing what steps to take can make all the difference. And that’s exactly what I’ll walk you through next—step-by-step to replace that belt and get your dryer running smoothly again.
Gather Your Tools and Parts
Before diving into the repair, assemble everything you’ll need: a new dryer belt suitable for your model, a screwdriver, a socket set, and possibly pliers. I once made the mistake of not double-checking the belt size, leading to a frustrating return trip. Confirm your dryer model and purchase the correct belt to avoid delays.
Unplug and Prepare the Dryer
Safety first—unplug the appliance from the power source. Move the dryer to a spacious area where you can access all sides easily. Remove the lint filter and detach the top panel by unscrewing the screws along the back. This step is akin to opening a car hood to access its engine; a little effort now saves time later.
Access the Drum and Belt Area
Carefully lift the top panel, and then remove the front panel or the lower kick panel if necessary, to locate the drum. I once struggled because I didn’t realize I needed to remove the control panel first; checking your model’s manual can clarify such nuances. Once accessible, inspect the old belt and note its routing path.
Remove the Old Belt
Loosen the tension pulley—sometimes called a idler pulley—by sliding or unscrewing it, depending on your model. Carefully slide the worn belt off the pulleys. Remember, the belt’s routing is critical; take a picture or draw a diagram to ensure correct installation of the new one. I learned this the hard way after reassembling my dryer wrong, causing it to not spin properly.
Install the New Belt
Loop the new belt around the drum, following the routing path you documented. Thread it over the tension pulley and make sure it seats properly on the motor pulley. Use your manual or the diagram you sketched; many models have a specific belt trajectory. Once in place, rotate the drum gently by hand to check for smooth movement without binding.
Test Tension and Alignment
Ensure the belt is seated correctly and tensioned properly. Too tight, and it could strain the motor; too loose, and the drum won’t turn. Spin the drum manually; it should turn smoothly without slipping. I once forgot to re-engage the tension pulley fully, which caused a squeaking noise during operation—an easy fix once identified.
Reassemble and Verify
Replace all panels and screws, then plug in the dryer. Before returning it to its usual spot, run a short cycle to verify operation. Watch for smooth spinning and listen for any unusual noises. Remember, if you’re unsure or uncomfortable with any step, professional same-day appliance repair services can be a quick and reliable alternative—check this guide for more info.
Protect Your Repair With Warranty
Keep your receipt and document the repair process. Many parts and labor come with warranty coverage that can save money on future issues. If you want to maximize your warranty benefits, learn how to optimize warranty claims.
Many homeowners believe that opting for cheap parts or skipping professional help can save money, but that misconception can cost you dearly in the long run. For instance, a frequent mistake is assuming that same-day service is always available without prior scheduling—while many providers promise quick fixes, actual availability often depends on the time of day, current demand, and technician dispatching protocols. To ensure reliability, it’s crucial to understand that scheduling in advance can prevent delays and guarantee quality work, as highlighted at [this guide](https://discountappliancehub.com/scheduling-your-appliance-repair-for-same-day-service-in-2025).
Another trap many fall into is underestimating the importance of warranty coverage, especially when using non-authorized parts. While some believe that warranties only cover parts, expert sources clarify that proper installation and repairs—preferably performed by certified technicians—are essential for warranty validity, which can save you significant expenses later. You can learn more about maximizing your warranty benefits [here](https://discountappliancehub.com/maximize-your-appliance-warranty-during-emergency-repairs).
A common myth is that all appliance repair parts are interchangeable across brands or models. In reality, supply chains have become more specialized, and using the wrong part—even if it looks identical—can lead to further damage or void your warranty. Always specify your appliance model number when purchasing replacement parts and follow manufacturer guidance.
Have you ever fallen into this trap? Let me know in the comments.
Thinking ahead to professional installation, many assume that simply plugging in a new appliance is enough. However, improper installation—like incorrect leveling or faulty electrical connections—can cause ongoing issues or safety hazards. To avoid this, always verify that your installer complies with local codes and manufacturer instructions. For expert tips, check [here](https://discountappliancehub.com/how-to-ensure-reliable-appliance-installation-in-2025).
In essence, understanding these nuances—the importance of scheduling, warranty validation, correct parts, and proper installation—can greatly extend your appliance’s lifespan and ensure safety. Moving beyond the basics requires a blend of awareness and choosing the right professionals when needed. If you’re considering upgrades or repairs, consulting trusted experts and taking these factors into account will save you money and headaches in the future.
Tools I Recommend for Reliable Appliance Maintenance
Over the years, I’ve found that having the right tools makes all the difference when it comes to maintaining and repairing your appliances efficiently. One must-have item in my toolkit is a high-quality digital multimeter. I personally use the Fluke 117 multimeter because of its accuracy and durability; it helps me diagnose electrical issues quickly without guesswork.
Another essential is a set of precision screwdrivers, such as the Wiha 26197 Premium Precision Screwdriver Set. These allow me to access small screws in tight spots, especially in appliances like microwaves or dishwashers. Additionally, I rely on a flexible inspection mirror to check behind components where visibility is limited—this tiny tool often prevents the need for extensive disassembly.
In terms of software, I particularly recommend Smart Thermostat Apps for maintaining climate control systems. These apps facilitate remote diagnostics and adjustments, allowing me to troubleshoot issues without leaving my desk. As smart appliances become more prevalent, integrating these digital tools helps ensure long-term performance and efficiency.
Long-Term Maintenance Techniques to Save You Money
Regularly scheduled inspections are key. I advise setting a maintenance calendar that includes cleaning filters, inspecting hoses, and testing electrical connections. For example, cleaning your refrigerator’s condenser coils once every six months can improve efficiency and prolong the appliance’s lifespan. Clearing debris from these coils prevents overheating and reduces energy bills.
Using appliance-specific lubricants, such as white lithium grease on hinges and moving parts, reduces wear caused by friction. It’s an inexpensive step that yields big dividends over time. Furthermore, upgrading your power management setup with surge protectors can shield your devices from electrical surges, which are common in storm-prone areas.
How do I maintain appliances over time to avoid costly repairs?
The best approach involves proactive measures like establishing a routine inspection schedule, investing in quality repair tools, and staying informed about your appliance models. Keeping detailed records of maintenance work can also help identify patterns and prevent unexpected breakdowns. For advanced guidance, check out here on how to leverage warranty coverage effectively. I encourage you to try setting up a maintenance checklist for your appliances today—simple steps now can save you significant money and stress in the future.
Remember, maintenance isn’t just about fixing things when they break; it’s about staying ahead of issues. Reliable tools and consistent care are your best allies. As appliances evolve, future trends point toward smarter diagnostic systems that self-report issues, hopefully reducing downtime even further. Embracing these innovations now ensures you’ll be ready for what’s coming next.
The Hidden Lessons No One Tells You About Dryer Maintenance
One of the biggest revelations I had during my appliance repair journey was realizing that most breakdowns are rooted in overlooked details—like a worn belt. The lightbulb moment was understanding how critical small components are in preventing major failures. For example, I once ignored a subtle squeak, assuming it was insignificant, only to find a shredded belt months later. So, paying attention to these subtle signs can save hundreds and extend your appliance’s life.
Another deep insight was how quickly a simple belt replacement can turn into a career lesson in patience and precision. It’s tempting to think DIY fixes are straightforward, but every model has quirks. I learned that taking photos, notes, or diagrams saves time during reassembly, avoiding unnecessary rework. These personal tidbits are invaluable for anyone looking to master appliance repair without feeling overwhelmed.
Tools and Resources That Truly Made a Difference
Over the years, I’ve curated a toolkit that has empowered me in countless repairs. The expert guide to appliance repair became my bible, offering step-by-step instructions tailored to different models. My trusted precision screwdriver set and a durable multimeter from Fluke helped diagnose electrical issues swiftly. These tools are reliable and backed by real-world reviews, making my repairs more efficient and less stressful.
Additionally, I recommend keeping a digital catalog of your appliance models and parts, which streamlines future repairs. The combination of trustworthy tools and well-organized resources turned my DIY efforts into successful projects, saving me money and frustration.
Your Next Step to Confident Appliance Care
Remember, tackling appliance repairs like replacing a dryer belt isn’t just about fixing a machine—it’s about empowering yourself to take control and prevent costly emergencies. Every repair done with care boosts your confidence and reduces dependence on costly service calls. I encourage you to start small, gather your tools, and follow trusted guides to transform those intimidating maintenance tasks into manageable, even rewarding, activities. The future of appliance care is in your hands—are you ready to take the first step?