I’ll never forget the Saturday I cranked up my dryer, expecting warm, fluffy towels, only to be met with silence. No spinning, no heat—just that sinking feeling of familiarity turning into helplessness. It hit me then: something was seriously wrong. As a homeowner, there are few frustrations worse than appliances that refuse to cooperate, especially when they’ve been humming along just fine. But here’s the truth: often, the culprit is something simple—like a snapped drum belt—that I can fix myself, saving time and money.
How Do You Know If Your Dryer’s Belt Is Gone?
Understanding the signs of a broken dryer belt is crucial. Usually, you’ll notice your dryer turns on but doesn’t spin, or there’s a loud banging noise during operation. Sometimes, the drum may turn very slowly or not at all. If you’ve opened up your dryer before, you might see the belt hanging loose or completely detached from the drum. Early detection can prevent further damage and help you fix the issue before your laundry piles up. If you’re unsure, I’ll walk you through the key indicators to look out for, so you don’t waste time guessing or fear worst-case scenarios. Trust me, I’ve made those mistakes early on—like ignoring the squeaking noises—which only led to costlier repairs later.
Is Supertech Repair Worth the Hassle?
When I first learned about dryer belts, I thought it was a complicated, time-consuming task. Turns out, with a little patience and the right tools, replacing a snapped belt can be straightforward. However, the common mistake I made was rushing into disassembly without checking for obvious signs of a broken belt first—like a loose or missing belt inside the dryer. Don’t make my mistake. Proper troubleshooting saves you from unnecessary dismantling and potential damage. If you’re skeptical about handling repairs yourself, remember that many issues, like a snapped belt, are perfectly manageable with some guidance. For complex problems, though, it’s wise to consult a professional or visit reputable sources like [this piece on common appliance repairs](https://discountappliancehub.com/why-your-dryer-gets-hot-but-doesnt-dry-the-clothes) to ensure safety and effectiveness. Up next, I’ll share step-by-step tips to diagnose whether your dryer’s belt is the root cause and how to fix it quickly.
Locate the Dryer Belt and Prepare Your Workspace
Start by unplugging the dryer to ensure safety; this prevents accidental start-ups. Move the dryer away from the wall for better access. Remove the panel at the back of the dryer by unscrewing the retaining screws. As I did during my first repair, keep all screws in a small container to avoid losing them. Lay down a towel or work surface nearby to place removed parts.
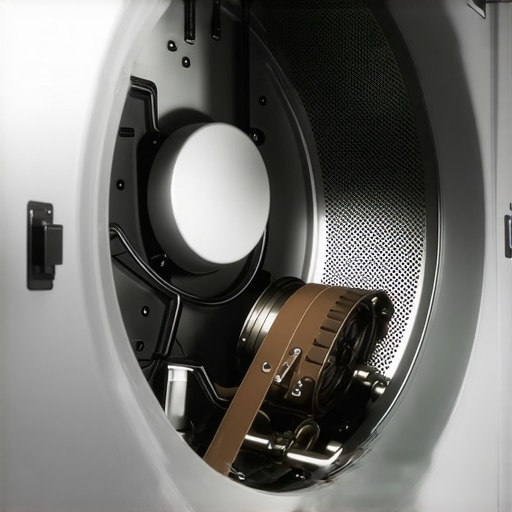
Inspect and Remove the Old Belt
Locate the belt around the drum—it’s a rubber loop that connects the motor pulley to the drum. If the belt is broken, you’ll notice it’s hanging loose or missing. To remove the belt, slide it off the motor pulley. Be cautious; the tensioner pulley holds the belt tight, so gently release the tension to slide the belt off. I once struggled with the tensioner, but applying steady pressure made it easier. Remember, a snapped belt looks frayed or has bits broken off—if that’s your case, it’s time for a new one.
Install the New Belt Correctly
Compare the new belt to the old one to ensure correct size. Loop the belt around the drum, aligning it over the platform or grooves. Route it around the tensioner pulley first, then over the motor pulley, ensuring proper tension. As I learned from a quick online tutorial, follow the specific routing path for your dryer model. Double-check that the belt sits evenly in the grooves to prevent slippage.
Reassemble and Test the Dryer
Once the belt is securely in place, reattach the back panel and tighten all screws. Before pushing the dryer back into position, plug it in and do a quick test. Turn on the dryer without clothes to see if the drum spins smoothly—remember, if your dryer isn’t spinning, visit this guide to troubleshoot further. This step confirms your repair was successful and saves you from a second trip behind the machine.
Tips for Smooth and Safe Repairs
Wearing gloves can protect your hands from sharp edges. Use a multimeter to check if the motor and belt tensioner are functioning properly, especially if issues persist. When in doubt, consulting a professional or exploring detailed tutorials minimizes risks. Remember, if your dryer has complex features like automatic sensors, replacing the belt might not fix the problem—consider same-day service if troubleshooting becomes overwhelming.
Many homeowners believe that appliance repairs are straightforward, but there’s a hidden layer of nuance that many overlook. For instance, a frequent misconception is that warranties fully cover all repair costs; however, most warranties have specific conditions and common pitfalls that buyers often miss, such as improper installation or neglecting routine maintenance. According to a study by the Consumer Product Safety Commission, nearly 30% of warranty claims are denied due to avoidable errors, highlighting the importance of understanding your coverage details.
Another common myth is that same-day service is always available or necessary for minor issues. While quick repairs are convenient, they can sometimes lead to rushed diagnoses. Some service providers might prioritize quick fixes over thorough troubleshooting, which can result in recurring problems or even damage to the appliance. It’s essential to ask whether the technician’s assessment is comprehensive or just a quick patch-up. Focusing solely on immediate fixes without identifying root causes can trap you into repeat repairs and additional expenses.
Are All Installation Errors Cheap to Fix Later?
Absolutely not. Incorrect installation is a silent threat that can undermine the longevity and efficiency of your appliances. For example, improperly leveled washing machines or dishwashers can lead to leaks, excessive noise, or early component wear. In fact, studies indicate that installation mistakes account for over 40% of early appliance failures. This emphasizes the importance of hiring qualified professionals who follow manufacturer guidelines—skipping this step might seem cost-effective upfront but can void your warranty and result in costly repairs down the line. To avoid installation pitfalls, check out our detailed guide on proper washer setup.
Furthermore, many assume that warranties automatically cover installation errors — they don’t. Modern warranty policies often specify that correct installation is a prerequisite for coverage. For instance, a defective range hood that causes poor ventilation might not be covered if it was improperly mounted, leading to performance issues and potential fire hazards. To protect your investment, always verify installation procedures before the service, especially when buying new appliances.
When it comes to routine maintenance and installation, understanding the intricacies can save you money and stress. Overlooking these details might seem trivial but can significantly impact your appliance’s lifespan and warranty validity. For example, simple steps like ensuring your refrigerator’s door gasket is clean can prevent cooling issues, which are often mistaken for compressor failure. In the same vein, avoid neglecting proper venting during dryer installation — clogged vents not only reduce efficiency but also pose fire risks. More info on avoiding these hidden mistakes can be found in our posts, such as gasket cleaning tips and dryer vent mistakes to avoid.
Finally, don’t fall for the notion that emergency or same-day service always guarantees quality. While quick response times are essential during leaks or power failures, some technicians may rush repairs without proper diagnostics. It’s crucial to ask whether the technician performs full system checks or just quick fixes, especially for complex appliances. Remember, a well-diagnosed repair saves money and prevents future failures. As the saying goes, “measure twice, cut once,” and the same applies to appliance repairs.
Understanding these nuances and debunking common myths empower you to make informed decisions. Avoid the trap of rushing into repairs or assuming warranties are all-encompassing. Instead, focus on proper installation, thorough troubleshooting, and reliable service providers to extend your appliances’ lifespan. Have you ever fallen into this trap? Let me know in the comments and share your experience.
Maintaining appliances over time requires more than just occasional cleaning; it involves the right tools, a systematic approach, and staying informed about the latest repair techniques. Personally, I rely on a few key pieces of equipment that have proven invaluable in troubleshooting and ensuring long-term performance. One such tool is a high-quality digital multimeter, like the Fluke 115, which I use daily to diagnose electrical issues accurately. Its precision helps me distinguish between faulty wiring, bad capacitors, or motor failures, saving me time and preventing unnecessary replacements.
Additionally, I swear by a cordless inspection scope—such as the Nutool Wi-Fi Endoscope—to visually inspect hard-to-reach areas inside appliances. This tool lets me check the inside of a refrigerator’s compressor compartment or the drain channels in dishwashers without disassembly. For software, I recommend keeping a dedicated appliance repair app, like RepairClinic’s troubleshooting guides, synced on your phone. These provide step-by-step instructions tailored for specific models, minimizing guesswork and reducing the risk of causing further damage.
Looking ahead, I predict that smart diagnostics will become more integrated into home appliance maintenance. Devices that can communicate their issues instantly and suggest precise fixes will streamline downtime and extend appliance life. Investing in these smart tools now can set you ahead of the curve and help you catch problems early—much like how regular HVAC filter checks prevent system failures, which you can learn more about here.
How do I maintain appliance performance over time?
Consistency is key. Routine checks, such as inspecting seals, cleaning filters, and verifying belt tensions, go a long way. For example, regularly cleaning fridge gaskets using techniques from this guide prevents leaks and maintains cooling efficiency. Moreover, scheduling annual professional inspections ensures your appliances stay within warranty parameters and operate at peak efficiency. Keep detailed logs of maintenance and repairs to identify recurring issues early and address them before they become costly.
For instance, routinely checking the water pressure in a dishwasher or ice maker can prevent backflow or leaks—details covered in this article. Using appropriate tools like a hose pressure gauge or specialized cleaning brushes helps maintain performance and extends the lifespan of your units. Remember, proactive maintenance not only saves money but also improves safety and reduces the need for emergency repairs.
If you haven’t already, invest in a quality multimeter and a visual inspection scope. Conduct a weekly review of your appliances’ performance, and don’t hesitate to consult comprehensive troubleshooting resources when needed. These small steps, combined with a habit of early detection, substantially improve appliance longevity and reliability—paving the way for fewer disruptions and more peace of mind in your home.
What I Wish I Knew Before Twisting That First Screw
One of the toughest lessons I learned was that jumping into repairs without thorough research often leads to wasted time and additional damage. Patience and a clear plan can make all the difference, especially when handling delicate components like refrigerator compressors or dryer belts. Moving cautiously and consulting trusted resources saved me from costly mistakes and gave me confidence in my DIY skills.
Why Relying on Secondhand Tools Can Cost You Dearly
Using subpar or borrowed equipment might seem tempting, but it often results in inaccurate diagnostics or incomplete repairs. Investing in reliable tools like a high-quality multimeter and an inspection scope not only speeds up the process but also ensures safety and effectiveness. Trust me, tools that I rely on daily, such as the Fluke 115 or Nutool Wi-Fi Endoscope, have consistently paid off.
How Overconfidence Can Sabotage Your Appliance Longevity
Thinking you can fix everything perfectly on your own might sometimes cause overlooked details—like improper belt routing or ignoring warranty clauses. Recognizing when to pause and seek professional help preserves your appliance’s life and your peace of mind. Remember, understanding the fine print, like warranty restrictions, can prevent future headaches from unexpected denial of coverage.
Where Smart Troubleshooting Leads to Repeat Repairs
Misdiagnosing issues due to incomplete knowledge can turn a quick fix into a cycle of repeated repairs. Digital resources and detailed tutorials tailored for your specific model can guide you through complex problems, saving time and money. For example, exploring specialized troubleshooting guides ensures you don’t just patch but permanently resolve issues like uneven cooling or unusual noise.
Links that Can Elevate Your Repair Skills
For more in-depth advice, I turn to cornerstone content such as why your dryer isn’t drying clothes. Supplement with targeted reads on avoiding installation pitfalls and warranty myths, which are crucial for long-term appliance health. These resources have been instrumental in transforming me from a novice into a confident DIYer, helping me extend the life of my appliances and save on service calls.
Keep Pushing Forward—Your Home’s Heart Needs You
Every repair you tackle builds your skills and confidence, turning you into your home’s ultimate guardian. With the right mindset, tools, and information, there’s no appliance issue too daunting. Keep learning, experimenting, and trusting your judgment—your home appliances will thank you for it. What’s the first repair you’re planning to take on next? Share your plans below, and let’s grow together in appliance mastery!
.