
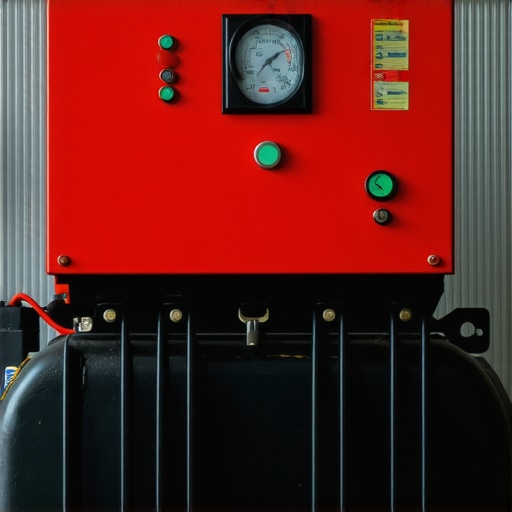
Imagine this: It’s a scorching summer day, and suddenly, your air conditioner stops cooling. You rush to check the unit, only to find it silent, the compressor possibly dead. That sinking feeling hits you—will it be a costly repair or something you can fix yourself? I’ve been there, and I know how frustrating it can be to diagnose whether your compressor has finally given up or if it’s just a momentary heat-induced hiccup.
Why Pinpointing Your Compressor’s Condition Matters
Understanding whether your compressor is truly dead or simply overheated can save you a fortune and prevent unnecessary replacements. A compressor isn’t just a pricey component; it’s the heart of your cooling or refrigeration system. Misdiagnosing it as dead when it’s overheated could lead to premature replacement, while ignoring real failure signs might cause further damage. Accurate diagnosis means peace of mind—and cost savings.
Got Cold Feet About Your Compressor? Here’s the Big Question
Many folks, including myself early on, assume that a compressor that isn’t humming means it’s dead. I once replaced an entire HVAC unit because I thought the compressor was busted—only to realize it was a simple overheating issue. It’s a common mistake, and one I want to help you avoid. Knowing the difference between a dead compressor and an overheated one can be confusing, but with a few simple checks, you’ll be able to tell the real story.
Start with Visual and Auditory Checks
Begin by inspecting your unit for obvious signs of damage or leaks. Listen for the compressor’s startup hum; if there’s no sound, it might be dead. I once checked my AC and found no noise, which initially worried me. However, a closer look revealed an electrical disconnect—fixing it restored operation.
Test the Power Supply
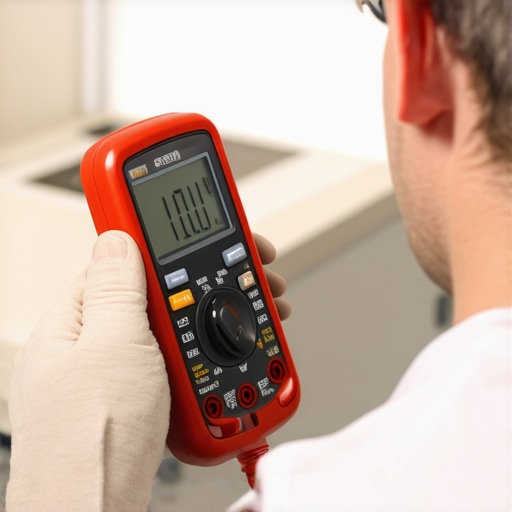
Use a multimeter to verify the outlet is delivering proper voltage. Sometimes, the issue isn’t the compressor but a power problem. During my first attempt, I overlooked this step, leading to unnecessary replacement of the compressor. Ensuring reliable power supply can be a quick fix and avoid costly repairs. For professional help, consider professional installation services.
Check the Capacitor
The capacitor supplies the starting surge. A faulty capacitor can stop the compressor from running. Remove and test it with a multimeter: if it’s bulging or leaks, replace it. I once replaced a capacitor, and my AC roared back to life instantly. Always handle capacitors carefully—safety first!
Test the Compressor Windings
Disconnect power and use a multimeter to measure resistance across the compressor’s terminals. Low resistance indicates a short; infinite resistance suggests an open circuit. If readings are abnormal, the compressor might be terminally damaged. In my case, these tests pointed to a dead compressor, prompting a replacement.
Assess Overheating Signs
If your compressor shuts down after running briefly, it may overheat. Check for dirt buildup or insufficient airflow. Cleaning coils or clearing blockages can prevent overheating. In my experience, simple coil cleaning extended my compressor’s life and improved efficiency. For maintenance tips, see vacuuming condenser coils.
Perform a System Pressure Test
Use refrigeration gauges to check system pressure. Abnormal readings may signal internal failure. This step is more advanced—consider professional assistance to avoid damage or injury. A technician can also run leak detection. Remember, knowing whether your compressor is dead or just overheated saves money and hassle.
Many homeowners operate under common assumptions about same-day appliance repair and warranties, but there are nuanced pitfalls that can trip even the most seasoned DIYers or cautious consumers. While instant service sounds ideal, the reality involves complexities that often go unnoticed. One widespread misconception is that all contractors offering same-day service are equally reliable and transparent. In my experience, some providers use this promise as a marketing ploy without delivering genuine urgency or quality, leading to hurried jobs that don’t address the root problem.
Furthermore, a frequent trap involves warranty claims. Consumers often assume that their warranty covers everything, but in reality, many warranties have fine print exclusions related to installation defects, parts used, or even the timing of the service. For instance, some warranties are void if the appliance wasn’t installed or maintained according to manufacturer specifications. That’s why understanding the details—like those found in warranty-backed services—is crucial before scheduling repairs or installations.
Why Do Some Installations Cause Unexpected Failures Down the Line?
Here’s a lesser-known nuance: improper installation can often mimic or precipitate issues that appear to be product failures. For example, a misaligned refrigerator door might seem like a seal failure, but it could stem from an incorrect leveling process. Installing a built-in oven without proper venting can lead to overheating and early component burnout—problems that are especially insidious because they invalidate warranties if found to be user or installer error. That explains why certified professionals who adhere to proper installation standards are worth their weight in gold.
Another advanced mistake involves neglecting system compatibility when replacing appliances. For example, installing a new microwave without confirming proper electrical wiring or circuit capacity can cause flickering or even damage, which many overlook. A recent study emphasizes that the key to reliable appliance performance is not just quick fixes but thorough, compliant installation processes that respect electrical and structural nuances (see expert guides).
Overcoming these misconceptions requires a keen eye and education. Remember, rushing a repair or installation without understanding the fine print of warranties or the importance of certified procedures can cost you more in the long run. Always ask your service provider about their licensing, experience, and warranty coverage—this is especially crucial for higher-end or built-in appliances.
Have you ever fallen into this trap? Let me know in the comments. For trusted, warranty-backed, and properly executed services, consider checking out trusted installation experts near you.
Master Your Maintenance Routine with Precision Tools
One of my go-to tools for maintaining appliances is the digital multimeter. I personally rely on the Fluke 115 because of its accuracy and durability. It helps me quickly verify voltage levels, test capacitor health, and measure resistance across vital components. Owning a reliable multimeter saves time and prevents guesswork during troubleshooting, especially for complex systems like HVAC or refrigeration.
Alongside this, I highly recommend investing in a good infrared thermometer, such as the Etekcity Lasergrip 774. It allows me to check thermal variations on components like motors and heating elements without direct contact. This non-invasive approach helps catch overheating issues early before they cause extensive damage or system failure.
Software tools also play a role in diagnostics. I use appliance-specific diagnostic apps connected via Bluetooth for some smart devices. For example, SmartThings or the manufacturer’s proprietary apps provide real-time data and error logs, making long-term monitoring more manageable. These tools empower me to schedule proactive maintenance, minimizing downtime and costly repairs.
Where do I keep my tools for quick access?
Organizing a portable toolkit with these devices makes all the difference. I keep mine in a dedicated box that includes screwdrivers, wire strippers, and a flashlight. Having everything in one place reduces the hassle during emergency repairs or routine checkups. Remember, performing regular inspections using these tools can extend your appliance lifespan significantly.
Future of Appliance Maintenance and Scaling Up
The trend toward smarter appliances suggests a future where remote diagnostics and predictive maintenance become standard. Using IoT-enabled devices, manufacturers are integrating sensors that can alert you to issues before they escalate. To stay ahead, I plan to incorporate these intelligent systems into my maintenance routine, ensuring maximum efficiency and fewer surprises.
How do I maintain appliance performance over time?
Implementing a scheduled maintenance plan is crucial. I set reminders every three to six months to clean coils, check seals, and verify electrical connections. For refrigeration units, regularly cleaning condenser coils using a brush and vacuum prolongs compressor health. Also, updating firmware on smart appliances ensures they operate with the latest bug fixes and features, as recommended by experts. For more detailed guidance on reliable installation and upkeep, check out this trusted resource.
Finally, always keep a record of maintenance activities and next scheduled checks. This documentation aids warranty claims and provides a clear history if professional repairs are needed. Remember, consistent upkeeping with the right tools not only prevents breakdowns but also maximizes the longevity and efficiency of your appliances.
Lessons That Changed My Approach to Same-Day Service
- I used to assume a dead compressor was always the culprit until I learned that overheating issues often mimic true failure, making me reconsider quick replacements.
- Proceeding with repairs without confirming proper system pressure or electrical supply sometimes led to wasted time and unnecessary costs—now I double-check these first.
- Understanding warranty fine print revealed that improper installation or neglecting routine maintenance could void coverage, pushing me to prioritize certified professionals for installations.
- Investing in reliable diagnostic tools like multimeters and infrared thermometers transformed my troubleshooting from guesswork into precise, cost-effective actions.
- Trustworthy resources and expert advice became my dependable allies, helping me distinguish between system quirks and real failures, especially during urgent repair scenarios.
Tools That Became My Troubleshooting Lifeline
- Fluke 115 Multimeter: This versatile device helps me quickly verify voltage, test capacitor health, and check motor windings, reducing diagnostic time.
- Etekcity Lasergrip 774 Infrared Thermometer: Spot overheating components early by non-invasively measuring temperature variations, preventing serious damage.
- Refrigeration Pressure Gauges: Critical for assessing system health, these gauges guide my decisions to repair or replace, avoiding costly errors.
- Diagnostic Apps and Software: Connecting via Bluetooth allows me to monitor appliance health in real-time and schedule maintenance proactively, increasing reliability.
Your Next Move Toward Appliance Peace of Mind
Remember, mastering accurate diagnostics not only saves money but also builds confidence in your ability to handle unexpected hardware hiccups. Embrace these testing routines, trust your tools, and never hesitate to consult experienced professionals when uncertain. The future of appliance maintenance is heading toward smarter, more precise approaches—be ready to adapt and protect your investments. Want to keep your appliances running flawlessly? Start by integrating these practices today, and don’t forget to check out trusted installation experts for reliable setup and repairs. What’s been your biggest lesson in diagnosing appliance issues? Share your story below!.