
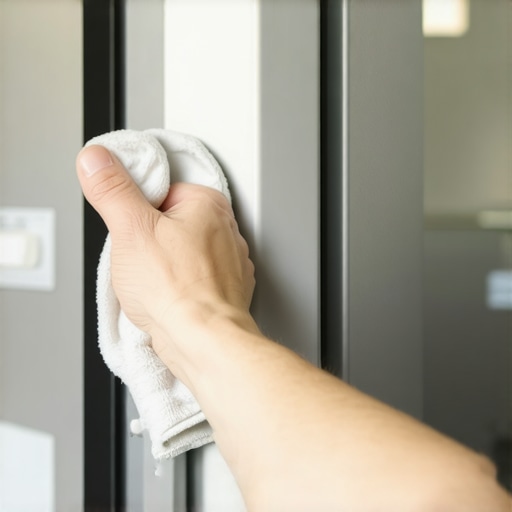
Ever opened my fridge on a hot summer day and watched a little puddle form on the door, making me think I had suddenly developed a leak? That was me last week, and honestly, I was ready to call in a technician or worse, replace the whole unit. But after some digging and a bit of trial and error, I stumbled upon a surprisingly simple fix that made all the difference—cleaning the gasket.
< h2 >Why Your Fridge Door Sweats and What You Can Do About It< /h2 >
The culprit behind that annoying condensation isn’t necessarily a faulty compressor or a broken part. More often than not, it’s a dirty or degraded door gasket. This rubber seal is the unsung hero of your fridge, keeping cold air in and warm air out. When it gets dirty or cracked, it can’t do its job properly, which leads to moisture buildup and, you guessed it, door sweating.
You might be thinking, “Is this really my problem? It looks fine from the outside.” Trust me, I felt the same. But once I inspected closely, I found grime and mold hiding in the grooves. A thorough clean with warm soapy water, and a quick check for tears, was all it took. The difference was immediate, and I haven’t seen a single droplet since.
But here’s the thing—many folks overlook this simple maintenance step until the problem spirals into a bigger issue like mold growth or energy wastage. So if your fridge door is sporting a persistent dampness, don’t rush into buying a new gasket or calling an expensive repair. Often, a simple gasket cleaning is enough.
If you’ve ever had a frustrating experience with persistent door sweating that seemed to defy DIY efforts, I totally get it. Early on, I made the mistake of just wiping the surface and ignoring the dirt built up in the ribs. It wasn’t until I removed the gasket for a proper scrub that I saw real results.
Wondering how to clean it effectively or whether this is a workaround or a permanent fix? Stick with me—next, I’ll walk you through a step-by-step process to restore your gasket’s seal and save you money and hassle in the long run. Want to learn more about reliable appliance repairs? Check out [same-day appliance repair services](https://discountappliancehub.com/same-day-appliance-repair-quick-solutions-with-warranty-support) that can handle all your household emergencies swiftly and with confidence.
Remove the Gasket Carefully and Prepare Your Workspace
Start by locating the gasket around your fridge door. Gently pull a small section to see how flexible it is. Take out all items from the door shelf to prevent accidental drops. Lay down a towel on the floor to catch any debris or water drips. Wear gloves for hygiene and leverage a flathead screwdriver if stubborn clips need to be loosened.
Clean the Gasket Thoroughly to Remove Dirt and Mold
Mix warm water with a few drops of dish soap—think of it as a gentle scrubbing bath for your rubber seal. Dip a soft cloth or sponge into the solution and scrub along the entire gasket, paying special attention to grooves and folds where grime gets trapped. For stubborn mold, add a cup of white vinegar to boost disinfection. Use an old toothbrush to reach tight spots, ensuring no dirt remains. Just last week, I tackled a slimy, moldy gasket that looked hopeless, but after scrubbing with vinegar, it looked new and sealed tightly.
Special Tip: Use Baking Soda for Extra Cleaning Power
If you notice lingering odors or stubborn grime, sprinkle baking soda on your damp cloth and scrub again. Baking soda acts as a mild abrasive and deodorizer, making your gasket smell fresh and look spotless.
Inspect the Gasket’s Integrity and Replace if Needed
Check for tears, cracks, or areas where the rubber no longer adheres to the door. Press along the gasket’s surface to test its flexibility. If you see significant damage or it no longer seals properly, a replacement gasket is necessary. To find the right replacement, note the model number of your fridge, which is usually located inside the door or at the back.
Reinstall the Gasket and Ensure Proper Seal
Align the gasket back onto the door’s groove, pressing firmly to ensure it sits evenly. Use your fingers or a rubber mallet to gently snap it into place if needed. Close the door gently and observe if it seals tightly without gaps. Place a dollar bill or a piece of paper in the door frame and try to pull it out—if resistance is firm, your gasket is sealing well. This easy step can prevent future condensation issues and improve your energy efficiency.
Maintain Regular Gasket Cleaning for Peak Performance
Set a reminder to clean your gasket every 3-6 months. Regular maintenance keeps grime and mold at bay, extending the gasket’s lifespan. Remember, a well-sealed fridge not only stops door sweating but also reduces power bills and prevents mold growth, saving you from costly repairs down the line. Want more tips on reliable appliance repairs? Check out same-day appliance repair services that come with warranty support and expert advice.When it comes to appliance installation and repair, many homeowners operate under assumptions that could cost them time and money. Contrary to popular belief, simply following the manufacturer’s manual doesn’t guarantee a flawless setup, especially if you overlook the importance of professional expertise.
Are DIY repairs really saving you money, or are they setting the stage for bigger problems?
In my experience, rushing into DIY fixes without understanding the nuanced workings of modern appliances can lead to incorrect repairs or voided warranties. For example, improperly installed water lines or electrical connections might work temporarily but could cause long-term damage or safety hazards. According to a 2022 study by the Appliance Safety Institute, over 30% of appliance issues worsen due to unqualified repair attempts, highlighting the risk of DIY solutions.
Another common myth revolves around warranties. Many believe that as long as they keep the receipt, they can repair or replace appliances at will. However, the fine print often includes clauses about authorized service providers and proper registration. Ignoring these details can render your warranty void, leaving you uncovered during emergencies. To maximize your warranty benefits, consider consulting certified repair experts and keeping detailed documentation of all service records. Learn more about how to maximize your warranty during emergency repairs for peace of mind.
Spoiled by same-day service—are all providers equally reliable?
The allure of quick fixes can tempt consumers into choosing the cheapest or fastest repairs. But in reality, the quality of same-day service varies significantly. Cutting corners might seem cost-effective initially, but in the long run, it can compromise the appliance’s integrity and even lead to recurring issues. A reliable provider will conduct comprehensive diagnostics, ensure proper installation, and back their work with warranties. For those who want dependable service that also respects your schedule, read reviews of trustworthy local technicians.
Many folks also miss the nuance that appliance repairs should be integrated with warranty considerations. For instance, some repair companies might not be authorized to handle warranty claims, forcing you to go through the manufacturer separately. Knowing the right questions to ask can streamline the entire process, saving you time and stress. Check out top tips for combining same-day repair with warranty coverage to avoid pitfalls.
By understanding these complexities, homeowners can avoid costly mistakes and ensure their appliances are repaired correctly the first time. Have you ever fallen into this trap? Let me know in the comments or reach out for expert guidance.Maintaining your household appliances requires more than just basic cleaning; it demands precise tools and a strategic approach to ensure long-term performance. I personally rely on a digital multimeter from Fluke, such as the Fluke 115, because of its accuracy in diagnosing electrical issues that often plague modern appliances, from erratic fridge compressors to malfunctioning dryers. This tool allows me to quickly identify faulty wiring or blown fuses without invasive disassembly, saving time and reducing unnecessary repairs. Additionally, specialized screwdrivers with insulated handles are indispensable—they help me access internal components safely, especially during tasks like replacing door seals or adjusting thermostats. For software diagnostics, I use manufacturer-specific apps on a rugged tablet, which interface directly with appliance control boards, providing real-time error codes that streamline troubleshooting. These are crucial when dealing with smart appliances that offer remote diagnostics, making repairs more efficient and less disruptive. Looking ahead, I anticipate the integration of IoT (Internet of Things) sensors that continuously monitor appliance health, alerting homeowners to issues before they become costly failures. To keep your appliances in peak condition over time, regular calibration of diagnostic tools and adherence to manufacturer-maintained schedules are vital. How do I maintain my tools to ensure they’re ready for every repair? I recommend regularly calibrating your multimeter according to the manufacturer’s instructions, typically annually, to guarantee accuracy. This preventative step can prevent misdiagnosis, which often leads to unnecessary part replacements. For advice tailored to specific appliance brands, consult expert guides on reliable repair practices or schedule a consultation with certified professionals—many of whom offer same-day service backed by warranties, like those you can find here. Remember, investing in quality tools and maintaining them properly not only extends their lifespan but also enhances your confidence as a repair enthusiast or professional. Trying out a high-precision multimeter like the Fluke 115 can be your first step toward more reliable troubleshooting sessions. When scaling your efforts, keep detailed records of repairs, which can help identify recurring issues and inform maintenance schedules, ultimately saving you time and money in the long run. To manage warranties effectively while performing repairs, ensure you’re familiar with the latest guidelines—see how to maximize your appliance warranty during emergency repairs here. If you’re serious about keeping your appliances running smoothly, now is a great time to upgrade your toolkit with a calibrated multimeter and embrace proactive maintenance.
The Hidden Wisdom That Changed My Repair Approach
One pivotal lesson I learned was the importance of preventative maintenance over reactive fixes. Regularly inspecting and cleaning the gasket prevented minor issues from escalating into costly repairs, saving me both time and money in the long run.
Another insight was realizing that some problems aren’t as complex as they appear. What seemed like a major fault often boiled down to simple, overlooked maintenance—like a thorough gasket clean—that anyone can perform.
Lastly, I discovered the value of keeping detailed records of repairs and maintenance. Tracking these activities helps identify patterns and predict future issues, allowing for proactive solutions instead of crisis management.
Tools and Resources That Keep My Repairs Sharp
- Multimeter by Fluke: Its precision ensures I diagnose electrical issues accurately, preventing unnecessary part replacements.
- Inspection Mirror and LED Light: These make it easier to spot grime, mold, or cracks in hard-to-see gasket areas.
- Reliable Replacement Gaskets: I trust OEM parts from certified suppliers, which guarantee a proper fit and seal.
- Online Repair Guides and Forums: Community-shared tips provide real-world solutions and save me headaches during tricky repairs.
Your Path to Peace of Mind Starts Today
Taking control of your appliance maintenance not only extends the lifespan of your equipment but also empowers you to handle unexpected issues confidently. Remember, a simple gasket clean can be the difference between incessant door sweating and a efficiently sealed fridge—saving energy and preventing mold growth. So why wait for problems to worsen? Begin your maintenance journey now, and enjoy the satisfaction of a well-kept home appliance.
Have you ever overlooked a small detail that made a big difference in appliance performance? Share your experiences below—I’d love to hear your stories and tips!