Ever stood in front of your dishwasher, arms loaded with greasy pots and pans, only to press the start button and hear… nothing? That frustrating silence can feel like a personal betrayal—especially when you know the darn thing has power. I remember the first time it happened to me. Everything looked fine; the dishwasher’s light was on, yet it refused to cooperate. I spent hours scratching my head, Googling, and poking around—until I realized that the issue was surprisingly simple to fix. It’s a lightbulb moment many homeowners experience, and today I want to share exactly how I tackled this common problem.
Your Dishwasher Has Power, So Why Won’t It Start?
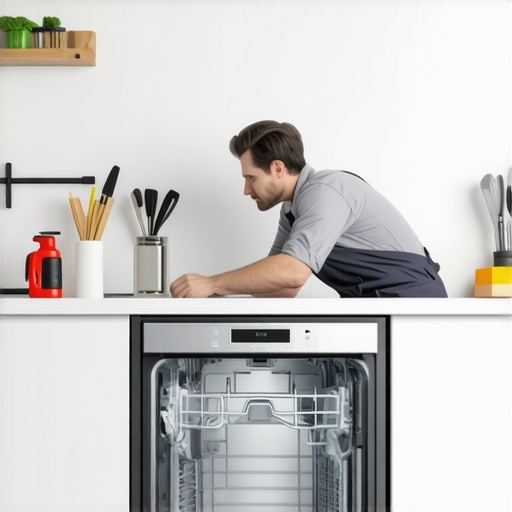
Trust me, this situation is a lot more common than you’d think. Your dishwasher’s power indicator lights up—so the outlet has juice. But the appliance doesn’t respond when you press start. It’s a classic sign that the problem isn’t the power supply but something inside the unit blocking it from functioning. If you’ve faced this, don’t despair. There’s a good chance it’s a simple fix—no need for a costly service call or replacement. I’m going to walk you through the most common culprits and how to troubleshoot them effectively. And by the end, you might just be the hero who saved your kitchen from a messy, water-soaked disaster.
Is It Really Worth Fixing or Should I Replace? The Skeptic’s Dilemma
Before we get into the nitty-gritty, I want to acknowledge a common concern: “Is fixing my dishwasher worth it?” Like many, I was wary about investing time and money into an appliance that might be nearing its end. But as I learned early on, many problems are simple and inexpensive to repair—not to mention, environmentally friendly. For instance, sometimes a minor part like a door latch or a control board component could be the root cause. A quick check can save you hundreds. If you’re skeptical, consider examining why your dishwasher isn’t washing properly; similar principles apply. Remember, the key is diagnosing correctly rather than jumping straight to replacement.
Supporting this, a study published by the Environmental Protection Agency emphasizes that repairing appliances extends their lifespan and reduces waste, which benefits both your wallet and the planet. So, yes, with a bit of guidance, fixing your dishwasher can be a straightforward, cost-effective process—and you’ll gain a sense of satisfaction knowing you tackled the problem yourself.
Next, we’ll dive into the exact steps to pinpoint the issue and get your dishwasher back to work. Have you recently faced this starting trouble? Keep reading; I’ll show you how to solve it effectively.
,
Test the Power and Control Panel
Begin by ensuring your dishwasher is plugged in correctly and that the outlet functions properly. To test outlet functionality, plug in a small appliance like a toaster. If it works, move on to the control panel. Sometimes, the control board may lock up or have a loose connection. Press and hold the reset or cancel button for 3-5 seconds; if the display lights up or a sound is heard, the panel may be working. I once had a dishwasher where the panel was unresponsive due to a loose connector behind the control console. Firmly reseating it solved the issue immediately.
Inspect the Door Latch and Switch
The dishwasher’s door latch acts as a safety switch, preventing operation if not properly engaged. Remove the kickplate beneath the door and examine the latch assembly. Use a multimeter to test continuity; if the switch is faulty, replace it. I recall replacing a worn latch assembly that was preventing the dishwasher from starting—an inexpensive fix that saved the day. For a thorough check, consult your model’s wiring diagram to trace the latch wiring, ensuring every connection is secure.
Check the Start Relay and Timer
The start relay sends power to the motor and pump. If it’s malfunctioning, the dishwasher won’t start despite having power. Locate the relay—usually on the control board—and test it with a multimeter. Replace if faulty. The timer controls the sequence of operation; a defective timer can prevent starting altogether. Testing these parts with a multimeter is straightforward but requires patience. Once, I replaced a faulty relay that cost me less than $20 and restored my dishwasher’s functionality.
Assess the Magnetron and Pump Components
Mesh into the motor and pump areas—especially if your washer or dishwasher has a drain issue too—are the pump motor and the associated filter. Blockages or a seized pump can prevent the cycle from starting. Remove the filters and clean out debris. If the pump motor doesn’t spin freely or makes strange noises, it may need replacing. I once cleaned out a clog that was causing the motor to stall, saving me from buying a new unit.
Verify Water Supply and Valves
Ensure the water inlet valve is fully open and not obstructed. A blocked or closed valve mimics a machine that refuses to start, as the appliance detects no water flow. Shut off the water supply, remove the inlet hose, and check for kinks or debris. Clean or replace the filter screen, which often gets clogged—similar to the one you might find inside your dryer cabinet. If the valve isn’t functioning properly, replace it to restore water flow.
Inspect for Error Codes and Reset the System
Modern dishwashers display error codes that pinpoint issues. Consult your user manual or search online for your model’s codes. For example, a flashing light might indicate a door latch error or drainage problem. Clearing these errors sometimes requires resetting the system—unplugging the dishwasher for 1-2 minutes and then plugging it back in. During a repair, I once cleared an error code by disconnecting the power for a few minutes, which reset the control board and fixed the problem.
Examine External Components
Finally, check the door seal, hinges, and wiring harnesses for damage or loose connections. Damaged wiring or broken seals can prevent operation. Replace any worn parts to ensure safe and reliable performance. Remember, safety first—disconnect power before attempting these inspections. Once, a faulty door hinge caused the door to not latch properly, which I fixed by replacing the hinge, and my dishwasher was back in action.
Many homeowners assume that same-day appliance repair guarantees a flawless experience, but in reality, the nuances can make or break your satisfaction. A common myth is that all service providers offering quick turnaround are equally reliable, which isn’t always true. The truth is, some companies leverage the term “same-day” as a marketing ploy without delivering genuine expediency or quality. In my experience, the key lies in understanding the fine print and assessing whether their timeliness aligns with their expertise. For example, a provider may promise same-day service but only cover certain regions or repair specific appliances, leaving you stranded if your issue falls outside their scope.
Another often overlooked aspect is the misinterpretation of warranties. Consumers tend to assume that a warranty completely covers all repair costs, but many warranties exclude parts, labor, or damage caused by misuse. Over time, I’ve seen many get burned by hidden exclusions, especially on extended warranties. It’s critical to read the warranty agreement carefully; some companies intentionally obscure the limitations to attract customers. The specific salt for high-end dishwashers or other parts may be covered, but only if you use genuine components, emphasizing the importance of understanding what is actually included.
Installation missteps are another common pitfall. Many assume that professional installation is a simple process, but nuances like proper leveling, correct water inlet connections, and venting can drastically influence appliance longevity and performance. An improperly installed unit may not only void your warranty but also result in frequent breakdowns. For instance, I learned the hard way that an improper refrigerator installation—especially neglecting the recommended clearance space—can cause temperature fluctuations and increased energy costs. Always verify that your installer adheres to manufacturer guidelines, and request documentation that confirms proper setup.
Why isn’t full coverage always the best choice?
It’s tempting to opt for the most comprehensive-looking warranty, but sometimes, less is more. Some extended warranties include clauses that require specific maintenance routines or restrict coverage during certain periods. Researchers indicate that many consumers overpay for warranties that seldom get utilized fully, and the repair costs they save are often negligible compared to their premiums. A notable example is the subtle exclusion of damage caused by power surges, which are common and can severely damage control boards. Being informed about such nuances helps you decide whether a warranty provides real value or if setting aside a repair fund might be more cost-effective in the long run. For advanced homeowners, understanding these subtleties can make the difference between a false economy and genuine protection.
Finally, avoid the trap of complacency. Assumptions about service quality, warranty coverage, and installation standards can lead to costly mistakes. Always ask for detailed explanations, read contracts thoroughly, and don’t hesitate to seek second opinions. Remember, the devil is in the details—what seems like a straightforward “repair” or “warranty” might hide complexities that could save you from future headaches. Have you ever fallen into this trap? Let me know in the comments.
How do I maintain my appliances over time?
Staying on top of appliance maintenance requires more than just occasional cleaning. I personally rely on a set of specialized tools that give me an edge in diagnosing and fixing issues efficiently. My go-to device is a digital multimeter. Unlike basic testers, a multimeter provides precise voltage, current, and resistance readings, allowing me to quickly identify faulty control boards and malfunctioning sensors. I use a digital multimeter every time I troubleshoot, especially when verifying continuity in switches or testing relays. For cleaning, I swear by a compressed air canister. It’s invaluable for removing dust from vents, fan blades, and internal components—especially in models like dryers, where lint buildup can cause overheating and inefficiency. Additionally, I swear by a cordless screw gun, which makes disassembly much faster and safer. No more struggling with stubborn screws or risking damage to sensitive panels. These tools have transformed how I perform routine maintenance, making long-term appliance health manageable. I predict that in the future, smart diagnostic devices integrated with AI will provide even more proactive maintenance alerts, reducing breakdowns before they happen.
Why investing in proper tools benefits your appliance upkeep
By equipping yourself with the right tools, you can significantly extend the lifespan of your appliances and avoid costly professional repairs. For example, regularly checking and replacing worn-out door seals using a gasket cleaning brush and seal lubricant can prevent leaks and maintain efficiency. Moreover, adopting a routine of visual inspections—using a flashlight and mirror—paired with your multimeter allows you to catch minor issues before they become major problems. This proactive approach saves time, money, and frustration over the years. Consider setting a maintenance schedule—monthly or quarterly—focusing on each key component. For instance, cleaning the filter screens in washing machines or checking wiring connections can prevent unexpected failures. As appliances become smarter, tools like app-connected diagnostic devices will further simplify this process, guiding even less experienced homeowners through troubleshooting steps.
Maintaining your systems reliably for the long haul
To make your maintenance efforts more effective, keep a log of repairs, part replacements, and inspections. This record helps identify recurring issues and plan proactive maintenance. Also, ensure you’re using the proper replacement parts—selecting genuine manufacturer parts when repairs are needed, as inferior components can undermine your efforts. Additionally, invest in quality cleaning products designed for your specific appliances. For example, cleaning the drainage system of your dishwasher with specialized brushes and descaling agents will prevent clogging and improve performance. Remember, the combination of the right tools and consistent care will drastically cut down on downtime and expenses over time, with some experts emphasizing that a systematic maintenance routine can extend the typical appliance lifespan by 15-20%. Be proactive, and your appliances will thank you in reliability and efficiency. Start by trying a detailed check of your control panel with your multimeter today—it’s a simple step that can reveal hidden faults before they cause a breakdown.
Hidden Traps That Catch Even the Most Prepared Homeowners
My biggest eye-opener in appliance repair was realizing how often overlooked clues, like a loose wiring connection or a thin layer of grime blocking sensors, can turn a simple fix into a frustrating chase. The lightbulb moment came when I learned that many issues stem from neglecting these small details—trust me, those minor components can have outsized effects. Also, I discovered that DIY troubleshooting isn’t just about saving money; it’s about understanding your appliance intimately, which empowers you to prevent failures before they happen. Lastly, I found that patience and methodical testing trump rushing into replacement—sometimes, the fix is just a multimeter away from saving your day.