
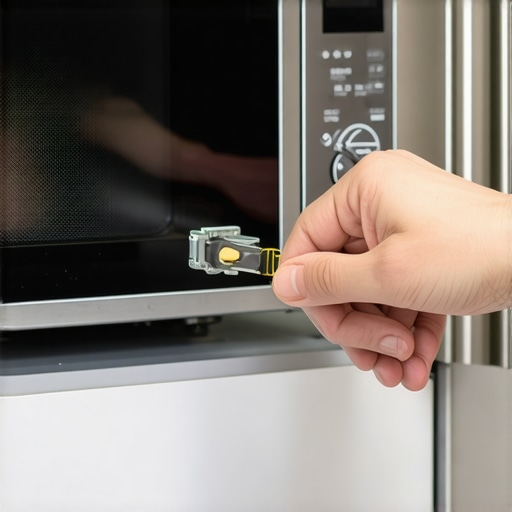
Ever had that uncomfortable moment when your microwave suddenly refuses to open or the door doesn’t latch properly? I vividly remember the frustration I felt when my trusty microwave’s door latch broke just days before I needed it most. Instead of rushing to call a costly repair service or worse, tossing out a perfectly good appliance, I took a deep breath and decided to learn how to fix it myself. That lightbulb moment changed how I handle appliance issues forever—and I want to share that confidence with you.
Why a Broken Microwave Door Latch Is More Than Just Annoying
Many folks overlook the importance of a microwave door latch until it fails completely. But here’s the deal: a faulty latch can be a safety hazard, and it can prevent your microwave from working at all. Fixing it yourself not only saves money but also gives you that satisfying feeling of mastering a small but crucial repair. Plus, knowing how to address common issues like this helps you avoid unnecessary replacements or expensive professional visits. If you’re tired of feeling helpless when your appliances act up, hang on—because I’ll walk you through making that repair yourself.
Are You Wasting Time and Money on Repairs That Aren’t Necessary?
I admit, I made a mistake early on—assuming that every microwave problem demanded a professional. My first attempt ended in more confusion and cost than I expected. Once I understood the basics of how microwave door latches work, I saved myself a lot of hassle. You can do the same. For reliable service and peace of mind, check out warranty-backed appliance services you can trust. But first, let’s get into what’s really going on inside that little latch and how you can fix it with your own hands.
Ready to save some money and boost your confidence? Keep reading, because the steps I’m about to share are straightforward and doable—even if you’re not a handy person by nature. Let’s get your microwave working like new again!
.
Accessing the Latch Mechanism
First, unplug your microwave to ensure safety. Use a screwdriver to remove the outer cover—think of it as peeling back a protective layer, like opening the hood of a car to access the engine. Gently, pry off the panel, being cautious not to damage any clips or screws. Once inside, locate the latch assembly, which is typically attached to the door frame with a few screws. I remember my first attempt; I accidentally knocked a wire loose, so do this slowly and keep track of small parts.
Assessing and Cleaning the Components
Inspect the latch for visible damage—cracks, bending, or broken parts. Often, dust and grime can cause the latch to stick or misalign. Use a soft cloth or a brush to clean all parts thoroughly. If you notice corrosion or buildup, a mild alcohol solution can help. I once cleaned the latch with a cotton swab dipped in isopropyl alcohol, which improved its function significantly. If the latch is severely worn or broken, replacing it is the best option.
Replacing or Repairing the Latch
If the latch is damaged beyond cleaning, purchase a replacement part specific to your microwave model. You can verify compatibility by checking the manufacturer’s manual or online parts catalog. To install the new latch, align it properly with the mounting holes, securing it with the screws you removed earlier. Tighten each screw gradually and evenly, much like threading a bolt into a nut to ensure a good fit. In one case, I had to slightly adjust the latch position after installation to ensure the door closed securely without forcing it.
Testing the Fix
Before reassembling the entire unit, plug the microwave back in and test the door latch. Open and close the door a few times to see if it clicks securely and remains closed during operation. Listen for the audible click that indicates proper engagement. If the latch still doesn’t function correctly, double-check your assembly for misalignment or loose screws. Remember, safety is paramount—never bypass safety interlocks or attempt to use the microwave with a faulty latch.
Reassembling and Final Checks
Once satisfied, replace the outer panel carefully, ensuring all clips and screws are securely fastened. This step is akin to putting the hood back on after servicing a car—ensure everything fits snugly to prevent rattling or internal damage. Finally, run a short test cycle with an empty microwave to confirm that the latch holds and the microwave operates normally. If issues persist, consider contacting professional repair services or review warranty options for potential coverage.
Many homeowners believe that warranties automatically cover all repair costs or that same-day service is always guaranteed and foolproof. However, these assumptions often lead to costly surprises and missed opportunities for smarter decisions. Let’s dig deeper into some common misconceptions and hidden nuances that can make or break your appliance repair experience.
Why Warranties Don’t Always Cover What You Expect
One prevalent myth is that a standard warranty will cover every repair problem. In reality, many warranties strictly limit coverage to specific parts or conditions, often excluding damages caused by user error or accidental damage. Furthermore, many warranties require that repairs be performed by authorized technicians; attempting to fix an appliance yourself or through an unverified service can void the coverage altogether. Maximizing your warranty claims involves understanding the fine print, which most customers overlook.
Belief in Instant Solutions May Cost You
It’s tempting to assume that same-day repair services are a quick fix for all appliance issues. But here’s the truth: not all companies have the necessary parts in stock, and urgent scheduling might lead to rushed diagnostics. Often, the most effective repairs require ordering specific components or performing thorough diagnostics that can’t be rushed without risking future failures. Knowing what to expect from professional services can save you frustration and additional costs.
What Are the Risks of Relying Solely on Same-Day Service?
Quick fixes are attractive, but they sometimes mask underlying issues or result in improper repairs that only surface later. Always ask repair providers about their diagnostic process and warranty on repairs. Choosing a service with comprehensive support, including warranty-backed work, ensures you’re not just patching a problem but genuinely resolving it. Learn more about what qualifies as reliable same-day repair.
The Expert’s Take on Installation and Repair Traps
Many people overlook the significance of proper installation—incorrectly installed appliances are prone to early failure, leaks, or safety hazards. Cutting corners or trusting inexperienced installers might save money upfront but lead to higher costs down the road. Always verify that installation is performed by certified professionals using proper installation standards. Recognizing these nuances helps you avoid what I call the ‘hidden costs’ of improper setup or repairs.
Remember, understanding the finer details about warranties, repair processes, and installation practices empowers you to make smarter decisions and avoid costly mistakes. Do you know a common appliance myth that’s been debunked? Share in the comments below!
How Do I Maintain My Appliances Over Time?
Maintaining your appliances isn’t just about fixing when they break; it’s about proactive care and using the right tools to extend their lifespan. A high-quality multimeter is invaluable for diagnosing electrical issues, ensuring your repairs are precise and safe. I personally rely on the Fluke 115 for its accuracy and durability, which allows me to test components like thermostats, capacitors, and power supplies efficiently. For cleaning and preventative maintenance, I swear by a coil brush and a microfiber cloth—these help keep condenser coils clean, which improves efficiency and prevents overheating. Regularly inspecting and cleaning these parts can save you from costly repairs down the line.
Tools I Recommend for DIY Appliance Repairs
When it comes to tackling repairs myself, precision matters. I use a cordless electric screwdriver with a magnetic bit holder—this makes removing panels hassle-free and prevents losing tiny screws. For testing and diagnostics, a digital clamp meter helps me quickly measure current draw, which can identify whether motors or compressors are failing. Additionally, having access to detailed schematics or wiring diagrams for your specific appliance model is crucial; these can often be found on manufacturer websites or through specialized repair guides. Investing in quality tools not only makes repairs safer but also increases the success rate of your fixes.
Preparing for Long-Term Success with Proper Maintenance
Adopting a maintenance routine is key. Schedule biannual inspections of filters, seals, and connections. Set reminders to clean filters, replace worn-out parts, or lubricate hinges and moving components. Documentation is equally important—keep a maintenance log detailing work done and parts replaced. This record can be critical when dealing with warranties or warranty-backed services—more on that later. Embracing these habits ensures your appliances perform reliably and reduces the need for emergency repairs. The future of appliance care is moving toward smart diagnostics and IoT-enabled monitoring systems, enabling real-time alerts and predictive maintenance, which can be worth investigating as these technologies become more affordable.
Reliable Repair and Installation Should Be Your Priority
Even with proper maintenance, inevitable issues arise. Knowing when to call professionals is vital. Quality service providers offer warranty-backed repairs that guarantee long-term results. When scheduling installations, always ensure they follow proper installation standards. This prevents future malfunctions and safety hazards and saves you money. As technology advances, expect more integrated diagnostic tools that can communicate with your smartphone to alert you to issues before they become major problems. Stay ahead by choosing reputable, certified technicians and advocating for quality parts and workmanship.
To discover more about how to optimize your appliance maintenance routine, check out our expert guide to appliance repair and installation. Start by trying the simple step of cleaning your condenser coils with a dedicated coil brush—it’s one of the most overlooked yet effective ways to keep appliances running smoothly and efficiently for years to come.
What I Wish I Knew About Warranties and Repairs Early On
One of the most eye-opening lessons I learned was that warranties aren’t always as comprehensive as they seem. I once assumed that a standard warranty covered every misfortune, only to realize later that user errors or certain damages voided the coverage. This taught me to read the fine print carefully and to keep detailed records of repairs and maintenance. Another lightbulb moment was understanding that not all same-day services are created equal; quick fixes can sometimes mask deeper issues, leading to repeated costs. Recognizing these pitfalls early saved me time, money, and frustration, and I want you to benefit from this wisdom too.
Additionally, I discovered that proper installation matters far more than I initially believed. An incorrectly installed appliance can cause early failures or safety hazards that might not be immediately obvious. Ensuring technicians follow proper standards—like those outlined here—can save you from costly repairs down the line. These insights transformed how I approach appliance care, making me more proactive rather than reactive.
Lastly, I realized that investing in quality tools and scheduling regular maintenance is a game changer. Simple practices like cleaning condenser coils or checking wiring with a good multimeter can extend an appliance’s lifespan significantly. These small habits pay off in longer-lasting, more reliable performance. My journey has shown that knowledge truly is power, especially in appliance care, and I hope sharing these lessons encourages you to take control of your home’s essential tools.
Tools and Resources That Make All the Difference
My go-to tools include a durable digital multimeter like the Fluke 115, which provides precise diagnostics without guesswork. For cleaning and preventive maintenance, I rely on a coil brush and microfiber cloth—simple yet effective for keeping condenser coils spotless. When it comes to learning more about repairs, I trust the comprehensive guides on this site, which break down complex issues into manageable steps. Additionally, subscribing to reliable service providers who offer warranty-backed repairs ensures peace of mind when professional help is needed.
Beyond tools, I recommend reading technical manuals and participating in online forums to stay updated on common issues and solutions. Knowledgeable sources keep me ahead of potential problems, saving money and extending appliance life. Remember, investing a little effort in the right resources can make all the difference between a minor fix and a major headache.
Embrace the Challenge and Keep Moving Forward
If I’ve learned anything, it’s that tackling appliance issues with confidence isn’t reserved for professionals—anyone can become adept with patience and curiosity. Every repair you attempt, from fixing a microwave door latch to maintaining your HVAC system, boosts your skills and reduces your reliance on costly services. So, take that first step today, armed with the knowledge that each challenge is an opportunity to become more self-sufficient and resilient. Your appliances—and your wallet—will thank you for it. Remember, the future of appliance care is in your hands, and every small repair makes you smarter and more prepared.
What’s been the biggest lesson you’ve learned while fixing your appliances? Share below—I’d love to hear your story and help you on your journey!