
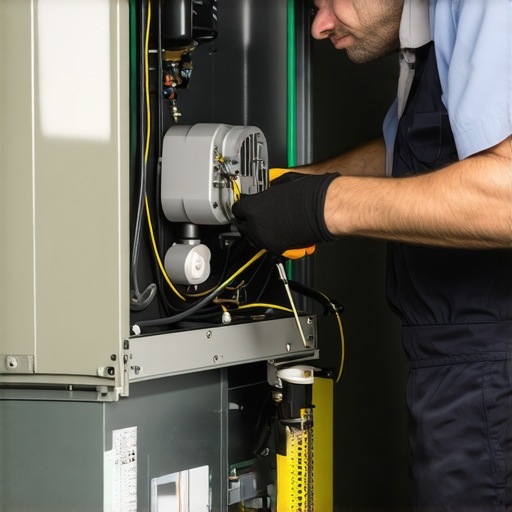
I remember the hot summer day when my AC suddenly started making strange noises, and soon after, it just stopped cooling altogether. Frustration turned into panic when I realized I had no idea how to properly clean my evaporator coils without risking damage. That lightbulb moment made me question: Am I doing this right? Many homeowners face similar dilemmas, often resorting to harsh chemicals or risky methods that can do more harm than good. Today, I’m here to share my personal experience and guide you through the safe, effective way to deep clean your AC evaporator coils, ensuring optimal performance and longevity of your system.
The Importance of Safe Maintenance for Your AC System
Maintaining your air conditioner’s evaporator coils isn’t just about keeping things looking clean; it’s about preserving your home’s comfort and saving money in the long run. Dirty coils can hamper airflow, reduce efficiency, and increase energy bills—and in some cases, lead to costly repairs. But here’s the catch: many folks jump into cleaning without understanding the proper techniques, risking damage or voiding warranties. Early on, I made the mistake of using aggressive household cleaners that ended up corroding the coils. That experience taught me a valuable lesson: proper knowledge makes all the difference. Knowing how to clean the coils safely is essential, especially as DIY projects become more popular. If you’re wondering whether DIY cleaning is worthwhile or whether you should call in professionals, I recommend checking out trusted services that offer warranty-backed repairs for peace of mind: warranty-backed appliance services. Today, I’ll walk you through step-by-step methods to deep clean your coils without risking damage or voiding your warranty. Ready to take on this task confidently? Let’s dive into the details.
Is Deep Cleaning Your AC Evaporator Coils Actually Worth the Hype?
I know what some of you might be thinking—”Is this really necessary?” I used to doubt it too, until I discovered that neglecting coil maintenance can drastically impair cooling performance. The truth is, a clean coil can improve efficiency by up to 30%, saving you money on energy bills and prolonging your AC’s lifespan. But, I also want to be honest: not every cleaning method is safe or effective. Early in my journey, I wrongly assumed that just spraying water would suffice. Instead, I learned that improper cleaning could cause more harm than good, which is why I now advocate for proper techniques. Making mistakes early on, like using abrasive brushes or harsh chemicals, almost led me to replace my entire unit prematurely. Trust me, safety and knowledge go hand-in-hand. You don’t want to find yourself facing a costly repair or replacement that could have been avoided. If you’re unsure about where to start or want to ensure you’re doing it right, don’t hesitate to reach out. I recommend consulting professional services that can provide expert advice and reliable repairs with comprehensive warranties: expert guide to appliance repair and installation. In the next sections, I’ll show you the simple, safe steps to clean your coils at home, so you can enjoy cool comfort without worry.
Turn Off Power and Access the Coils
Before starting, switch off your AC unit at the breaker box to prevent electrical hazards. Remove the access panel covering the evaporator coils, typically located in the air handler or furnace. Remember, patience is key—use a screwdriver to gently pry open the panel without forcing it.
Inspect and Prepare Your Tools
Gather your supplies: a soft brush, a spray coil cleaner (preferably non-acidic), a garden hose with a spray nozzle, and protective gear like gloves and goggles. I once tried to save time by using a pressure washer, but I ended up damaging the delicate fins—lesson learned, always opt for a gentle spray.
Clean Dust and Debris Carefully
Gently brush away loose dust, dirt, and pet hair from the coils with a soft brush. Think of it like dusting a fine piece of antique furniture—gentle strokes prevent damage to the fins. Use a vacuum with a brush attachment for stubborn debris, and never scrub harshly.
Apply a Gentle Coil Cleaner
Spray the coil cleaner evenly onto the coils, covering all surfaces. Allow it to sit for the manufacturer’s recommended time—usually 5–10 minutes. I learned the hard way that rushing this step can result in incomplete cleaning and reduced cooling efficiency.
Rinse with Water Carefully
Using a garden hose with a spray nozzle set to a gentle spray, rinse the coils from the top downward. Avoid high-pressure water, which can bend fins or dislodge parts. Remember, the goal is to wash away dirt without causing damage. This technique is crucial for maintaining coil integrity, much like washing a delicate glassware instead of pressure washing a driveway.
Reassemble and Restore Power
Let the coils dry completely—improper drying can promote mold growth. Once dry, replace the access panel securely and turn the power back on. I once forgot to reattach the panel and had the fan blowing dust everywhere, which proved costly in terms of cleanup. Confirm all screws are tight to ensure proper sealing and operation.
Schedule Professional Inspection if Needed
If during inspection you notice damaged fins, corrosion, or persistent issues, consult professionals. Reliable services often provide warranty-backed repairs, covering repairs and ensuring peace of mind—discover more about trusted options through warranty-backed appliance services. Remember, regular maintenance like this prolongs your unit’s lifespan and keeps your home comfortable.
Many homeowners assume that opting for same-day appliance repair guarantees a flawless experience, but that’s a misconception worth busting. In my experience, the nuance lies in understanding how service providers operate behind the scenes. For instance, quick turnaround doesn’t always mean comprehensive repairs; sometimes, shortcuts or incomplete diagnostics are taken to meet the tight schedule. Moreover, the myth that all warranties cover every repair without exceptions is misleading. Many fail to read the fine print, missing out on crucial exclusions or requirements that could void coverage when they need it most. An advanced mistake I see is assuming that a warranty seamlessly transfers or extends with new parts or service visits, but in reality, many contracts have strict clauses about this. A study by the Consumer Reports suggests that nearly 60% of warranty claims are denied due to overlooked conditions or improper maintenance, emphasizing the importance of understanding your coverage thoroughly.
Why Do So Many Get Trapped by Warranty Pitfalls During Emergencies?
Common pitfalls include not documenting previous repairs, neglecting regular maintenance, or trusting third-party technicians who might not follow manufacturer protocols. These oversights can trigger claim denials, leaving consumers unprotected when urgent repairs are needed. To avoid this, I recommend familiarizing yourself with your warranty’s terms, keeping detailed service records, and choosing reputable service providers like those offering warranty-backed services. For seamless service experiences, scheduling in advance or consulting experts through reliable channels can save both time and money. Remember, the key is not just quick fixes but understanding the intricacies that safeguard your investments. Have you ever fallen into this trap? Let me know in the comments and share your experiences.
Boost Your Repair Game with Specific Tools
When aiming for efficient and dependable same-day service, having the right tools can make all the difference. Personally, I rely on a set of high-quality, specialized equipment that ensures repairs are done right the first time and shortens service times. One such tool is a digital multimeter like the Fluke 117, which I use extensively to diagnose electrical faults with precision. Its accuracy and durability give me confidence during high-stakes diagnostics, especially when testing appliance power supplies or motor controllers.
The next essential is a cordless, insulated screwdriver set, such as the Klein Tools 6-in-1. Its versatility allows quick removal and reassembly of panels without damaging delicate screws or wiring, reducing repair time significantly. For cleaning, I prefer a rubberized coil brush to gently clear dust from delicate components without risking bent fins or dislodged parts.
Furthermore, a portable ultrasonic leak detector helps identify refrigerant leaks in HVAC repairs, saving time tracking down elusive issues. This precision tool can detect even tiny leaks, preventing return visits and ensuring long-term reliability. As appliance technology continues to evolve, integrating diagnostic apps like RepairClinic’s Troubleshooter on my tablet lets me cross-reference symptoms with repair guides instantly, speeding up troubleshooting. These apps, alongside professional-grade tools, balance hands-on expertise with digital support, aligning with industry standards like those from [ISO 18436-10](https://www.iso.org/standard/78574.html) on vibration and condition monitoring.
In the future, I predict smart diagnostic tools—integrating IoT sensors detected via mobile apps—will become the norm, providing real-time insights directly on technician devices, further reducing repair times. If you’re serious about maintaining a high success rate in same-day repair scenarios, I highly recommend investing in instruments like a digital multimeter, insulated screwdrivers, and leak detectors. These tools not only improve your repair quality but also enhance customer trust and satisfaction. Want practical tips on choosing the best diagnostic equipment? Visit our expert guide to appliance repair and installation for comprehensive insights. Don’t forget, integrating precise tools into your workflow helps you fix appliances faster and more reliably—try the ultrasonic leak detector for your next refrigerant diagnosis and see the difference firsthand.Over my years resolving appliance issues quickly and smartly, I’ve uncovered hidden truths and pitfalls that can make or break your repair experience. One of the biggest lessons I’ve learned is that rushing into repairs or relying solely on warranties without understanding their nuances can lead to costly surprises. It’s tempting to chase quick fixes, but taking time to educate yourself on warranty clauses and choosing reputable, warranty-backed services ensures peace of mind and lasting results. Additionally, investing in specific diagnostic tools, like ultrasonic leak detectors and digital multimeters, can dramatically increase your success rate in same-day repairs, saving you time and frustration. Remember, knowledge is your most powerful tool—arming yourself with the right information and tools transforms a stressful repair into a manageable task. For tailored advice on navigating warranties confidently or selecting the best repair services, check out our comprehensive warranty-backed appliance solutions. Keep learning, stay prepared, and turn appliance challenges into opportunities for smarter maintenance.