
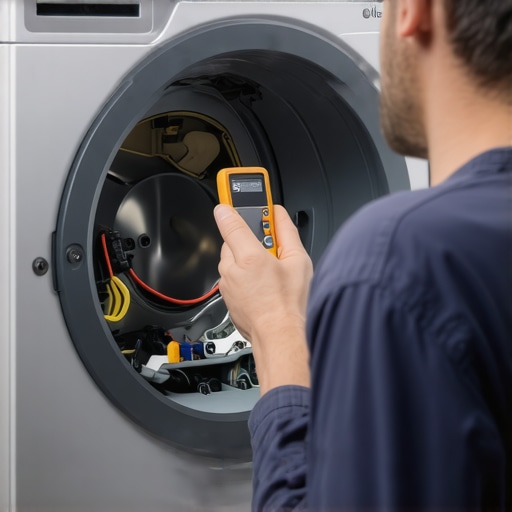
I remember the day my dryer suddenly stopped heating, right in the middle of doing laundry. No warning, no strange noises—just cold air blowing through the drum. Frustration set in because I knew I needed to get it fixed fast but dreaded the idea of calling in a professional and paying a hefty service fee. After some quick research, I realized I might be able to troubleshoot the issue myself, saving time and money.
That was a lightbulb moment for me: many appliance problems can be diagnosed at home with just a basic multimeter and a little guidance. Today, I want to share a simple yet effective way to check if your dryer’s thermal fuse has blown—something that’s often the culprit behind a no-heat problem. If you’re tired of unresponsive dryers and unreliable technicians, stick around. We’re going to walk through the process step-by-step, so you can confidently test your appliance and maybe even fix it yourself.
Why Checking the Thermal Fuse Matters More Than You Think
The thermal fuse acts like a safety valve in your dryer. It’s designed to blow if your appliance overheats, preventing fires or further damage. But here’s the thing: a blown fuse doesn’t mean your whole dryer is done for. Sometimes, it’s the tiny problem that’s hiding behind a big inconvenience. Testing the fuse is straightforward, and it can save you from unnecessary replacements or plumber-like repair costs. Plus, knowing how to do it empowers you to handle minor issues without waiting for a repair technician to arrive.
Is it really worth the effort, or am I risking making things worse?
Early on, I made a common mistake—assuming that if my dryer wasn’t working, it was definitely a complex problem or something I couldn’t fix myself. That hesitation kept me from troubleshooting sooner. Turns out, one simple mistake we often make is misreading multimeter readings or skipping essential safety steps. Trust me, a little caution and patience go a long way in avoiding further damage.
If you want to avoid spending hundreds on repairs or replacement, understanding how to test your thermal fuse is a smart move. When you’re ready, I’ll guide you through the exact steps to check your fuse using a multimeter. It’s easier than you think. And if your tests indicate the fuse is blown, I’ll also share how to replace it quickly and safely, so your dryer can be back to work in no time.
And hey, if your dryer seems to have other issues or you’re unsure about what you find, don’t hesitate to reach out. You can get professional assistance at [same-day service in 2025](https://discountappliancehub.com/scheduling-your-appliance-repair-for-same-day-service-in-2025) or consult trusted experts who’ll handle the repairs confidently. Ready to become your own appliance detective? Let’s dive in.
Disconnect Power Before You Proceed
My first mistake was jumping straight into testing without unplugging the dryer—never do this! Turn off the power at the circuit breaker to ensure safety, preventing shocks during the process. I learned this the hard way when I got a minor zap while handling internal components.
Locate the Thermal Fuse in Your Dryer Model
The thermal fuse is typically found near the heating element or blower housing. Consult your dryer’s manual or find a diagram online for your specific model. For my model, it was behind the back panel, secured with two screws. Use a screwdriver to remove the panel and access the fuse.
Identify the Fuse with a Multimeter
Once exposed, find the thermal fuse—a small, rectangular component with two wires attached. Set your multimeter to the lowest resistance setting, often denoted as ohms (Ω). Touch the multimeter probes to each terminal on the fuse. A good fuse will show a reading close to zero or a very low resistance (<1Ω). If it shows infinite resistance or OL (open loop), it’s blown. During my first attempt, I mistakenly read the multimeter from the wrong terminals—double-check the connections to avoid false results.
Perform a Continuity Test for More Accuracy
If your multimeter has a continuity setting, use it for a more straightforward test. Place the probes on each fuse terminal; a continuous beep indicates a good fuse. No beep means it’s blown. I found that this method reduces errors, especially if your multimeter is well-calibrated. When I tested my fuse, I heard the beep confirming it was functioning, but later realized I was testing the wrong component. Be meticulous with your target!
Replacing a Blown Fuse Safely
If you determine the fuse is blown, replace it with one of the same type and rating. Make sure the new fuse is rated appropriately—most are 15 or 20 amps. I ordered a replacement online, and it arrived quickly. Carefully install the new fuse in the same orientation, secure the panel, and reconnect power. Keep in mind, if the fuse blows again shortly after replacement, there may be an underlying airflow or overheating issue in your dryer, which warrants professional attention.
When to Consider Professional Help
If testing indicates a blown fuse, but replacing it doesn’t solve the problem, or if the fuse keeps blowing repeatedly, it’s time to contact specialists. Skilled technicians can diagnose deeper issues like airflow obstructions or faulty thermostats. You can schedule same-day service at [this link](https://discountappliancehub.com/scheduling-your-appliance-repair-for-same-day-service-in-2025) to resolve persistent problems quickly.
Keep Safety a Priority with Expert Support
Remember, working on electrical components involves risks. If you’re unsure or uncomfortable performing these tests yourself, hire professionals. Reliable repair services are just a click away, and they have the right tools and expertise to troubleshoot thoroughly. Don’t hesitate to reach out at [contact us](https://discountappliancehub.com/contact-us) for safe, effective repairs.
When it comes to warranties, same-day service, installation, and appliance repair, many homeowners operate under misconceptions that can cost them time and money. A common myth is that an extended warranty covers all repair costs indefinitely. In reality, warranties often have fine print exclusions, limited coverage periods, or require specific conditions to be met, as outlined in expert resources like the [warranty-backed appliance services you can rely on](https://discountappliancehub.com/warranty-backed-appliance-services-you-can-rely-on). Overestimating warranty coverage can lead to unexpected bills or denied claims, especially if proper documentation isn’t maintained.
Another trap many fall into involves the expectations around same-day service. It’s tempting to believe that requesting urgent repair guarantees same-day arrival; however, detailed factors such as technician availability, parts inventory, and geographic location influence the actual response time. As highlighted in [what to expect from same-day appliance repair experts](https://discountappliancehub.com/what-to-expect-from-same-day-appliance-repair-experts), being flexible and understanding these nuances ensures smoother service experiences.
Installation errors are often underestimated by homeowners, who may assume that professional installation is straightforward and error-proof. Yet, improper setup—like incorrect leveling or miswired connections—can compromise appliance performance and safety. For insight into the complexities involved, see [how to ensure reliable appliance installation in 2025](https://discountappliancehub.com/how-to-ensure-reliable-appliance-installation-in-2025). A savvy homeowner recognizes that professional installation involves precise procedures that, if overlooked, can lead to recurring issues or voided warranties.
So, what are some advanced pitfalls most overlook? One nuanced mistake involves neglecting to verify whether repair technicians are authorized to perform warranty-covered repairs. Sometimes, non-certified technicians might perform work that voids warranty claims or employs subpar parts, leading to further problems down the line. Always ask whether your service provider is authorized, a tip supported by [fast, trustworthy appliance installation near you](https://discountappliancehub.com/fast-trustworthy-appliance-installation-near-you).
Furthermore, misconceptions about what constitutes a covered repair can be costly. For example, some believe that if an appliance failed within the warranty period, it’s automatically covered. However, as highlighted in [how to maximize your appliance warranty during emergency repairs](https://discountappliancehub.com/maximize-your-appliance-warranty-during-emergency-repairs), certain damages caused by user neglect or improper maintenance are often excluded. Knowing these nuances helps manage expectations and prevents disputes.
Have you ever fallen into this trap? Let me know in the comments. Recognizing these deeper truths can significantly improve your experience with appliance services, saving you stress and expenses. Remember, research, preparation, and clear communication with authorized, certified professionals are your best tools to navigate the complex landscape of appliance warranties and repairs.
Investing in Reliable Testing Equipment
Personally, I swear by a high-quality digital multimeter like the Fluke 117. Its accuracy and durability make it invaluable for diagnosing issues like blown thermal fuses or faulty thermostats. I prefer digital over analog because it provides precise readings and easy-to-read displays, which minimize the risk of misinterpreting results. Additionally, having a multimeter with auto-ranging capabilities saves me time, especially when troubleshooting multiple components in different appliances.
Another essential tool I recommend is a cordless electric drill with variable speed and a set of precision screwdriver bits. It speeds up accessing internal panels and parts, making maintenance less tedious and more efficient. I’ve learned that investing in quality tools upfront reduces the frustration of incomplete repairs and ensures safety during operation.
Utilizing Software for Maintenance Planning
While manual tools are critical, managing your appliance maintenance schedule with software like Home Maintenance Tracker helps you stay on top of routine checks and warranty reminders. I personally track filter replacements, cleaning schedules, and repair dates. This habit not only prolongs appliance lifespan but also prevents minor issues from becoming costly breakdowns. Given emerging smart home integrations, future trends seem to point toward AI-powered diagnostics that can preempt failures before they occur, as outlined in recent industry reports.
How do I keep my appliances operational over time?
Regular inspections are key. For example, cleaning refrigerator condenser coils with a brush and vacuum—something I do biannually—significantly improves efficiency and reduces overheating risks. Also, changing filters promptly, such as in washing machines and water dispensers, prevents blockages and mold growth. Using a combination of these maintenance routines, aligned with tools like digital multimeters and software tracking, ensures your appliances stay reliable for years to come.
When in doubt or facing persistent issues, professional support can save you time and money. You can schedule same-day service for quick fixes or complex repairs, ensuring minimal disruption. Interested in upgrading your maintenance approach? Consider trying the advanced diagnostic techniques discussed—like testing components with a multimeter—that could save you from unnecessary replacements. Reach out through our contact page for expert assistance and further guidance. Remember, consistent maintenance backed by proper tools extends your appliances’ life and preserves their warranties, keeping your home running smoothly.
The Costly Myths That Shroud Appliance Repair Realities
One of my biggest learning curves was believing that warranties cover every hiccup an appliance throws at you. I used to think if I had an extended warranty, repairs would be free or at least heavily subsidized. The truth is, warranties often come with exclusions, fine print, and specific conditions, which caught me off guard during a breakdown. This realization pushed me to read warranty policies carefully and stay informed about what’s truly covered, preventing costly surprises. Understanding warranty coverage thoroughly is a game-changer for every homeowner.
Mastering the Nuances of Rapid Repair Services
I once assumed that requesting same-day repair meant I would get a technician at my doorstep that very hour—only to be disappointed when schedules couldn’t align. After digging deeper into the process, I learned that factors like technician availability, parts on hand, and geographic location influence response times. Being flexible and understanding these nuances helped me better plan repairs and appreciate the quality of the service, even if it wasn’t instant. For real insider tips on what to expect from fast, reliable repairs, check out this guide on same-day service expectations.
The Hidden Pitfalls of DIY Appliance Fixes
Thinking I could troubleshoot any issue myself, I often skipped safety precautions—until I faced a small electrical shock that made me reconsider. Learning that disconnecting power before opening appliance panels is non-negotiable saved me from potential injuries and further damage. There’s a fine line between confidently repairing and inadvertently causing bigger problems. Investing in reliable tools, like a quality multimeter, and knowing when to seek professional help has made all the difference. For comprehensive tips on safe DIY repairs, consider this expert guide.
Why Sharpening Your Diagnostic Skills Matters Most
Initially, I relied heavily on guesswork, which cost me time and money. But once I learned to interpret multimeter readings correctly and perform proper tests, diagnosing problems like blown thermal fuses or faulty thermostats became much easier. This skill not only saves you money but also gives you confidence in handling minor repairs. Remember, the key isn’t just owning the right tools—it’s knowing how to use them effectively. To become a DIY diagnostic pro, start with this resource on troubleshooting techniques.