
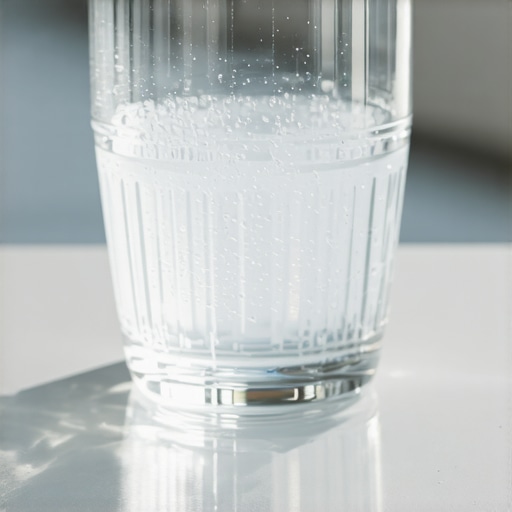
I still remember the sinking feeling in my chest last Thanksgiving. I had just pulled my favorite set of wine glasses out of the dishwasher, ready to toast with the family, only to find them covered in a dull, ghostly white haze. No matter how many times I ran them through, they looked perpetually dirty. It was incredibly embarrassing. I initially thought my dishwasher was on its deathbed and that I would have to shell out hundreds of dollars for a professional appliance installation to replace it. But after some frantic research and a few failed experiments, I realized the machine itself wasn’t broken. The culprit was much sneakier, and it is a problem that plagues millions of kitchens every single day. Today, we are going to strip away that cloudy mystery and get your glassware looking sparkling clean again. I will show you exactly how to identify if you are dealing with hard water deposits or silica film, and how to fix it without panic.
The Day I Accidentally Baked the Film onto My Plates
My first instinct during that Thanksgiving crisis was to crank the water temperature to maximum and run the cycle again with double the detergent. That was a massive mistake. I ended up chemically etching some of my cheaper glasses, permanently ruining them. I did not realize that excess detergent combined with soft or moderately hard water actually creates an abrasive environment. If your water lacks the minerals to buffer the soap, the detergent attacks the glass itself. If you are struggling with other sudden appliance mysteries, getting a same-day appliance repair diagnostic can help determine if your machine’s heating element is overheating and baking these minerals directly onto your dishes.
Is my glassware permanently ruined?
It is the question that keeps most of us up at night when we look at our cloudy cabinets. The good news is that most of the time, that white film is just a stubborn layer of calcium and magnesium carbonate. You can easily test this at home by soaking a cloudy glass in warm white vinegar for about 15 minutes. If the cloudiness wipes right off, you are dealing with hard water scale. According to the United States Geological Survey, over 85% of American homes have hard water, making this a near-universal headache. If the film does not budge after the vinegar bath, unfortunately, the glass is etched, which is a permanent physical change. To prevent this from happening to your next batch of dishes, you can use the hard water trick for keeping your dishwasher clean, which balances your chemistry. Have you noticed a stubborn white haze creeping onto your favorite dishes lately? Let me know in the comments below, because we are about to dive into the exact step-by-step cleaning process to reclaim your kitchen shine.
Step-by-Step Guide to Stripping Away the White Haze
To rescue your cloudy glasses from looking like they survived a sandstorm, you need a method that breaks down mineral bonds without scratching the delicate surfaces. I learned this the hard way when I aggressively scrubbed my favorite high-end tumblers with an abrasive sponge, permanently clouding them with micro-scratches. Think of hard water scale like dried concrete; trying to scrape it off physically will only damage the structure underneath. Instead, we must use chemistry to dissolve it. To start, fill your kitchen sink or a large washbasin with equal parts hot water and white vinegar. Submerge your cloudy glasses completely, ensuring no air bubbles are trapped inside, and let them soak for exactly 20 minutes. If you have an appliance with poor water flow, you might also want to look into the water pressure requirement for your high-end coffee station or kitchen line to prevent minerals from settling in the first place. Once the timer goes off, remove the glassware and immediately wipe the surface with a soft microfiber cloth. The calcium build-up should glide off effortlessly. Rinse each piece under warm, running tap water and dry them instantly with a clean towel to prevent new water spots from forming.
The Quick Maintenance Step to Protect Your Dishwasher
If your dishes keep coming out cloudy even after manual soaking, your machine is likely recirculating heavily concentrated mineral water. Cleaning the internal components of your dishwasher is a vital maintenance chore that is highly overlooked, much like the maintenance step most people skip on their water heater.  Pull out the bottom rack of your dishwasher and inspect the spray arms. If you see tiny white rocks blocking the water jets, poke them out using a wooden toothpick. Follow this up by running an empty cycle with a dedicated dishwasher cleaner or a cup of citric acid powder placed in the detergent cup. This simple routine dissolves the scale hiding deep inside the pump and internal lines, ensuring your machine can wash with clean, unobstructed water streams.
Protecting Your Household Investment After Upgrades
When you purchase a brand-new dishwasher, the last thing you want is for hard water to ruin it within the first year. Many homeowners focus purely on the visual appeal of a new appliance and forget to check how water hardness affects their coverage. If you are preparing to upgrade your kitchen, understanding how to protect your investment is vital, which is why you should learn top tips for same-day service warranty coverage. Hard water damage is often classified as a lack of basic maintenance by manufacturers, meaning they might deny repair coverage if scale buildup causes the pump to seize. Keeping your machine scale-free not only keeps your wine glasses sparkling but also protects your wallet from costly premature repairs.
What Most Homeowners Get Wrong About Same-Day Appliance Repairs
Many people believe that calling in an emergency technician is a straightforward, drop-in fix where the technician arrives, swaps a part, and leaves your appliance perfectly restored under warranty. Everyone says you should just call the first number you find on search engines for quick help, but in my experience, rushing this process without checking your paperwork leads to absolute financial disaster. The rush to secure same-day appliance repair quick solutions with warranty support often blinds us to how manufacturers actually evaluate these emergency visits. If a technician installs a non-OEM part just to get your machine running that afternoon, your entire active warranty could be instantly voided. Always ask the technician if they are using factory-certified components before they turn a single wrench on your machine.
The Unexpected Trap of Third-Party Authorizations
The biggest trap you can fall into during an appliance crisis is assuming any licensed technician is authorized to work on your specific brand. Manufacturers are incredibly strict about who touches their hardware. If you hire an independent local expert to perform a rapid fix without getting prior authorization from your warranty provider, they will likely reject your claim for reimbursement. I learned this the hard way when a minor electrical issue turned into a massive out-of-pocket expense because I did not check the fine print first. To protect your finances during these stressful moments, you must learn how to maximize your appliance warranty during emergency repairs by properly documenting the breakdown and contacting your provider before booking the visit. A study by the National Association of Consumer Agency Administrators highlights that vague warranty terms and unauthorized repairs are among the top sources of unresolved consumer complaints, proving that the burden of proof always falls on the homeowner.
How do I prove my appliance failed from wear and tear instead of neglect?
This is the ultimate question that separates prepared homeowners from those who get stuck with massive repair bills. When a claim adjuster reviews your case, they will look for any sign of poor maintenance to deny your payout. To successfully dispute a denial, you must maintain a physical or digital log of every filter change, professional cleaning, and diagnostic check. If you have recently upgraded your kitchen, knowing how to document appliance damage for a warranty payout is your absolute best defense. Take clear photos of the failure point, keep receipts of any specialized cleaning products you purchased, and ensure the technician notes the exact cause of the breakdown on their invoice. Have you ever fallen into this trap and been denied coverage over a minor detail? Let me know in the comments below, and let us swap stories to keep these manufacturers honest.
My Personal Toolkit for Fighting Hard Water Scale
To stop minerals from ruining my dishes and choking my dishwasher pump, I had to stop relying on generic grocery store rinses. I developed a system using a digital TDS (Total Dissolved Solids) pen to test my kitchen water supply. Measuring the water chemistry directly tells me exactly how much citric acid I need to add to the cycle. Additionally, I physically inspect the spray arm seals every six months. If you want to avoid premature parts failure, taking the time to learn the filter change mistake that ruins your little luxury water flow is highly beneficial for keeping all your water-fed kitchen appliances running smoothly. This hands-on, preventative method is much better than waiting for a total system breakdown.
How do I maintain my dishwasher performance over time?
The key to keeping your dishwasher working like new is consistent, scheduled maintenance rather than waiting for structural issues to appear. According to the Association of Home Appliance Manufacturers (AHAM), consumer neglect of filters and internal seals is the primary driver of premature appliance degradation. Once a month, manually unscrew the cylindrical mesh filter at the bottom of the tub and scrub it with a soft nylon brush under warm water. To ensure everything stays aligned and prevents leaks, implementing the leveling secret for a silent dishwasher cycle will keep the internal spray arms rotating perfectly. Looking forward, we are seeing a clear shift toward smart appliances with built-in turbidity sensors that notify you precisely when a filter is clogged. But until those systems are standard in every home, doing these manual checks yourself is the absolute best way to extend your machine’s lifespan. If you want to keep your kitchen running flawlessly, grab a digital TDS pen this week and test your water hardness level so you can calibrate your washing cycles perfectly. 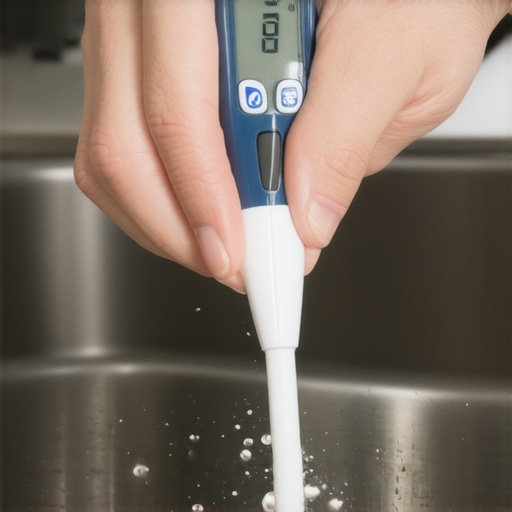
The Hardest Lessons I Learned Fighting Hard Water and Voided Warranties
Over the years, I have realized that the battle against cloudy glassware is only half the struggle. What really matters is how we manage the appliances that keep our kitchens running. First, assuming a quick fix from any local technician is safe can be an incredibly expensive mistake. I once bypassed official channels to resolve a minor issue, only to find out that using non-certified technicians is one of the quickest ways to void your coverage. If you ever find yourself in a rush, it is critical to learn top tips for same-day service warranty coverage so you do not lose your financial protection. Second, never underestimate how fast mineral scale can destroy an appliance pump. Neglecting water hardness does not just ruin your wine glasses; it slowly chokes your dishwasher and can lead to sudden mechanical failures that require scheduling your appliance repair for same-day service in 2025 to save your kitchen from a flood.
My Essential Toolkit for Pristine Kitchen Appliances
To keep my kitchen sparkling and protect my machinery from early retirement, I rely on a select group of tools and resources that have saved me thousands of dollars. I highly recommend investing in a digital TDS (Total Dissolved Solids) meter to accurately measure your home’s water hardness before adjusting your detergent levels. I also keep a steady supply of pure citric acid powder, which acts as a safe, natural descaler for the dishwasher interior without the harsh chemical smells of commercial alternatives. For those times when a machine behaves erratically despite being clean, I reference official manufacturer portals for exact troubleshooting codes. Finally, whenever I need to coordinate professional help or get a new unit set up correctly, I rely on specialized guides like the expert guide to appliance repair and installation today to make sure the work is done to the highest standard.
Take Back the Shine and Protect Your Kitchen Investment
You do not have to live with dull, cloudy glasses or live in constant fear of your dishwasher breaking down. By taking control of your water chemistry, executing simple monthly cleanings, and understanding your warranty rights, you can keep your kitchen running flawlessly for years to come. If you are ever faced with an unexpected breakdown, remember that speed should not come at the cost of your warranty; always look for same-day appliance repair quick solutions with warranty support to ensure you are fully protected. Your home deserves to sparkle, and with these simple maintenance habits, it always will.
Have you ever had to deal with stubborn white film on your dishes, or did you discover a trick that works wonders for hard water scale? Let me know in the comments below!