
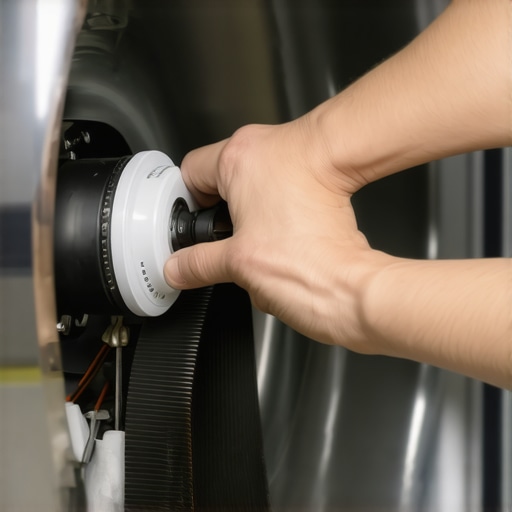
It started as a faint chirp, like a lonely cricket had moved into my laundry room. Within three days, that chirp morphed into a rhythmic, metal-on-metal screech that I could hear through two closed doors and a pair of noise-canceling headphones. It was 11 PM on a Sunday, I had a wet load of work shirts that needed to be dry by morning, and my dryer sounded like it was preparing for a literal meltdown. I stood there, staring at the machine, wondering if I was about to be out five hundred bucks for a new unit or if I’d have to wait days for a service call. That was the night I realized most of us overcomplicate appliance issues. We assume a noise that loud must be a terminal illness for the machine, but more often than not, it is just a cry for a tiny bit of maintenance. Have you ever stood in your laundry room, wincing at every rotation of the drum, wondering if the whole thing was about to explode? You aren’t alone. Today, I am going to show you how to kill that noise for good without calling in a pro or losing your entire Saturday.
Stop Living with That Ear-Piercing Dryer Scream
I’ll be the first to admit that I made a massive mistake early on. When I first heard the squeak, I grabbed a can of standard WD-40 and thought I’d just spray it near the rollers. Big mistake. Not only did the smell linger on my clothes for weeks, but it actually gummed up the works even worse. I didn’t realize that dryers require very specific, high-temp lubricants or, quite often, just a simple tightening of the specific screw that fixes a rattling dryer drum. If you hear a rhythmic thumping instead of a high-pitched squeak, you might actually be looking at a different issue altogether, like the ones found in this belt replacement guide for a thumping dryer. But if it’s that nails-on-a-chalkboard screech, we are going to fix it right now. According to a study by Consumer Reports, nearly 30% of homeowners replace appliances that could have been fixed with less than $50 in parts and an hour of labor. We aren’t going to be part of that statistic.
Is this 10-minute fix actually worth the hype?
You might be skeptical. How can a noise that sounds like a dying freight train be solved in the time it takes to brew a pot of coffee? The secret lies in the fact that most squeaks come from just two or three high-friction points: the drum support rollers, the idler pulley, or the front glides. By the time you finish this expert guide to appliance repair and installation, you will realize that your dryer is essentially just a big spinning bucket with a heater attached. It is much less intimidating than it looks. Before we dive into the guts of the machine, it’s also the perfect time to do a safety check; while you have the panels off, you should definitely learn how to tell if your dryer vent is a fire hazard. Trust me, the peace of mind is worth the extra few minutes. Let’s get your tools ready and save your ears from that torment.
Unplug Everything and Pop the Top
Before you touch a single screw, pull the machine out and kill the power. I cannot stress this enough; wrestling a dryer is like fighting a giant, hollow marshmallow, but one that can deliver a nasty electric shock if you aren’t careful. Once it is dead, you need to get inside. Most modern units from Whirlpool or GE use simple spring clips. Take a stiff putty knife and slide it into the gap between the top and front panels. You will have to push with a bit of force, and it might feel like you are about to snap the plastic, but then you will hear a satisfying ‘click.’ The lid will pop up just like the hood of a car. I remember the first time I did this; I was so terrified of breaking the clips that I spent twenty minutes gently prodding it when all I needed was a firm shove. If the top won’t budge, check for the specific screw that fixes a rattling dryer drum hiding in the lint trap housing.
Make Sure the Pulley Spins Like a Fidget Spinner
With the top up, you can see the drum and the belt. This is where most people get intimidated, but your dryer is just a spinning bucket. If you reach down to the bottom near the motor, you will find the idler pulley. This little wheel is responsible for keeping the belt tight. If it is seized or clogged with hair and lint, it will scream like a banshee. I once found a tangled mess of my wife’s hair and a lost shoelace wrapped so tightly around the pulley that the motor was literally smoking from the friction. 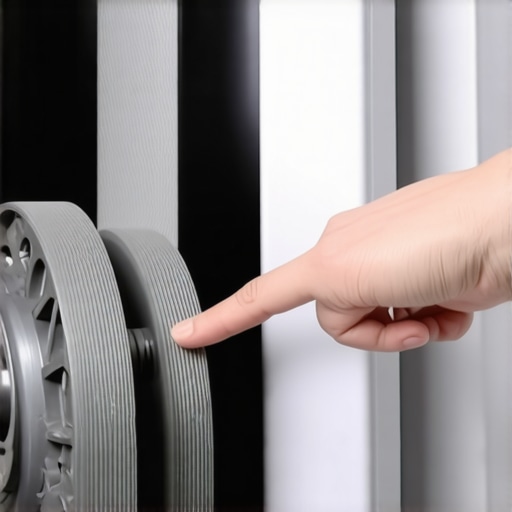 Spin the pulley with your finger. It should spin effortlessly. If it grinds or stops immediately, it’s time to replace it. This is often the $20 part that saves you from buying a new machine. While you are in there, use a shop vac to remove the dangerous lint build-up your dryer filter always misses. This isn’t just about the noise; it is about preventing a fire.
Apply the Right Grease in the Right Spots
Now, here is the part where most DIYers fail: the lubrication. Do NOT use WD-40. It is a solvent, not a long-term lubricant, and it will evaporate in the high heat of the dryer, leaving you with a squeak that is twice as loud next week. You need high-temp turbine oil or white lithium grease. Apply a tiny drop to the axles of the drum rollers. If you notice the rollers have ‘flat spots’—meaning they aren’t perfectly round anymore—grease won’t save them. You will need to swap them out. If this feels like too much of a deep dive, you can always look into affordable same-day appliance fixes with warranty benefits. Sometimes, especially if you are dealing with a complex tensioner system, it is better to have warranty-backed appliance services you can rely on rather than risking a belt snap. If you do decide to go it alone, keep this expert guide to appliance repair and installation open on your phone. I once forgot the path the belt took around the motor and spent forty minutes trying to loop it backwards. Don’t be like me; take a photo of the belt orientation before you move anything. Finally, check the sensor adjustment for a dryer that thinks the clothes are dry while you have the panels off, just to ensure your efficiency is as high as your peace and quiet.
You’ve got the drum spinning again, and the silence in your laundry room is beautiful. But before you pat yourself on the back and toss in a load of towels, we need to talk about the business side of appliances that most people ignore until it costs them a thousand dollars. Everyone says that if you can turn a wrench, you should never pay for a pro. In my experience, that logic is exactly what gets people into trouble with their manufacturer. I’ve seen homeowners perform a perfect repair, only to have a major control board fry three months later and find their entire protection plan nullified because they broke a factory seal. If you want to keep your peace of mind, you have to learn how to verify your new appliance is covered under the original warranty before you start digging into the internals.
Can you really maintain your own warranty status?
The short answer is: maybe. The hidden nuance that most DIY blogs skip is the ‘qualified technician’ clause. Most high-end brands require that any invasive repair be logged by a certified pro. A study by the Warranty Group suggests that nearly 40% of claims are denied simply because the homeowner couldn’t provide proof of professional maintenance or used non-OEM parts. If you are dealing with a complex issue, it is often smarter to look into affordable same-day appliance fixes with warranty benefits. This gives you the paper trail you need to keep your long-term coverage intact. Have you ever had a warranty claim denied because you tried to fix it yourself? Let me know in the comments; I’ve heard some absolute horror stories about this.
The Documentation Trap That Catches Most Homeowners
The biggest ‘oops’ factor I see isn’t the repair itself—it’s the lack of a paper trail. If a technician comes to your house, the first thing they want to see isn’t the machine; it’s the document every technician needs to see for a valid warranty visit. Without it, you are likely looking at a hefty service fee just for them to knock on your door. This is why I always tell people to maximize your appliance warranty during emergency repairs by keeping a folder of every receipt, part number, and even photos of the internal components before you touch them.  Even something as simple as top tips for same-day service warranty coverage can save you from a denied claim. Remember, the goal isn’t just to stop the squeak today; it’s to make sure you aren’t paying for a whole new machine tomorrow because of a technicality. If you’re ever unsure, it’s worth checking how to avoid paying the service fee for a denied warranty claim before you pick up that screwdriver.
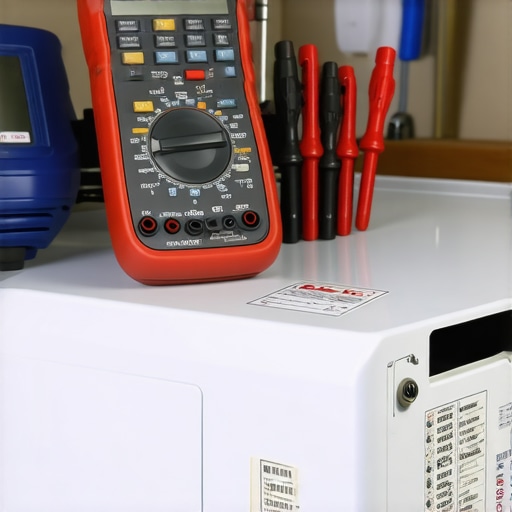
You can have all the knowledge in the world, but if you are trying to pull a dryer drum with a butter knife and a prayer, you are going to lose. I personally never start a repair without my telescopic magnet tool and a dedicated set of nut drivers. Why? Because the moment you drop a screw into the dark abyss of the dryer cabinet, your quick fix turns into a two-hour scavenger hunt. If you really want to level up, invest in a decent digital multimeter. It is the only way to move beyond guessing. Instead of wondering if a thermal fuse is blown, you can test it for continuity in seconds. This kind of precision is exactly what to expect from same-day appliance repair experts who do this for a living. They aren’t smarter than us; they just have the right data points.
How do I keep my dryer quiet for the next decade?
Consistency beats intensity every single time. You don’t need to rebuild your machine every year, but you do need a rhythm. Every six months, I pull the vent hose and use a leaf blower to clear the line from the inside out. It’s loud, it’s messy, but it works better than any brush kit I’ve ever bought. According to technical guidelines from the Association of Home Appliance Manufacturers (AHAM), even a single millimeter of lint buildup on the internal blower wheel can reduce airflow efficiency by up to 15%, forcing the motor to run hotter and louder. This is the maintenance step that extends the life of your high-efficiency washer and dryer sets. If you notice the heat isn’t quite right after a cleaning, you might need to look into the sensor adjustment for a dryer that thinks the clothes are dry to recalibrate the system.
Looking ahead, I suspect we are moving toward a world where ‘dumb’ appliances simply won’t exist. We are already seeing machines that can self-diagnose and order their own replacement rollers before they even start to squeak. However, this tech creates its own set of headaches, like why your smart dryer wont connect to your laundry room router. As these machines get more complex, the value of warranty-backed appliance services you can rely on will only skyrocket. You might be able to grease a wheel today, but you probably won’t be soldering a Wi-Fi chip tomorrow. For now, focus on the mechanical basics. My big tip for you today: go grab your vacuum and clear out the lint trap housing—not just the screen, but the actual chute. It is the simplest way to prevent the friction that leads to that dreaded screech. If things still feel shaky, don’t hesitate to check out fast trustworthy appliance installation near you to ensure everything is leveled perfectly.
The Hardest Lesson I Learned About Touching the Internal Wiring
When I first started tinkering with my appliances, I thought a successful repair was all that mattered. I didn’t realize that using a generic part instead of an OEM replacement could be a red flag for a future inspector. If you decide to go the DIY route, always keep your receipts and take clear photos of your work. This is especially true if you are trying to maximize your appliance warranty during emergency repairs. I’ve seen people lose out on a full machine replacement because they couldn’t prove they didn’t cause collateral damage while fixing a simple squeak. If you feel even a bit overwhelmed, looking into affordable same-day appliance fixes with warranty benefits is the safest way to keep your coverage intact while getting the job done fast. One major oversight I made was not knowing how to avoid paying the service fee for a denied warranty claim before I opened the cabinet.
My Go-To Kit for Keeping My Laundry Room Quiet
You don’t need a professional-grade workshop to keep your dryer running smoothly, but a few specific items make a world of difference. First, get a dedicated set of nut drivers; using a standard screwdriver on those hex-head bolts is a recipe for stripped metal. Second, a telescopic magnet is a lifesaver when you inevitably drop a screw into the dark corners of the chassis. For the more technical side, I always recommend a digital multimeter to test components before you spend money on replacements. If you are just starting out, this expert guide to appliance repair and installation today covers the fundamental steps every homeowner should master. Having the right tools isn’t just about speed; it’s about the confidence to know you aren’t guessing. I also keep a roll of thermal tape and a small vacuum attachment specifically for reaching deep into the vent chute.
Reclaim Your Quiet Sunday Afternoons
Repairing your own dryer is about more than just saving a few hundred dollars—it’s about taking control of your home’s environment. There is a specific kind of satisfaction that comes with hearing nothing but the soft tumble of clothes after days of piercing noise. Don’t let the fear of a complex machine stop you from performing basic maintenance. Whether you choose to do it yourself or opt for same-day appliance repair quick solutions with warranty support, the goal is a safe, efficient home. You’ve got the knowledge, now it’s time to put it into practice and enjoy the silence of a job well done. Have you ever attempted a repair only to realize you were missing one tiny, crucial tool? Let me know your biggest ‘oops’ moment in the comments below!