

I remember standing in my kitchen at 6:00 PM on a Tuesday, starving. I’d just preheated the oven for a frozen pizza—nothing fancy—but thirty minutes later, the air inside was as cold as a February morning. I could smell a faint hint of gas, and I heard that familiar clicking, but the heat just wouldn’t kick in. It’s a classic heartbreak in the kitchen. You think your stove is dead, your dinner plans are ruined, and you’re already bracing for a massive repair bill. But before you panic, you need to know that your oven might just be ‘tired,’ not dead. Often, the culprit is an igniter that has simply lost its spark. [image_placeholder]
Stop Waiting for a Flame That Is Never Coming
Most people assume that if the igniter glows, it’s working. That is the biggest trap in the world of gas appliances. I made that exact mistake years ago, staring at a dull orange glow and wondering why my oven takes 45 minutes to reach temperature. I thought, ‘Hey, it’s glowing, so it must be fine, right?’ Wrong. A glowing igniter is like a flashlight with dying batteries; it might show you the path, but it doesn’t have the strength to actually get you where you’re going. In this case, that ‘place’ is the point of ignition for your gas burner. If you’re smelling gas but seeing no flame, you’re likely dealing with an igniter that has lost its resistance. It’s pulling enough juice to look pretty, but not enough to trigger the safety valve to release the full gas flow. This is where most homeowners panic and start looking for an expert guide to appliance repair and installation today, which is smart if you’re time-crunched, but you can actually diagnose this yourself with a simple visual check.
Is this really just a weak part or a total oven failure?
I get the skepticism. It feels like the whole unit is shot when it stops heating. But here’s a secret: the igniter is a wear-and-tear part, much like the brake pads on your car. According to the repair experts at RepairClinic, a gas oven igniter usually needs to reach a temperature of roughly 2,100 to 2,500 degrees Fahrenheit to open the gas valve. If yours is only hitting 1,800, it stays orange, looks ‘on,’ but the safety valve stays shut. I once spent three hours tearing apart a control board only to realize a cheap part was the culprit. Talk about a total waste of a Saturday. If you aren’t ready to get your hands dirty, you can always look into affordable same-day appliance fixes with warranty benefits to get back to baking. Have you ever stood there staring at that orange glow, praying for a flame that never shows up? Let me know in the comments—I feel your pain. Now, let’s look at exactly how to spot the difference between a healthy glow and a weak one.
Grab Your Multimeter to Stop the Guesswork
To stop guessing whether your igniter is ‘tired’ or dead, you need to test for continuity. Think of your igniter like a lightbulb; if the filament inside is broken, the circuit is open, and no electricity can flow. If you have been wondering why your gas oven igniter clicks but never lights, this test provides the definitive answer. Set your multimeter to the ohms setting (the symbol that looks like a horseshoe). Unplug the oven first—safety is not optional here—and disconnect the two wires leading to the igniter. Touch a probe to each wire terminal. If you get a reading of ‘O.L’ or infinity, the igniter is toast. A healthy igniter usually shows a resistance between 40 and 400 ohms. I once spent forty minutes wrestling with a stuck floor panel only to find my multimeter showing a perfect reading, meaning the issue was actually my gas valve. Don’t be like me; test the part before you start the heavy teardown. 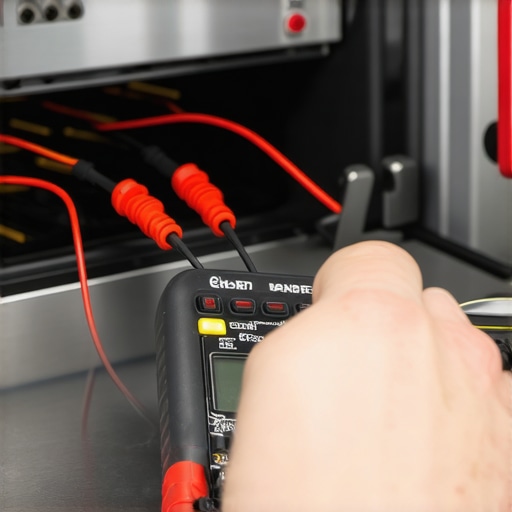
Access the Burner Without Breaking Your Back
Once you’ve confirmed the part is failing, it is time for the physical labor. Most modern ovens require you to remove the racks and the bottom metal plate of the oven cavity. This plate is usually held by two screws at the back. Be careful—these screws live in a high-heat environment and love to seize up. I highly recommend using a bit of penetrating oil if they don’t budge immediately. After the plate is out, you’ll see the burner tube and the igniter attached to the side of it. This is where precision matters. For a successful expert guide to appliance repair and installation today, you must note the exact position of the old igniter. If you mount the new one even a quarter-inch too far from the gas ports, it won’t catch the gas stream, and you’ll be right back to square one with a clicking sound and no flame.
Swap the Part and Save the Circuit
When you unscrew the old igniter, be extremely gentle with the new one. The carbide or silicon nitride element is as fragile as a dry cracker. One accidental bump against the oven frame can hairline-fracture the element, and it will burn out the first time you apply power. I remember a particularly frustrating Saturday where I dropped the mounting screw right into the burner port. I spent an hour fishing it out with a magnet. If you’re not feeling confident, same-day appliance repair quick solutions with warranty support can take that stress off your plate.
Protect Your Warranty While Getting the Job Done
Before you start twisting wires together, check your paperwork. One of the hidden costs of DIY repairs on warranty-covered items is that you might void your entire coverage by opening the unit yourself. If you are still within your first year of ownership, stop what you are doing and call the manufacturer. If you do go the professional route, make sure you have the document every technician needs to see for a valid warranty visit, which is typically your original proof of purchase. Replacing a $30 part yourself feels great until you realize you’ve forfeited a $500 control board replacement later down the line because you broke the factory seal.I see people make the mistake of thinking ‘same-day’ means ‘job finished today.’ In reality, scheduling your appliance repair for same-day service in 2025 is often more about securing a fast diagnosis than a final resolution. Most technicians carry universal parts like thermal fuses or igniters, but if your high-end control board is fried, you are still at the mercy of shipping speeds. I once called for a ‘same-day’ fix on a dishwasher, only to realize the technician spent the entire visit confirming what I already knew because I hadn’t provided the specific model number beforehand. To truly get a result, you must give the pro every detail upfront to maximize your appliance warranty during emergency repairs.
Don’t Fall for the Same-Day Fix Illusion
Everyone wants their kitchen back in order by dinner time, but the ‘Oops’ factor here is assuming the clock starts when the tech arrives. If you haven’t cleared the area or pulled the unit out (if possible), you’re paying for labor that doesn’t involve fixing a thing. Even worse, many people overlook how to avoid paying the service fee for a denied warranty claim by failing to check the simple stuff first, like a tripped breaker. According to a recent survey by Consumer Reports, nearly 30% of appliance repair calls could have been avoided with simple home maintenance or by checking the power source.
Why does your new gas range smell like sulfur when preheating?
This is a nuance that sends new homeowners into a panic. Most assume they have a dangerous gas leak when they first fire up a new unit. In reality, why your new gas range smells like sulfur when preheating is often just the factory-applied protective oils burning off the heating elements. However, a sophisticated eye will also check the connections. If that smell persists after the first few uses, you might have an actual slow leak at the manifold, or you may have bypassed the correct way to ground a gas range during a new install, which can lead to static discharge and phantom smells. 
The Maintenance Trap Hidden in Your Fine Print
Experts at the Association of Home Appliance Manufacturers (AHAM) frequently point out that a huge percentage of modern warranty claims are denied because the homeowner neglected basic ‘user-level’ maintenance. If you cannot prove you have cleaned your condenser coils or replaced your filters, you are walking straight into the deductible trap in most third-party appliance protection plans. Companies look for any reason to categorize a failure as ‘wear and tear’ rather than a defect. I have seen a $600 control board replacement rejected because the owner hadn’t cleaned a $10 lint screen for six months. Have you ever fallen into this trap or had a warranty claim denied for a silly reason? Let me know in the comments—I’d love to hear your horror stories.
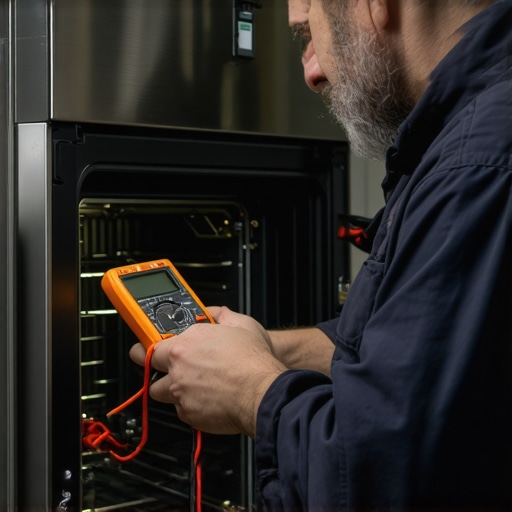
Building a toolkit that actually saves you money doesn’t mean buying the most expensive gear at the hardware store. For me, the holy grail is a high-sensitivity digital multimeter with a ‘Peak Hold’ function. I use a professional-grade Fluke unit because it handles non-linear loads without giving ghost readings, which is essential when you’re checking for the one wire that always loose in your wall oven control board. If you are using a cheap meter, you might see voltage that isn’t really there, leading you to replace a motherboard when you just had a loose ground. I’ve personally saved thousands by verifying the exact resistance of sensors before calling in the pros.
Build a Toolkit That Actually Saves You Money
Beyond the meter, I never start a job without a set of non-marring pry tools and a telescopic magnet. You’d be surprised how many ‘broken’ appliances are just victims of a dropped screw or a stuck panel. When you are looking for warranty-backed appliance services you can rely on, notice the tools they bring. A pro who shows up with just a screwdriver is a red flag; they should have diagnostic equipment that can read the internal logs of your machine. According to the Master Technician Association, over 40% of circuit failures in high-end ranges are caused by micro-corrosion on the ribbon cables, something you can only find with the right magnification and cleaning agents.
How do I maintain my kitchen tech over the long haul?
The secret to avoiding the repairman isn’t luck; it’s a paper trail. I keep a dedicated folder for every major unit in my house. You need to know how to prove you maintained your HVAC for a warranty claim or any other major appliance. This means saving every receipt for filters, descaling solutions, and even the professional cleanings. If you ever need to leverage the maintenance contract clause that saves you on labor costs, that folder is your best friend. I recommend taking a photo of the model and serial number the day you install it, so you never have to pull the machine out from the wall just to order a part. This is one of my top tips for same-day service warranty coverage because it lets the tech arrive with the part already in their truck.
Smart Sensors are the Next Big Thing in Home Repair
Looking ahead, I predict we are moving toward a world of ‘predictive failure.’ We are already seeing high-end brands integrate sensors that can detect a drop in igniter resistance before it actually stops working. Soon, how to ensure reliable appliance installation in 2025 will involve calibrating these internal AI monitors. It will make DIY diagnosis even easier, but it will also make professional installation more critical to ensure those sensors are calibrated correctly from day one. I suggest you try one advanced tip tonight: grab your multimeter and check the resistance on your oven’s temperature probe. It takes two minutes and can tell you if your oven is lying to you about its temperature before your next big holiday dinner.
Hard Truths I Wish I Had Known Before Touching My Oven
After years of tinkering with ranges and refrigerators, the most expensive lesson I ever learned was that ‘saving money’ through DIY can sometimes cost you double. I once spent forty dollars on a generic igniter that lasted exactly three weeks, only to find out I had ignored how to verify your new appliance is covered under the original warranty. I basically threw away a free professional repair because I was too impatient to check my paperwork first. Another lightbulb moment was realizing that just because a part ‘fits’ does not mean it is calibrated correctly for your specific model. High-end ranges have strict resistance tolerances, and using a cheap knock-off can actually stress your control board over time. Finally, do not underestimate the power of a firm but polite phone call. Sometimes, knowing how to negotiate a repair instead of a replacement with your warranty provider can get you a better long-term result than a quick patch job you did yourself on a Sunday afternoon.
[image_placeholder]
The Survival Kit for Every Modern Homeowner
If you want to move from ‘guessing’ to ‘knowing,’ you need a few non-negotiable items in your toolkit. First, a high-quality digital multimeter is not just for electricians; it is your best defense against unnecessary part replacements. I also swear by keeping a digital archive of every service manual for my home appliances. This simple habit helped me find the third-party warranty loophole that saves you hundreds on parts when my dishwasher pump failed out of season. Lastly, if you are calling for help, knowing what to expect from same-day appliance repair experts will help you prep the space so they can work efficiently from the second they walk through the door. I personally recommend the ‘Fluke’ brand for meters because they are nearly indestructible and provide the precision needed for sensitive electronics.
Take the Reins of Your Kitchen Today
Repairing your own oven or managing a complex warranty claim does not have to be a source of constant stress. It is about building a relationship with your home where you are the one in control. Whether you are swapping a weak igniter or finally organizing those scattered warranty receipts, every small step makes you a more capable and confident homeowner. You have the tools and the knowledge now—do not let a clicking sound or a cold oven ruin your family dinner. Have you ever successfully fixed a major appliance only to realize it was a tiny ten-dollar part causing all the trouble? Let me know in the comments below!