
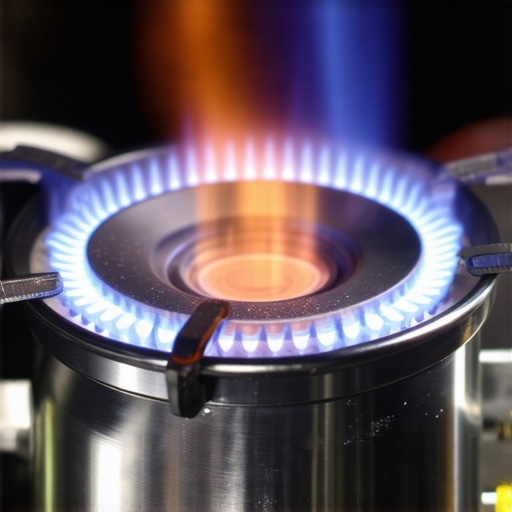
It was 6:30 PM on a cold Tuesday. I had a tray of lasagna ready, my kids were circling the kitchen like vultures, and then I heard it. Click. Click. Click. But that familiar ‘whoosh’ of the flame? Totally absent. I stood there staring at the oven door like it was going to magically fix itself. It didn’t. In my early DIY days, I once tried to ‘help’ the process with a long-reach lighter, which resulted in a small fireball and a very singed pair of eyebrows—definitely one of those hidden costs of DIY repairs I tell people to avoid now. That clicking is a tease. It tells you the stove is trying, but somewhere between the spark and the gas, there’s a breakdown in communication. Today, I’m going to walk you through exactly why your oven is ghosting you and how to get that flame back without calling for an expensive same-day appliance repair if it’s just a simple fix.
That Rhythmic Clicking is Lying to You
If you hear the click, your spark module is likely fine, but that doesn’t mean the igniter is strong enough to actually light the gas. Most people don’t realize that as igniters age, they can still produce a spark that is too weak or ‘cool’ to ignite the natural gas or propane. According to the National Fire Protection Association, cooking equipment is a leading cause of home fires, often stemming from neglected maintenance or failed gas components. This isn’t just about a cold dinner; it’s about safety. Before you tear the whole thing apart, you need to check if the ports on your burner are clogged with last month’s spilled chili. Have you ever tried to light your stove only to be met with that eternal clicking?
Is a clicking igniter always the real problem?
Not necessarily. Sometimes the issue isn’t the spark at all, but the gas flow or even how the unit was originally set up. I’ve seen plenty of cases where the gas range wasn’t even properly grounded, leading to erratic ignition cycles. Ensuring the correct way to ground a gas range was followed during installation can save you a world of headache. If the igniter is glowing orange but not clicking, that’s one thing—but if it’s clicking and still nothing? We need to look deeper at the gas valve and the thermal fuse to see where the path to a hot meal is being blocked.
Start With the Basics and Clean the Burner Head
Before you start ordering parts, we need to address the most common culprit: kitchen grime. Grease, spilled sauces, and even cleaning residue can build up around the igniter and the burner ports. I once spent forty-five minutes sweating over a range, convinced the control board had fried, only to realize a single, calcified drop of tomato sauce was diverting the spark away from the gas flow. Take a soft toothbrush and some rubbing alcohol to the area around the igniter. Ensure the tiny holes in the burner head—the ports—are completely clear. If they are blocked, the gas can’t reach the spark, and you’ll just get that rhythmic clicking until the safety sensor shuts everything down. If you’ve recently had a new unit put in, double-check that the installer followed the correct way to ground a gas stove, as poor grounding can actually interfere with the spark intensity.
The Orange Glow Trap
If your oven uses a glow-bar igniter rather than a spark module, you might see it turn a bright, cheery orange and think, ‘Hey, it’s working!’ This is a lie. Igniters are like old incandescent light bulbs; they can still draw power and glow without ever reaching the 2,100 degrees Fahrenheit required to open the gas safety valve. If your igniter glows for more than 90 seconds without a flame appearing, it’s likely weakened and needs replacement. This is a common scenario where people mistakenly think they have a gas supply issue when they really just need a $20 part that usually fixes the problem, similar to how a small relay fixes a fridge. Checking the correct fuse to check when your range wont turn on is also a vital step if you’re getting no response at all from the control panel. 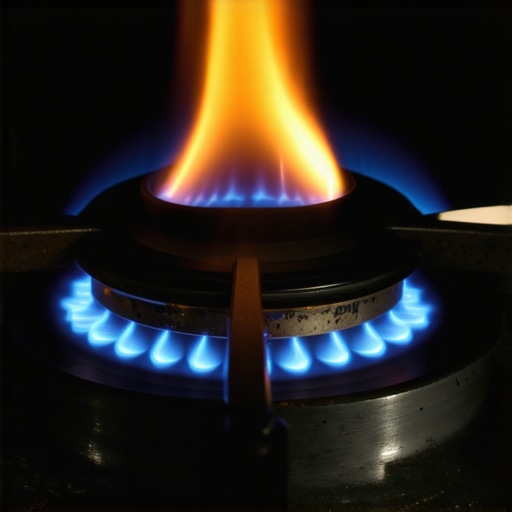
Check the Alignment of the Burner Cap
It sounds too simple to be true, but a slightly tilted burner cap is a leading cause of ignition failure. If the cap isn’t sitting perfectly flat, the gas doesn’t distribute evenly, and the spark won’t jump to the right spot. I remember a frantic call from my sister-in-law who thought her house was going to blow up because she smelled gas but saw no flame. It turns out she had bumped the cap while wiping the stovetop. If you do smell that distinct ‘rotten egg’ scent, it’s worth knowing why your new gas range smells like sulfur when preheating and how to distinguish a minor seating issue from a real leak.
Listen for the Whistle
While you’re troubleshooting, pay attention to the sound of the gas. A whistling or hissing sound without ignition can point to a high-pressure issue or an air-mixture problem. Many DIYers skip the fine-tuning, but understanding why your new gas range flame is whistling when you cook can help you adjust the air shutter for a perfect blue flame. If you find yourself over your head, don’t be afraid to look into an expert guide to appliance repair and installation today to see if your specific model has a known defect or a thermal fuse that’s hidden behind the back panel. Always verify the integrity of your lines using the gas line connection that always fails a soap bubble test to ensure that while you’re hunting for a spark, you aren’t ignoring a slow, dangerous leak.A lot of homeowners assume that ‘fast’ equals ‘efficient.’ In my experience, people often prioritize scheduling your appliance repair for same-day service in 2025 over checking the credentials of the person walking through the door. Here is the contrarian truth: a same-day fix from a non-specialized technician can actually be the most expensive mistake you make. High-end gas ranges often require specific diagnostic tools and brand-specific knowledge that generic repair services simply don’t carry in their vans. If you’re not careful, a technician might swap out a functioning igniter while ignoring a faulty control board relay, leaving you with the same problem forty-eight hours later.
Don’t Sacrifice Your Warranty for a Quick Fix
The ‘Oops’ factor usually hits when you realize that the guy you found on a whim used a non-OEM (Original Equipment Manufacturer) part. While it might get the flame going for a week, using ‘universal’ parts is one of the quickest ways to void your manufacturer coverage. You need to ensure you are receiving warranty-backed appliance services you can rely on to protect your investment. I’ve seen countless homeowners get stuck with a massive bill because they didn’t realize their ‘cheap’ repair actually nullified their five-year protection plan. According to a 2023 JD Power Appliance Satisfaction Study, consumers often value speed initially, but the highest long-term satisfaction is tied directly to ‘first-time fix’ rates, which are significantly higher when using factory-certified technicians. 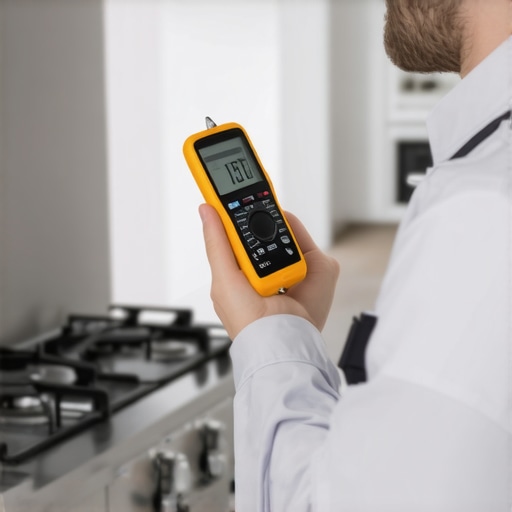
The Documentation You Must Demand
Before any tools touch your stove, you need to see the paperwork. Most people skip this, but having the document every technician needs to see for a valid warranty visit ready on your end—and asking for theirs—is vital. If a technician can’t provide a service log or proof of insurance, they shouldn’t be working on your gas lines. This is especially true for modern units where how to ensure reliable appliance installation in 2025 involves complex electronic calibrations that go far beyond simple plumbing.
Can a third-party repair actually void my manufacturer warranty?
Yes, absolutely. Most manufacturers explicitly state that any repair performed by an unauthorized service provider using non-approved parts will terminate the warranty immediately. This is a common ‘trap’ for those looking for same-day appliance repair without vetting the company first. To stay safe, always check how to verify your new appliance is covered under the original warranty before authorizing any work. Furthermore, failing to keep a clean service history can lead to you having to figure out how to avoid paying the service fee for a denied warranty claim down the road. If the igniter is clicking and the gas is flowing, but there’s no spark, the issue might be as nuanced as a micro-crack in the porcelain insulator—something a generic tech might overlook while trying to beat the clock. Have you ever fallen into this trap of hiring for speed rather than expertise? Let me know in the comments.Moving past the panic of a cold kitchen, let’s talk about the gear that actually makes a difference. Most people think a screwdriver and a prayer are enough, but if you want to stop guessing, you need a digital multimeter. I personally never touch a gas range without one because it’s the only way to verify if your igniter is pulling the 3.2 to 3.6 amps required to open that safety valve. If you’re hunting for affordable same-day appliance fixes with warranty benefits, knowing these numbers can prevent a technician from upselling you on a control board you don’t actually need. Another tool I swear by is a simple set of torch tip cleaners. These tiny, serrated wires are perfect for clearing carbon deposits out of those microscopic burner ports that a toothbrush just can’t reach.
Stay Ahead of the Next Breakdown
One of the best top tips for same-day service warranty coverage I can give you is to start a ‘house diary.’ Every time you clean those ports or have a pro out for fast trustworthy appliance installation near you, write it down. Why? Because manufacturers like GE and Whirlpool often include specific maintenance requirements in their technical manuals, such as the Whirlpool Job Aid for Gas Cooking Products, which notes that consistent port cleaning prevents ‘delayed ignition’—that scary mini-explosion sound. If you can’t prove you’ve done your part, they might balk at a major repair claim later. This is exactly why your extended warranty company keeps asking for service logs when a big-ticket item like the manifold fails. #IMAGE_PLACE_HOLDER_D#
How do I keep my gas range firing perfectly for years?
Long-term maintenance is less about heavy scrubbing and more about precision. Once a quarter, remove the burner caps and inspect the porcelain insulators on your igniters for hairline cracks. Even a microscopic fracture can cause the electricity to ‘leak’ to the stove chassis instead of jumping to the burner head. While you’re at it, check the age of your flexible gas connector. Many pros recommend replacing these every ten years, regardless of how they look. Just like knowing the specific wrench you need to unjam a disposal in seconds, knowing the ‘health’ of your gas lines prevents emergencies before they start. If your stove features modern tech, learning how to read the error codes on your high-end induction cooktop or gas range can save you a $100 diagnostic fee.
The Shift Toward Predictive Repairs
Looking ahead to 2025 and beyond, I see the industry moving toward AI-driven diagnostics. We are already seeing high-end units that monitor the ‘glow time’ of an igniter and send a notification to your phone before it actually fails. This trend will make scheduling your appliance repair for same-day service in 2025 much easier because the tech will arrive with the exact part already in hand. For now, your best bet is to be proactive. My advanced tip for you today: grab a bottle of specialized leak detector solution—not just dish soap—and brush it onto your gas fittings. If you see even one tiny, persistent bubble, shut it down and call in the pros. It’s a five-minute check that could save your kitchen.
Hard Truths I Learned from Singed Eyebrows and Cold Dinners
After years of tinkering with gas lines and heating elements, I’ve realized that the biggest mistake is assuming a ‘spark’ means everything is fine. High-end cooking equipment is incredibly sensitive to voltage fluctuations and residue buildup. One of the most important lessons is to maximize your appliance warranty during emergency repairs by keeping detailed records of every time you clean those burner heads or check the igniter’s resistance. I’ve also learned that while we all want a quick fix, you need to know what to expect from same-day appliance repair experts to ensure they aren’t just putting a band-aid on a gas leak. Sometimes the real issue isn’t the igniter at all; it could be a poorly seated orifice or a failing gas manifold that requires professional calibration.
The Precision Gear Every Home Chef Should Keep Under the Sink
To move from a ‘guesser’ to a ‘fixer,’ you need a few specialized items that go beyond the basic toolbox. First, a digital multimeter is non-negotiable for testing igniter draw. Second, I highly recommend a dedicated gas leak detector solution. It is far more reliable than the gas line connection that always fails a soap bubble test because it clings to the pipe and reacts to even microscopic seepage. Finally, keep a set of torch tip cleaners on hand; these tiny wires are the only way to properly clear the carbon from your burner ports without damaging the metal. Just as having the specific wrench you need to unjam a disposal in seconds saves your plumbing, these tools will save your stove and your sanity. #IMAGE_PLACEHOLDER_E#
Bringing Back the Heart of Your Kitchen
There is something incredibly satisfying about hearing that first crisp ‘whoosh’ of a blue flame after a long troubleshooting session. Your gas range is the heart of your home, and keeping it in peak condition doesn’t have to be a source of stress. By combining a bit of proactive cleaning with the right professional expertise, you ensure that your next family dinner is a success, not a delivery order. Don’t be afraid to dive into the technical side of your appliances—the more you know, the safer and more efficient your kitchen becomes. Have you ever tried to fix a ‘clicking’ stove only to find out it was something as simple as a dirty burner cap? Let me know your experiences in the comments below!