
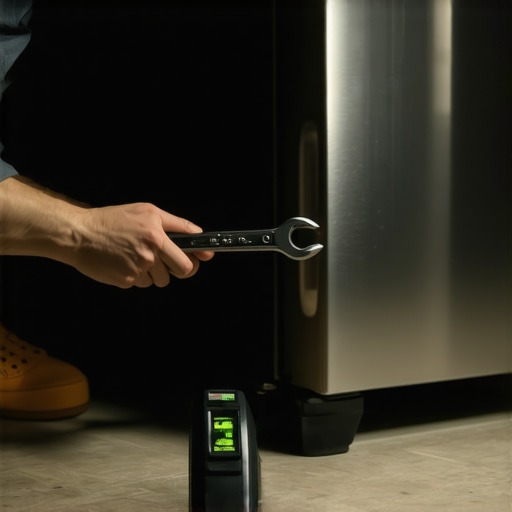
It was 3:14 AM, and the rhythm was undeniable. *Whirr. Thump. Vibrato.* My kitchen floor felt like it was hosting a miniature earthquake, and the culprit was my towering stainless steel refrigerator. I’d spent thousands on a ‘whisper-quiet’ model, yet here I was, wide awake, wondering if the compressor was about to take flight. I’ve been there—standing in the dark with a flashlight, staring at a massive appliance that seems determined to vibrate its way into the neighbor’s yard. If you’ve ever felt like your fridge is trying to communicate through Morse code via your floorboards, you aren’t alone. Today, I’m going to show you the one leveling trick that finally gave me back my sleep.
Your Kitchen Floor is Rarely as Level as the Contractor Promised
Most of us assume that if the floor looks flat, it is flat. I made the classic rookie mistake of thinking a level floor meant my fridge didn’t need any adjustment. In reality, the weight of a fully stocked refrigerator can reveal sub-floor imperfections you never knew existed. When your unit isn’t perfectly balanced, the internal fans and the compressor hit resonant frequencies that turn your floor into a giant speaker. This is often the real reason your new fridge is louder than your old one. According to research from major industry groups, improper leveling is a leading cause of excessive noise and can even lead to premature wear on the compressor mounting springs.
Is a simple wrench turn really worth the effort?
You might be skeptical that a quarter-inch of adjustment can stop a house-shaking rattle. I certainly was. Early on, I tried to solve the issue by wedging a piece of cardboard from an old box under the front leg—a move that eventually caused the fridge to tilt and likely put unnecessary strain on the door seals. If you’re worried about doing it yourself, you can always look into an expert guide to appliance repair and installation today to see how the pros handle it. But before you call for fast trustworthy appliance installation near you, let’s talk about why the ’tilt-back’ method is your new best friend. Have you ever tried to ‘fix’ a noisy appliance only to make the sound ten times worse? Tell me I’m not the only one who has resorted to shims and prayers! Before we dive into the specific wrench turns, we need to understand the physics of the rattle.
Remove the Base Grille to Find the Feet
Before you can make any adjustments, you have to find the adjustment bolts. On most modern units, these are hidden behind a plastic kickplate or base grille at the very bottom. I remember the first time I tried this; I spent ten minutes tugging at the plastic, terrified I’d snap a clip and ruin the look of my kitchen. If you’re hesitant, checking an expert guide to appliance repair and installation today can give you the confidence to pop those clips. Usually, a firm pull at the ends or a quick turn of a few screws is all it takes. Once that panel is off, you’ll see the leveling legs—large threaded bolts that support the weight of the front of the unit. These legs aren’t just for show; they are the frontline defense against the resonant humming that keeps you up at night.
The Quarter-Inch Lean That Saves Your Compressor
There is a specific geometry to a well-set fridge. You aren’t actually looking for it to be perfectly ‘level’ from front to back. Instead, you want a slight rearward tilt. I call this the ‘gravity-fed’ method. If you raise the front legs so the fridge leans back about a quarter of an inch, the doors will swing shut on their own if left ajar. This isn’t just about convenience. A door that doesn’t seal properly forces the compressor to run overtime, which is a major factor in the door gasket fix that cuts refrigerator energy bills. When the unit is tilted back correctly, the internal coolant flows more efficiently and the compressor sits securely on its mounting springs, rather than rattling against the frame. This tilt also prevents moisture issues, such as why your freezer is building up snow around the gasket, which happens when warm air leaks in through an uneven seal.
Stop Using the Wrong Tools for Leveling
I once tried to level my old unit using a butter knife because I was too lazy to go to the garage for a real wrench. The knife slipped, I gouged my linoleum floor, and the bolt didn’t move an inch. Don’t be me. You need a sturdy adjustable wrench or a specific hex-head driver depending on your model. Using the wrong tool can strip the bolt, making future adjustments impossible and potentially complicating your warranty-backed appliance services you can rely on. As you turn the bolt clockwise to raise the corner, have someone else push slightly on the top of the fridge to take the weight off the leg. It makes the turn effortless. If the bolt is stuck, a tiny drop of lubricant can help, but be careful not to get it on the floor. While you’re down there, ensure you haven’t pinched any wires, as a the power-cord error that voids your fridge warranty is a common mistake during DIY moves.
Balance the Side-to-Side Sway
While the front-to-back tilt should be about a quarter-inch, the side-to-side measurement must be perfectly level. If one side is even slightly higher than the other, the internal fan blades can start to scrape against their housing. This creates a high-pitched chirping sound that most people mistake for a dying motor. I’ve seen homeowners assume they need a the starter relay trick that fixes a warm refrigerator when the issue was simply a lopsided frame causing the fan to stall. Use a bubble level across the top of the fridge to ensure both front legs are sharing the load equally. This balance is critical for how to ensure reliable appliance installation in 2025, as modern lightweight frames are much more sensitive to torque and twisting than the heavy steel tanks our parents owned.
Everyone tells you to just ‘put a level on it’ and walk away, but after years of troubleshooting, I’ve found that the biggest mistake is leveling against the refrigerator doors rather than the cabinet itself. Modern doors are often intentionally offset or adjustable via a cam system to compensate for heavy milk jugs; if you use them as your primary leveling guide, you might accidentally twist the entire chassis. This structural torque is a silent killer, leading to a warped frame that eventually causes leaks you wouldn’t expect and puts unnecessary friction on the cooling fan bearings.
Stop Relying on the Level Across the Doors
When you level the cabinet, you ensure the internal components—the evaporator, the drain pan, and the compressor—are sitting exactly where the engineers intended. A twisted frame can cause the internal drain tube to angle uphill, leading to water pooling inside the unit. I’ve seen homeowners spend hundreds on what they thought was affordable same-day appliance fixes when the only real issue was a structural tilt they introduced themselves. In my experience, a ‘flat’ fridge is often a failing fridge; you need that specific rearward pitch to protect the mechanical heart of the machine.
Can a poorly leveled fridge actually void your manufacturer protection?
This is the ‘oops’ factor that haunts many DIYers. While leveling seems minor, manufacturers like Samsung and LG specifically cite ‘improper installation’ as a reason to deny service. According to research by the Association of Home Appliance Manufacturers (AHAM), nearly 25% of service calls for new appliances are actually installation errors rather than component failures. If a technician arrives for a warranty-backed appliance service and finds your fridge propped up on scrap wood or tilted so far back the compressor is straining, they can mark the claim as ‘owner-induced stress.’ This is why it is critical to understand the hidden costs of DIY repairs on warranty covered items before you grab your wrench.
The Trap of Rushed Same-Day Repairs
We all want fast trustworthy appliance installation near you, but there is a nuance to ‘same-day service’ that pros rarely mention. A truly expert technician might take longer because they are checking the static pressure of your coolant or the resistance of the starter relay, whereas a ‘fast’ fix often involves just swapping the most likely part without finding the root cause. This ‘parts cannon’ approach is why many people find themselves scheduling your appliance repair for same-day service multiple times for the same issue. Before you let someone touch your unit, ask if they have the specific service manual for your model; if they don’t, they are just guessing. Have you ever fallen into this trap of choosing speed over precision? Let me know in the comments—I’ve seen plenty of ‘quick fixes’ turn into month-long nightmares!
I’ve realized that the ‘set it and forget it’ mentality is the quickest way to end up calling for affordable same-day appliance fixes. For my own kitchen, I’ve ditched the standard bubble level for a high-precision digital angle gauge. It might seem like overkill, but knowing my fridge has exactly a 0.25-degree rearward pitch ensures the door gasket seals with vacuum-like efficiency every time. This level of precision is actually your best defense against why your freezer is building up snow around the gasket. According to the Service Manual for High-End Refrigeration by Sub-Zero, even a 1-degree deviation from the specified pitch can increase energy consumption by up to 5% because the compressor has to work against an uneven mechanical load.
How do I maintain this perfect balance over time?
The secret isn’t just in the initial install; it’s in the seasonal follow-up. Houses breathe and shift as temperatures change, and that perfect tilt you set in the winter might be completely off by mid-summer. I make it a point to re-verify my levels every time I swap out my water filter. If you are ever in doubt about these adjustments, browsing an expert guide to appliance repair and installation today can provide the specific torque specs your model requires. Beyond physical tools, your most powerful asset is your documentation. I keep a ‘maintenance passport’ for every major appliance. This is the one maintenance record that saves your appliance warranty claim when a major component fails. When a technician sees a documented history of leveling checks and coil cleanings, they are far more likely to help you maximize your appliance warranty during emergency repairs rather than looking for a reason to blame ‘user negligence.’ When you finally decide to call for what to expect from same-day appliance repair experts, you want to be the customer who has everything ready. I’ve found that having the original warranty document you must save before discarding the box sitting right on top of the unit changes the entire dynamic of the service call. It signals that you are an informed owner who understands the maintenance contract clause that saves you on labor costs. Don’t just settle for a quick fix; ask the tech to verify the leveling while they are there. This ensures that the same-day appliance repair quick solutions with warranty support you receive actually last for the long haul. Looking ahead, I expect we will see refrigerators with ‘active suspension’ legs that auto-level themselves using internal gyroscopes. Until that tech hits the consumer market, a $20 digital gauge and a dedicated maintenance log are your best friends. My challenge to you is simple: go grab a level right now and check your side-to-side balance. If it’s off by more than a hair, you’re literally burning money on electricity!
Lessons from My Battle with the 3 AM Kitchen Hum
Leveling is a dynamic process, not a one-time event. As the seasons change, the wood in your subfloor expands and contracts, which is why how to ensure reliable appliance installation in 2025 requires a bi-annual check-up. The biggest ‘aha!’ moment for me was realizing that the weight of the groceries actually changes the structural balance. Always level your unit with a semi-full fridge to mimic real-world usage and prevent the frame from twisting under load. If you ignore the tilt, you aren’t just dealing with noise; you are risking the defrost timer failure that freezes your refrigerator coil because the internal drainage geometry gets thrown off. Never underestimate the power of a simple wrench; it is the thin line between a warranty-backed appliance service and a rejected claim due to owner negligence.
What I Keep in My Maintenance Drawer
I swear by a high-accuracy digital level rather than the old plastic bubble versions. It removes the guesswork and ensures I hit that exact 0.25-degree rearward pitch every time. I also keep a dedicated ‘maintenance passport’ for the house; documenting these small tweaks is the one maintenance record that saves your appliance warranty claim when a major component fails. Finally, I always have a digital copy of an expert guide to appliance repair and installation today saved on my tablet for quick reference when a bolt feels stuck or a base grille refuses to pop off.
Your Path to a Quiet Kitchen Starts Today
You do not need to be a certified technician to master the art of the quarter-inch lean. Taking control of your appliance’s stability is the first step toward avoiding expensive and stressful affordable same-day appliance fixes in the future. By paying attention to the pitch and the door seal now, you ensure your kitchen stays peaceful and your energy bills stay low. Reclaiming your sleep from a vibrating compressor is entirely within your reach. Have you ever discovered a bizarre DIY ‘fix’ from a previous homeowner, like cardboard or bottle caps, shoved under your fridge legs? Let me know in the comments below!