
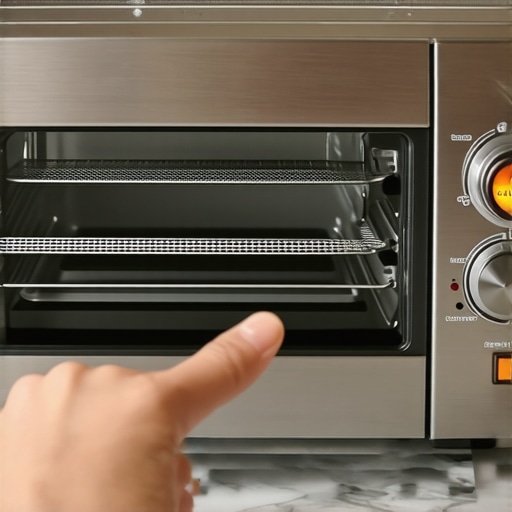
I was standing in my kitchen, staring at a very expensive piece of stainless steel that refused to do the one thing I paid it for: toast bread. My high-end toaster oven, the kind that cost more than my first car’s transmission repair, was stone cold. No lights, no heat, just a silent protest against my breakfast plans. I’d checked the circuit breaker. I’d unplugged and replugged until the cord felt loose. I was ready to call it a day and look for same-day appliance repair options because, honestly, who can survive a weekend without a bagel? But before I spent a dime, I remembered a tip from an old manual I’d tossed years ago.
The Morning My Premium Oven Almost Ended Up on the Curb
I’ve been there—that moment of pure frustration where you want to toss a $400 machine out the window. It’s a gut-punch when your ‘luxury’ appliances fail because you expect them to be indestructible for that price. I made a massive mistake a few years back with a similar unit where I actually paid a technician $120 just to show up, only for him to flip a tiny switch on the bottom and leave within two minutes. I felt like an absolute idiot. That experience taught me that manufacturers hide these ‘maintenance’ or ‘reset’ buttons to prevent the internal components from frying during a power surge or an overheat event. Sometimes, you might even notice your heating elements only glowing halfway before the whole thing eventually shuts down as a safety precaution. According to the safety experts at the National Fire Protection Association, high-wattage kitchen appliances are designed with thermal cutoff switches to prevent residential fires, which account for a significant portion of home insurance claims. This hidden button is your first line of defense, but it is also the most overlooked feature in the modern kitchen.
Is This Tiny Button Actually Worth the Hype?
You’re probably skeptical. You’re thinking, ‘If my oven is dead, a little plastic button isn’t going to fix a fried heating element.’ I thought the same thing. However, these high-end machines are smarter than we give them credit for. They have ‘brains’ that lock out the power if they detect even a millisecond of abnormal electrical resistance or a clogged vent. It is often mistaken for a total hardware failure by owners. Before you go down the rabbit hole of the hidden costs of DIY repairs, you need to know exactly where your specific model hides its reset. Have you ever had an appliance just ‘die’ on you, only to find out it was a simple settings or safety issue? Let me know, because I’m starting to think these manufacturers play a game of hide-and-seek with us. Today, I’m going to show you how to find that elusive maintenance button and why it’s the secret to keeping your high-end toaster oven out of the scrapyard while keeping your warranty-backed service history clean. Sometimes, it isn’t even a button—it is a sequence—but once you know it, you are the master of your kitchen again.
Look Under the Chassis First
Your luxury toaster oven isn’t just a heater; it’s a computer that cooks. Most of these high-wattage units feature a thermal safety switch designed to ‘trip’ if the internal temperature exceeds a safe limit. This usually happens during back-to-back high-heat cycles or if the crumb tray is so full it’s insulating the bottom of the unit. Unplug the oven and flip it over. Look for a tiny, recessed hole—often no wider than a toothpick—labeled ‘Reset.’ Using a paperclip, press and hold that internal button for ten seconds. It’s the appliance version of a heart defibrillator. If you hear a faint ‘click,’ you’ve just saved yourself from calling same-day appliance repair. I once spent thirty minutes panicking over a dead oven after a heavy Sunday brunch, only to find the reset button tucked behind a rubber foot. It felt like finding a hidden treasure, except the treasure was just the ability to make toast again. 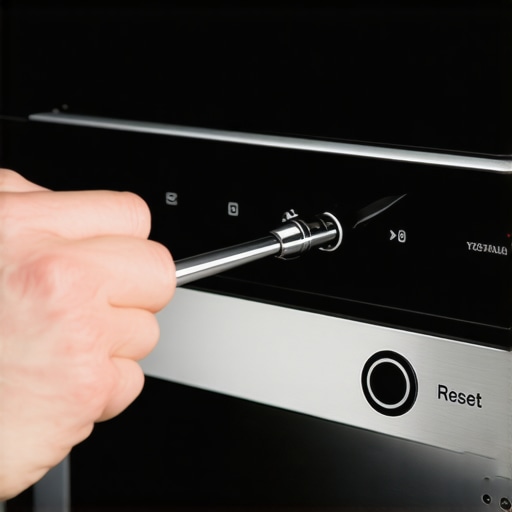
Ditch the Cheap Power Strip Immediately
One of the most common reasons these units fail isn’t a hardware break; it’s a power starvation issue. High-end toaster ovens pull massive amounts of current—often 1500 to 1800 watts. If you are plugging your oven into a standard office power strip, you are asking for trouble. The power strip mistake killing your high-end coffee machine circuit is the exact same culprit here. These strips have internal breakers that can wear out or limit the voltage, causing the oven’s control board to glitch or shut down to protect its sensitive electronics. Think of it like trying to run a marathon while breathing through a cocktail straw. Always plug your oven directly into a grounded wall outlet. If the unit still won’t power on, check the GFC outlet in your kitchen; those buttons pop more often than you’d think, especially in humid environments.
Try the Secret Software Handshake
If there is no physical button, your oven likely has a ‘soft reset’ sequence. Manufacturers like Breville or Wolf often use a combination of button presses to clear error codes. Usually, this involves unplugging the unit, holding down the ‘Start/Cancel’ button, and plugging it back in simultaneously. Keep holding until the screen flashes or beeps. This clears the logic board’s memory. If your heating elements only glowing halfway was the original problem, this software refresh can sometimes recalibrate the power distribution. However, be careful. If you find yourself needing to do this daily, you might be facing a deeper hardware issue that requires an expert guide to appliance repair and installation today to ensure your kitchen remains safe from electrical hazards.
Don’t Lose Your Warranty Over a Simple Fix
Before you grab a screwdriver and start peeling back the stainless steel skin, check your screen for a padlock icon. I once spent forty minutes sweating over a perceived hardware failure, nearly ready to dismantle the base, only to realize I had leaned against the ‘lock’ button while wiping the counter. The control lock feature you might have accidentally turned on is a classic ghost fault. If the buttons are unresponsive but the lights are on, hold the ‘Cancel’ or ‘Lock’ button for three to five seconds. If you do decide to open the unit, remember the hidden costs of DIY repairs—most manufacturers can tell if the casing has been tampered with. Always document your steps and keep the one maintenance record that saves your appliance warranty claim in case a professional intervention becomes necessary. Troubleshooting is about ruling out the silly mistakes before spending money on the serious ones.
It’s easy to think that once you’ve found the reset button, your job is done. But after a decade of maintaining high-end kitchens, I’ve learned that the biggest trap isn’t the appliance itself—it’s the way we interact with the service industry. Most people believe that calling for same-day appliance repair guarantees a fixed unit by dinner time. In reality, the nuance is much more complex. While a reputable tech will arrive promptly, the specialized nature of luxury components means that ‘same-day’ often refers to the diagnostic precision rather than the final replacement of a circuit board. A 2023 reliability survey from Consumer Reports highlights that nearly 25% of advanced appliance repairs require a follow-up visit due to the specific software versions needed for control boards. Understanding this prevents the frustration of feeling ‘cheated’ when a part needs to be overnighted.
Stop Expecting a One-Hour Miracle
Here is a contrarian view: the faster a technician says they can ‘definitely’ fix a high-end unit without seeing it, the more you should worry. Modern machines are incredibly sensitive to voltage fluctuations and sensor errors. If you rush the process, you might end up with a temporary patch that leads to the hidden costs of DIY repairs when that patch fails. I always recommend prioritizing what to expect from same-day appliance repair experts—which is a professional diagnosis and a clear path forward—rather than a rushed, imperfect solution. Have you ever been promised a quick fix only to have the same issue pop up three days later? Let me know in the comments, because I suspect it’s more common than the ‘pros’ like to admit.
The Maintenance Log is Your Only Real Insurance
The biggest ‘oops’ factor I see with my clients is the assumption that a warranty is a bulletproof shield. It isn’t. If you cannot provide the one maintenance record that saves your appliance warranty claim, many manufacturers will reject your request for a free repair, citing ‘user neglect’—even for something as simple as a failed heating element. You need to know how to prove periodic maintenance to keep your warranty valid. This means keeping a digital folder with photos of your cleaned filters and crumb trays. It sounds tedious, but it’s the difference between a $0 bill and a $500 invoice. I’ve seen claims denied simply because a crumb tray looked like it hadn’t been emptied in a month, allowing heat to build up and trip the thermal fuse.
Is Professional Installation Actually Necessary for Luxury Gear?
Many homeowners try to save a few dollars by doing the heavy lifting themselves. However, how to ensure reliable appliance installation in 2025 involves more than just plugging it in. From ensuring the correct wire gauge to checking the precise level of the unit, a professional setup prevents the micro-vibrations that eventually lead to hardware failure. If you are investing in a high-end kitchen, fast trustworthy appliance installation near you is an investment in the unit’s decade-long lifespan. Don’t let a $50 savings on labor lead to a $2,000 headache later. Troubleshooting is an art, but prevention is a science. When in doubt, lean on expert guide to appliance repair and installation today to keep your kitchen running without a hitch.
The Diagnostic Kit That Saves My Weekends
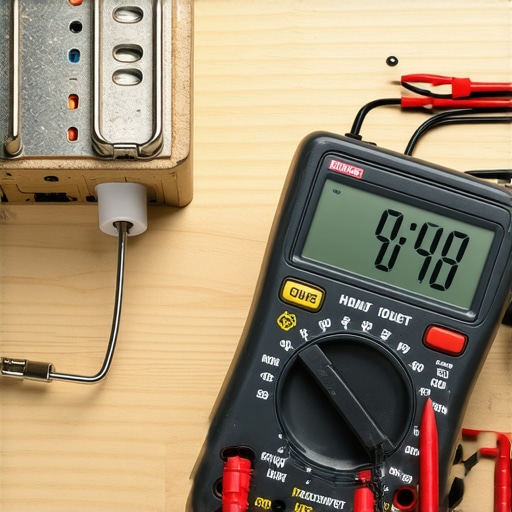
I don’t just guess why an oven is failing; I use what I call my ‘lie detector.’ If you’re serious about maintaining high-end gear, you need a non-contact infrared thermometer. When a client tells me their toast is uneven, I don’t take their word for it. I map the heat. A high-end unit should have a variance of no more than 5 to 10 degrees across the stone or tray. If I see a 50-degree drop on the left side, I know why your oven temperature sensor needs a calibrated adjustment before I even open the casing. Another non-negotiable tool is a basic digital multimeter. This isn’t just for electricians; it’s for anyone who wants to verify if a thermal fuse has actually blown or if the board is just being stubborn. According to the UL 1026 standards for Electric Household Cooking and Food Serving Appliances, these internal safety limits are precise, and a multimeter is the only way to verify if you’re within those safety parameters without playing a guessing game with your house’s wiring.
Your Installation Is Probably Choking the Circuit
I’ve walked into multi-million dollar kitchens where a $600 toaster oven was shoved into a decorative cubby with zero airflow. This is the fastest way to kill a control board. When considering how to ensure reliable appliance installation in 2025, you have to look at the ‘air envelope.’ Most luxury manuals specify at least four inches of clearance on all sides. Ignoring the proper clearance needed to prevent oven overheating is a guaranteed way to trip those thermal resets we talked about earlier. If you’re building a custom nook, install a small, silent DC fan to pull heat away from the chassis. It’s a $20 fix that adds five years to the appliance’s life. This level of detail is exactly what to expect from same-day appliance repair experts who actually know their craft—they look at the environment, not just the machine.
How do I keep my high-end appliances humming for a decade?
The secret isn’t just cleaning; it’s ‘stress-testing.’ Once every six months, I run my appliances through their highest-draw cycles while monitoring the plug temperature. If the cord feels hot to the touch—not just warm, but hot—you have a contact resistance issue in your wall outlet. This is a precursor to a melted terminal. By catching this early, you can schedule scheduling your appliance repair for same-day service in 2025 before an emergency occurs. Additionally, I recommend a ‘soft’ vacuuming of the rear vents every quarter. Dust is an insulator, and on a logic board, it acts like a blanket that traps heat until the chips de-solder themselves. This proactive approach keeps your warranty-backed appliance services for actual mechanical failures rather than preventable overheating issues.
Where Smart Kitchens Are Heading Next
Looking forward, we are moving away from manual resets toward predictive AI diagnostics. In the next three to five years, your toaster oven won’t just ‘die’; it will send a notification to your phone saying, ‘Component X is showing 15% increased resistance; click here to schedule a technician.’ We are already seeing this in high-end HVAC systems, and the tech is trickling down to the countertop. Until that becomes standard, you have to be the ‘smart’ part of the system. If you want to stay ahead of the curve, I challenge you to do this today: pull your oven out, check the manufacture date on the back, and download the actual service manual—not the user manual—from the manufacturer’s site. Having that PDF on your phone when you call for same-day appliance repair makes you the most informed client the tech will see all year, often resulting in a faster, more accurate fix. If you’re feeling overwhelmed, check out an expert guide to appliance repair and installation today to bridge the gap between DIY and pro-level maintenance.
The Most Expensive Lesson I Learned From a Cold Toaster
After years of dealing with temperamental kitchen gear, I’ve realized that the ‘premium’ price tag often covers the cost of complexity, not just quality. One thing I’ve learned is that a ‘broken’ oven is usually just a ‘confused’ one. These units have sensitive brains that lock down at the first sign of trouble. Instead of panicking, I now approach every failure as a conversation with the machine. I’ve discovered that knowing the difference between a manufacturer warranty and a service contract is crucial when the simple reset doesn’t work. Another lightbulb moment? Realizing that a dirty crumb tray isn’t just a mess—it’s a thermal hazard that shuts down your power. Most importantly, I’ve learned to maximize your appliance warranty during emergency repairs by having my maintenance logs ready before the tech even knocks.
Tools That Make You Look Like a Pro Service Tech
You don’t need a van full of parts to keep your kitchen running. First, get a non-contact infrared thermometer; it’s the only way to prove your heating elements are failing before they actually die. Second, I swear by the official ‘Service Manual’ for your specific brand—not the thin pamphlet that came in the box. Third, keep a digital folder of your receipts and cleaning photos. These simple habits are what allow you to find affordable same-day appliance fixes with warranty benefits because you can provide the proof the manufacturer requires. If you’re ever in doubt about a technical step, you can always contact us for guidance on finding a reputable specialist in your area.
You Can Fix This Without Breaking the Bank
Don’t let a silent appliance ruin your morning. Most of the time, the solution is hiding in plain sight—under a rubber foot or behind a sequence of buttons. By taking these proactive steps, you ensure that your high-end investment lasts as long as it was designed to. When you do need professional help, remember these top tips for same-day service warranty coverage to ensure you aren’t overpaying for a simple fix. Your kitchen is the heart of your home; keep it beating with a little bit of patience and the right knowledge about same-day appliance repair. Have you ever managed to ‘resurrect’ a dead appliance with a simple trick? Let me know in the comments below!