
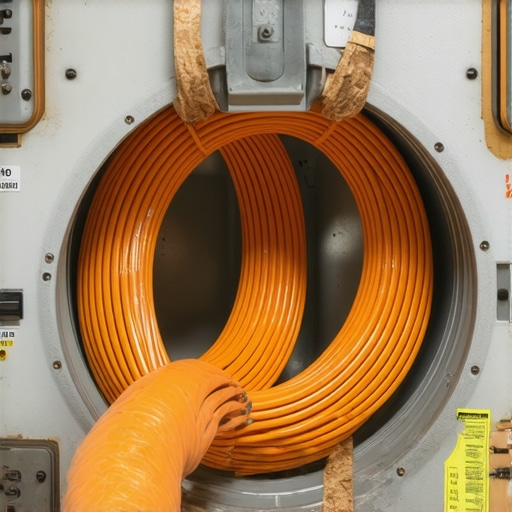
I’ll never forget the smell. It wasn’t the scent of fresh linen or even the ‘new appliance’ aroma I was expecting after dropping a paycheck on a high-efficiency dryer. It was the acrid, heart-thumping stench of melting insulation. I had just finished what I thought was a ‘successful’ DIY install, only to realize I’d made the most classic rookie mistake in the book: I assumed the old wire gauge from my 1990s unit would play nice with a modern machine. Spoiler alert: it didn’t. If you’re staring at a tangle of copper and a three-prong or four-prong outlet, wondering if you can just ‘make it work,’ stop right there. Getting the wire gauge right isn’t just about following codes; it’s about making sure your house doesn’t turn into a bonfire. Today, I’m going to walk you through exactly what you need to know about wire sizing so you can ensure reliable appliance installation and get back to doing laundry without a fire extinguisher in hand.
Why Reusing Your Old Wire is a Recipe for Disaster
Modern dryers are absolute beasts when it comes to power consumption. Back when I first started tinkering with home repairs, I thought a wire was just a wire. I was young, overconfident, and frankly, a bit lazy. I was wrong. Using a gauge that’s too thin for the amperage your dryer demands creates resistance, and resistance creates heat. It’s like trying to force a fire hose worth of water through a straw—something has to give. According to the National Electrical Code (NEC), most residential electric dryers require a dedicated 30-amp circuit, which strictly mandates 10-gauge copper wire. If you try to sneak by with 12-gauge—which is common for standard kitchen or bedroom outlets—you are literally playing with fire. I learned this the hard way when I had to call for emergency repairs because I’d fried the terminal block on a brand-new unit within a week. That ‘savings’ on a cheaper wire cost me triple in repair fees and a very frustrated spouse.
Does the wire gauge really make that much of a difference?
You might be sitting there thinking, ‘It’s just a dryer, surely it’s not that sensitive.’ I get it. We all want to save a few bucks where we can, especially after buying a new machine. But here’s the kicker: even if it doesn’t catch fire immediately, improper wiring causes significant voltage drops. This strains the motor and the heating element, often leading to an annoying thermal switch reset or, worse, a fried control board that costs half the price of the dryer to replace. If you’ve ever dealt with a wiring mistake killing your smart home thermostat, you know how one bad connection can cascade into an expensive nightmare. Have you ever noticed your dryer cord feeling abnormally hot to the touch after a long cycle? If so, reach out to us—we need to talk about your setup before something melts. Now that we’ve established why that thick 10-gauge wire is your best friend, let’s dive into how you actually identify what’s currently hiding behind your drywall and how to spot a hazard before it starts.
Check Your Breaker Before Touching a Screwdriver
Before you even think about pulling that new dryer out of the box, you need to head to your electrical panel. It is the brain of your home, and if the brain is mismatched with the body, things get messy. Look for the circuit breaker labeled ‘Dryer.’ In a standard home, this should be a double-pole breaker (it looks like two switches tied together) rated for 30 amps. If you see a single 15-amp or 20-amp breaker, stop. You are not ready for a DIY hookup. I once ignored a mismatched breaker at a buddy’s house, thinking we could just ‘test it out’ for one cycle. The breaker tripped three times in ten minutes, and by the fourth, the smell of ozone told us we were seconds away from a permanent hardware failure. To avoid this, follow an expert guide to appliance repair and installation today to ensure your panel matches your machine’s hunger for power.
Spotting the Difference Between 10 and 12 Gauge
If the breaker is 30 amps, the wire hidden behind the wall must be 10-gauge. You can identify this by looking at the outer jacket of the cable—it usually has ’10/3′ or ’10AWG’ stamped right on it. The number 10 refers to the thickness; ironically, in the world of wire, the smaller the number, the thicker the copper. 12-gauge wire is thinner and is meant for 20-amp circuits. Using 12-gauge for a 30-amp dryer is like trying to run a marathon while breathing through a cocktail straw; the wire will overheat, melt the insulation, and eventually arc against the metal studs or the dryer’s own cabinet. 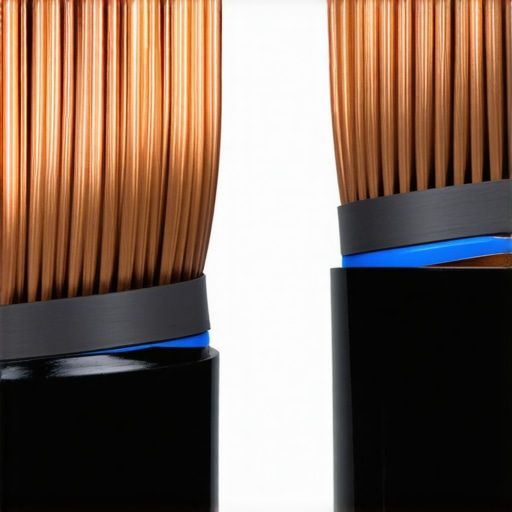
The 4-Prong Standard is Your Safety Net
Since 1996, the NEC has required 4-prong outlets for dryers. This setup separates the neutral and the ground, which is a massive safety upgrade. If you have an older 3-prong outlet, you might be tempted to just swap the cord on the dryer and call it a day. While this is often allowed for existing installations, you must ensure you how to properly ground your new induction cooktop or dryer correctly by following the manufacturer’s bonding instructions. I remember a specific job where a client had bypassed the ground entirely. Every time she touched the dryer while barefoot on the basement floor, she got a nasty ‘tingle.’ That ‘tingle’ was electricity looking for a path to ground—and she was it. Proper fast trustworthy appliance installation near you ensures that the machine is grounded to the house’s electrical system, not to you.
Don’t Forget the Strain Relief Clamp
This is the most skipped step in the DIY world. When you connect the cord to the back of the dryer, there is a hole in the metal backplate. You cannot just let the wire sit against that sharp metal edge. You must install a strain relief clamp. Years ago, I skipped this on a rush job at my own place. The constant vibration of the drum eventually sawed through the wire insulation against the sharp metal hole. One afternoon, the whole machine let out a loud ‘bang’ and died. I had to search for same-day appliance repair quick solutions with warranty support because I’d shorted out the entire terminal block. It’s a five-minute fix that saves a five-hundred-dollar repair bill. Always double-check your connections and ensure they are tight; a loose screw on a high-amperage terminal is a primary cause of ‘melted wire’ syndrome. If you aren’t sure if your connections are snug enough, it is always better to look for warranty-backed appliance services you can rely on to verify the work before you plug it in.
Why Professional Installation Is Not a Golden Ticket
Most homeowners believe that hiring a local pro automatically protects their investment. I used to think the same until I realized a hard truth: many ‘general’ handymen follow local building codes but ignore the manufacturer-specific nuances that dictate whether your protection plan stays valid. In my experience, even a technically correct electrical setup can be a reason your warranty claim was denied if the installer doesn’t document the specific amperage draw during the first cycle. If the terminal block isn’t torqued to the exact inch-pounds specified in the manual, that high-amperage heat will eventually cause a micro-arc. To a technician, that looks like ‘user-induced heat damage’ rather than a part failure, and suddenly you are on the hook for a $400 repair. To ensure reliable appliance installation, you have to be the annoying person in the room asking if they used a torque screwdriver, not just a standard drill.
Does rushing for same-day service lead to cut corners?
It is the most common trap in the industry. When your laundry is piling up, you want scheduling your appliance repair for same-day service in 2025 to be as fast as possible. However, the ‘Oops’ factor here is massive. A rushed tech might skip the vital step of checking your home’s neutral-to-ground voltage. According to a study by the Association of Home Appliance Manufacturers (AHAM), improper grounding is a leading cause of premature control board failure in smart appliances. If you force a same-day fix without insisting on a full diagnostic of the circuit, you might just be putting a band-aid on a symptom while the real disease—unstable voltage—waits to kill your new board. 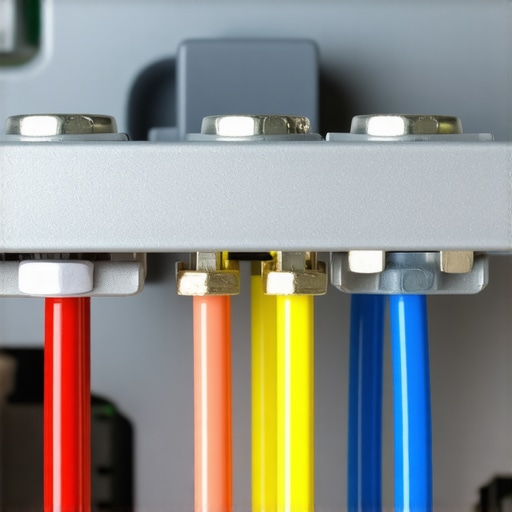
The Documentation Gap Most DIYers Ignore
Even if you nail the 10-gauge wiring and the 4-prong outlet, you are still at risk if you don’t have the right paper trail. I’ve seen dozens of people lose out on hundreds of dollars because they didn’t have the document most people forget before calling service: the dated photo of the electrical terminal before the back panel was closed. When you maximize your appliance warranty during emergency repairs, that photo is your shield. It proves that you didn’t leave a loose connection or a frayed wire. Without it, the manufacturer can claim ‘improper installation’ and walk away. Also, keep an eye on the wear and tear clauses that might void your warranty; some plans won’t cover a fried motor if they find even a hint of lint buildup in the internal cabinet, which often happens when people use foil vents instead of a hard pipe upgrade. Have you ever had a ‘pro’ install go wrong, or have you ever been denied a claim over a tiny technicality? Let me know in the comments—I’m curious to see how many of you have fallen into the ‘expert install’ trap. If you’re currently staring at a broken machine and need someone who actually respects the manual, check out what to expect from same-day appliance repair experts before you make the call.
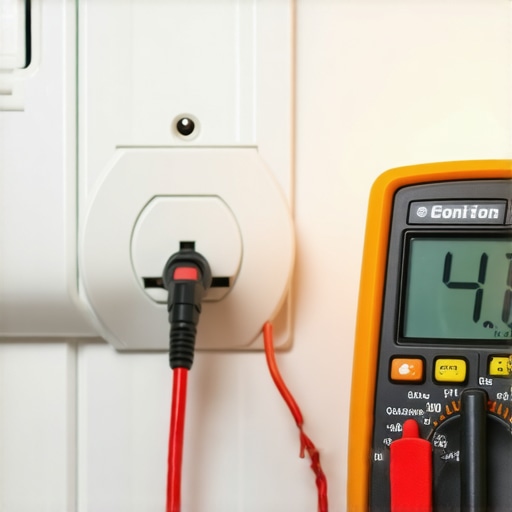
I used to eyeball everything. I thought ‘hand-tight’ was a universal measurement until I realized that heat expansion in high-amperage circuits doesn’t care about my feelings. If you want to ensure reliable appliance installation, you need a digital multimeter—not a cheap ten-dollar one, but something rated for HVAC and high-amperage loads. This tool tells you the truth about your voltage drops before they fry your control board. I also swear by an infrared thermometer. After a fifteen-minute dryer cycle, I aim it at the terminal block. If I see anything over 140 degrees Fahrenheit, I know I have a loose connection that is going to cause a meltdown later. According to the NEMA Standards Publication DC 3, even a slight deviation in electrical contact pressure can lead to significant thermal runaway. This is why I carry a torque screwdriver set to exactly twenty-five inch-pounds for most dryer terminals. Using the right torque ensures the connection stays tight through thousands of vibration cycles.
How do I keep my high-power appliances running for a decade?
Maintenance is not just about cleaning; it is about monitoring components before they fail. Beyond the obvious lint trap trap, you should be checking your moisture sensors once a quarter. A quick wipe with rubbing alcohol on those metal bars inside the drum removes the waxy buildup from dryer sheets that tricks the machine into running too long. If you use the moisture sensor trick for perfectly dry laundry every time, you will significantly reduce run times and save the heating element from premature burnout. I predict that within the next few years, we will see a shift toward integrated thermal imaging in smart appliances that alerts your phone the second a wire starts to overheat. Until that future arrives, you are the first line of defense. Always keep a log of every check-up because the maintenance receipt you must save for future claims is your only real insurance against a stubborn warranty adjuster who wants to blame ‘neglect’ for a part failure. Grab a multimeter today and test your dryer outlet voltage while the machine is running—it is the single most important five-minute task you can perform to prevent a thousand-dollar disaster.
I’ll never forget the smell. It wasn’t the scent of fresh linen or even the ‘new appliance’ aroma I was expecting after dropping a paycheck on a high-efficiency dryer. It was the acrid, heart-thumping stench of melting insulation. I had just finished what I thought was a ‘successful’ DIY install, only to realize I’d made the most classic rookie mistake in the book: I assumed the old wire gauge from my 1990s unit would play nice with a modern machine. Spoiler alert: it didn’t. If you’re staring at a tangle of copper and a three-prong or four-prong outlet, wondering if you can just ‘make it work,’ stop right there. Getting the wire gauge right isn’t just about following codes; it’s about making sure your house doesn’t turn into a bonfire. Today, I’m going to walk you through exactly what you need to know about wire sizing so you can ensure reliable appliance installation and get back to doing laundry without a fire extinguisher in hand.
Why Reusing Your Old Wire is a Recipe for Disaster
Modern dryers are absolute beasts when it comes to power consumption. Back when I first started tinkering with home repairs, I thought a wire was just a wire. I was young, overconfident, and frankly, a bit lazy. I was wrong. Using a gauge that’s too thin for the amperage your dryer demands creates resistance, and resistance creates heat. It’s like trying to force a fire hose worth of water through a straw—something has to give. According to the National Electrical Code (NEC), most residential electric dryers require a dedicated 30-amp circuit, which strictly mandates 10-gauge copper wire. If you try to sneak by with 12-gauge—which is common for standard kitchen or bedroom outlets—you are literally playing with fire. I learned this the hard way when I had to call for emergency repairs because I’d fried the terminal block on a brand-new unit within a week. That ‘savings’ on a cheaper wire cost me triple in repair fees and a very frustrated spouse.
Does the wire gauge really make that much of a difference?
You might be sitting there thinking, ‘It’s just a dryer, surely it’s not that sensitive.’ I get it. We all want to save a few bucks where we can, especially after buying a new machine. But here’s the kicker: even if it doesn’t catch fire immediately, improper wiring causes significant voltage drops. This strains the motor and the heating element, often leading to an annoying thermal switch reset or, worse, a fried control board that costs half the price of the dryer to replace. If you’ve ever dealt with a wiring mistake killing your smart home thermostat, you know how one bad connection can cascade into an expensive nightmare. Have you ever noticed your dryer cord feeling abnormally hot to the touch after a long cycle? If so, reach out to us—we need to talk about your setup before something melts. Now that we’ve established why that thick 10-gauge wire is your best friend, let’s dive into how you actually identify what’s currently hiding behind your drywall and how to spot a hazard before it starts.
Check Your Breaker Before Touching a Screwdriver
Before you even think about pulling that new dryer out of the box, you need to head to your electrical panel. It is the brain of your home, and if the brain is mismatched with the body, things get messy. Look for the circuit breaker labeled ‘Dryer.’ In a standard home, this should be a double-pole breaker (it looks like two switches tied together) rated for 30 amps. If you see a single 15-amp or 20-amp breaker, stop. You are not ready for a DIY hookup. I once ignored a mismatched breaker at a buddy’s house, thinking we could just ‘test it out’ for one cycle. The breaker tripped three times in ten minutes, and by the fourth, the smell of ozone told us we were seconds away from a permanent hardware failure. To avoid this, follow an expert guide to appliance repair and installation today to ensure your panel matches your machine’s hunger for power.
Spotting the Difference Between 10 and 12 Gauge
If the breaker is 30 amps, the wire hidden behind the wall must be 10-gauge. You can identify this by looking at the outer jacket of the cable—it usually has ’10/3′ or ’10AWG’ stamped right on it. The number 10 refers to the thickness; ironically, in the world of wire, the smaller the number, the thicker the copper. 12-gauge wire is thinner and is meant for 20-amp circuits. Using 12-gauge for a 30-amp dryer is like trying to run a marathon while breathing through a cocktail straw; the wire will overheat, melt the insulation, and eventually arc against the metal studs or the dryer’s own cabinet. #IMAGE_PLACE_HOLDER_B#
The 4-Prong Standard is Your Safety Net
Since 1996, the NEC has required 4-prong outlets for dryers. This setup separates the neutral and the ground, which is a massive safety upgrade. If you have an older 3-prong outlet, you might be tempted to just swap the cord on the dryer and call it a day. While this is often allowed for existing installations, you must ensure you how to properly ground your new induction cooktop or dryer correctly by following the manufacturer’s bonding instructions. I remember a specific job where a client had bypassed the ground entirely. Every time she touched the dryer while barefoot on the basement floor, she got a nasty ‘tingle.’ That ‘tingle’ was electricity looking for a path to ground—and she was it. Proper fast trustworthy appliance installation near you ensures that the machine is grounded to the house’s electrical system, not to you.
Don’t Forget the Strain Relief Clamp
This is the most skipped step in the DIY world. When you connect the cord to the back of the dryer, there is a hole in the metal backplate. You cannot just let the wire sit against that sharp metal edge. You must install a strain relief clamp. Years ago, I skipped this on a rush job at my own place. The constant vibration of the drum eventually sawed through the wire insulation against the sharp metal hole. One afternoon, the whole machine let out a loud ‘bang’ and died. I had to search for same-day appliance repair quick solutions with warranty support because I’d shorted out the entire terminal block. It’s a five-minute fix that saves a five-hundred-dollar repair bill. Always double-check your connections and ensure they are tight; a loose screw on a high-amperage terminal is a primary cause of ‘melted wire’ syndrome. If you aren’t sure if your connections are snug enough, it is always better to look for warranty-backed appliance services you can rely on to verify the work before you plug it in.
Why Professional Installation Is Not a Golden Ticket
Most homeowners believe that hiring a local pro automatically protects their investment. I used to think the same until I realized a hard truth: many ‘general’ handymen follow local building codes but ignore the manufacturer-specific nuances that dictate whether your protection plan stays valid. In my experience, even a technically correct electrical setup can be a reason your warranty claim was denied if the installer doesn’t document the specific amperage draw during the first cycle. If the terminal block isn’t torqued to the exact inch-pounds specified in the manual, that high-amperage heat will eventually cause a micro-arc. To a technician, that looks like ‘user-induced heat damage’ rather than a part failure, and suddenly you are on the hook for a $400 repair. To ensure reliable appliance installation, you have to be the annoying person in the room asking if they used a torque screwdriver, not just a standard drill.
Does rushing for same-day service lead to cut corners?
It is the most common trap in the industry. When your laundry is piling up, you want scheduling your appliance repair for same-day service in 2025 to be as fast as possible. However, the ‘Oops’ factor here is massive. A rushed tech might skip the vital step of checking your home’s neutral-to-ground voltage. According to a study by the Association of Home Appliance Manufacturers (AHAM), improper grounding is a leading cause of premature control board failure in smart appliances. If you force a same-day fix without insisting on a full diagnostic of the circuit, you might just be putting a band-aid on a symptom while the real disease—unstable voltage—waits to kill your new board. #IMAGE_PLACE_HOLDER_C#
The Documentation Gap Most DIYers Ignore
Even if you nail the 10-gauge wiring and the 4-prong outlet, you are still at risk if you don’t have the right paper trail. I’ve seen dozens of people lose out on hundreds of dollars because they didn’t have the document most people forget before calling service: the dated photo of the electrical terminal before the back panel was closed. When you maximize your appliance warranty during emergency repairs, that photo is your shield. It proves that you didn’t leave a loose connection or a frayed wire. Without it, the manufacturer can claim ‘improper installation’ and walk away. Also, keep an eye on the wear and tear clauses that might void your warranty; some plans won’t cover a fried motor if they find even a hint of lint buildup in the internal cabinet, which often happens when people use foil vents instead of a hard pipe upgrade. Have you ever had a ‘pro’ install go wrong, or have you ever been denied a claim over a tiny technicality? Let me know in the comments—I’m curious to see how many of you have fallen into the ‘expert install’ trap. If you’re currently staring at a broken machine and need someone who actually respects the manual, check out what to expect from same-day appliance repair experts before you make the call.
I used to eyeball everything. I thought ‘hand-tight’ was a universal measurement until I realized that heat expansion in high-amperage circuits doesn’t care about my feelings. If you want to ensure reliable appliance installation, you need a digital multimeter—not a cheap ten-dollar one, but something rated for HVAC and high-amperage loads. This tool tells you the truth about your voltage drops before they fry your control board. I also swear by an infrared thermometer. After a fifteen-minute dryer cycle, I aim it at the terminal block. If I see anything over 140 degrees Fahrenheit, I know I have a loose connection that is going to cause a meltdown later. According to the NEMA Standards Publication DC 3, even a slight deviation in electrical contact pressure can lead to significant thermal runaway. This is why I carry a torque screwdriver set to exactly twenty-five inch-pounds for most dryer terminals. Using the right torque ensures the connection stays tight through thousands of vibration cycles.
#IMAGE_PLACE_HOLDER_D#
How do I keep my high-power appliances running for a decade?
Maintenance is not just about cleaning; it is about monitoring components before they fail. Beyond the obvious lint trap trap, you should be checking your moisture sensors once a quarter. A quick wipe with rubbing alcohol on those metal bars inside the drum removes the waxy buildup from dryer sheets that tricks the machine into running too long. If you use the moisture sensor trick for perfectly dry laundry every time, you will significantly reduce run times and save the heating element from premature burnout. I predict that within the next few years, we will see a shift toward integrated thermal imaging in smart appliances that alerts your phone the second a wire starts to overheat. Until that future arrives, you are the first line of defense. Always keep a log of every check-up because the maintenance receipt you must save for future claims is your only real insurance against a stubborn warranty adjuster who wants to blame ‘neglect’ for a part failure. Grab a multimeter today and test your dryer outlet voltage while the machine is running—it is the single most important five-minute task you can perform to prevent a thousand-dollar disaster.
The Hardest Lesson I Learned While Wiring My First Dryer
The biggest epiphany for me wasn’t just about wire thickness; it was about respecting the physical forces of electricity. Even if you have the perfect 10-gauge wire, a single loose screw creates an arc that is hotter than the surface of the sun. I’ve seen 4-prong plugs that were technically wired correctly but suffered a meltdown because the installer skipped the proper way to secure a stacked laundry unit, leading to vibrations that loosened the terminal block over time. My lightbulb moment was realizing that every component—from the breaker to the strain relief—is part of a safety chain. If one link is weak, the whole house is at risk. Don’t fall into the trap of thinking ‘close enough’ is good enough for 240 volts.
The Toolbox That Prevents Electrical Failures
If you plan on tackling your own appliance installs, you need to move beyond the basic screwdriver. I personally trust a digital multimeter for verifying that the outlet is pushing a true 240V, as lower voltage forces the motor to draw more current and overheat. I also never start a job without a torque screwdriver set to the manufacturer’s spec, usually 25 inch-pounds, to ensure connections don’t wiggle free. To avoid the wrong way to level a professional kitchen range or a heavy dryer, keep a magnetic spirit level in your bag. These tools aren’t just for show; they are the difference between a machine that lasts twelve years and one that dies in two.
Stop Guessing and Start Installing with Confidence
You now have the insights needed to protect your home and your investment from the silent threat of improper wiring. By choosing 10-gauge wire and ensuring your grounding is up to code, you aren’t just doing a chore—you’re performing a vital safety upgrade. Don’t let a simple mistake like using the wrong wire gauge or skipping a clamp turn into a costly insurance claim. When you ensure reliable appliance installation, you gain more than just dry clothes; you gain the peace of mind that comes with knowing your home is secure. Have you ever checked the back of your dryer and found a wire that felt surprisingly hot? Let me know your experiences below!