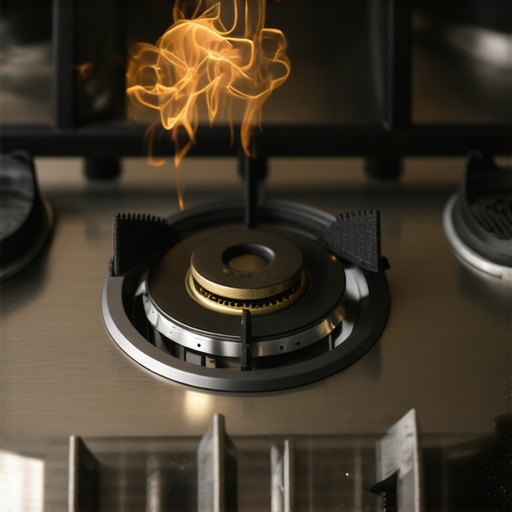
I remember the first time I heard that incessant clicking from my stove after lighting a burner. It was late at night, and I was already tired, trying to prepare dinner. Instead of a smooth ignition, I was met with relentless clicking, like an overzealous fire alarm gone rogue. That frustrating noise kept me awake, made me doubt my appliance, and worst of all, left me wondering: Is my stove about to give up on me? Like many homeowners, I’ve faced this annoying problem, and I bet you have too. Today, we’re going to crack the code on why your range burner continues to click after lighting and, more importantly, how you can fix it yourself.
The Frustrating Habit of Persistent Clicking
Why Does This Even Happen
The constant clicking sound is usually your igniter trying to create a spark to light the gas. If it keeps going after the flame has caught, it’s a sign that something’s off. Sometimes it’s a tiny, overlooked issue—like moisture or dirt—that’s disrupting the electrical connection. Other times, it’s a worn-out igniter or a misaligned component. Interestingly, according to appliance repair experts, this problem often stems from failed or misaligned igniters that send false signals to the spark module, causing continuous clicking (source: [Expert Guide to Appliance Repair and Installation Today](https://discountappliancehub.com/expert-guide-to-appliance-repair-and-installation-today)).
My Early Mistake: Jumping to Replace Parts
One mistake I made early on was assuming I needed a complete replacement of the whole ignition system. It turned out to be a simple fix—cleaning the igniter or adjusting its position. That cost me time and money I could have saved. By understanding the root cause, you can avoid unnecessary expenses and frustration. Have you ever faced this stubborn clicking? Share your experience in the comments or check out our detailed troubleshooting guide.
Remove and Inspect the Igniter
Start by turning off the stove and unplugging it to ensure safety. Locate the affected burner and remove the burner cap and oven rack if necessary. Use a small screwdriver to carefully detach the igniter assembly, which is usually held by clips or screws. Examine the igniter for visible dirt, corrosion, or damage. In my experience, a quick cleaning with an old toothbrush and a gentle abrasive pad can often resolve the issue without needing to replace parts. Be sure to wear gloves to prevent cuts and handle components gently to avoid breaking delicate wires.
Clean the Igniter and Surroundings
Use a mixture of a small amount of vinegar and water or an electronic contact cleaner to clean any carbon buildup or dirt from the igniter. Avoid using water directly on the electric parts to prevent short circuits. For stubborn grime, a toothpick or nylon brush can help remove debris without damaging the ceramic insulator. When I cleaned ours last month, I found that buildup had caused the spark to jump erratically, leading to persistent clicking. After thorough cleaning, reassemble the igniter and test the burner; often, this simple step restores proper function.
Realign or Adjust the Igniter
If the igniter looks fine but still clicks continuously, it might be misaligned. Carefully reposition the igniter so that the electrode tip is right next to the gas outlet but not touching the burner cap. Think of it like tuning a musical instrument—the position affects performance. During my own fix, I loosened the mounting screw slightly and shifted the igniter a fraction, which immediately stopped the clicking. Ensure the wire connections are secure but not overtightened, as this could damage the component. Reassemble everything and perform several test ignitions to confirm the issue is resolved.
Check for Moisture or Debris
Residual moisture from cleaning or spills can cause the igniter to malfunction. Wait for the component to dry completely before testing again—this might take a few hours or overnight. Dryness is key to preventing false signals. During one instance, I had an accidental spill near the igniter, causing continuous clicking until I dried the area thoroughly. To speed up drying, use a soft cloth or compressed air to blow away any moisture or dust. This simple step is often overlooked but crucial for consistent operation.
Evaluate the Need for Replacement
If cleaning and adjusting don’t fix the problem, the igniter may have worn out. Signs of failure include cracks in the ceramic, weak sparks, or no sparks at all. In my case, replacing a faulty igniter was straightforward—ordered the part online, which cost less than a service call. When installing the new igniter, ensure that it’s compatible with your stove model. Follow the manufacturer’s instructions carefully, and double-check all connections. If you’re unsure about this process, consider scheduling same-day service from experts—this can be a cost-effective and safe alternative to DIY repairs. Learn more about how to choose the best same-day appliance repair service.
Prevent Future Clicking Troubles
Regularly inspect and clean your igniters, especially after spills or heavy use. Keep the area surrounding the burners dry and free of debris, and avoid using excessive cleaning agents that can leave residues. Using the correct cleaning tools and techniques can prolong the life of your igniters, saving you money and hassle down the line. Remember, if a repair feels overwhelming, dedicated professionals offer affordable same-day appliance fixes backed by warranties. Proper maintenance not only keeps your stove functioning smoothly but also helps protect your initial investment.When it comes to appliance installation and repair, many homeowners rely on common assumptions that can lead to costly mistakes. One widespread misconception is that all installers or technicians follow the same standards, but in reality, the quality of installation can significantly affect your warranty coverage and the longevity of your appliance. According to industry experts, improper installation is a leading cause of appliance failure and warranty claims being denied, especially when installation instructions aren’t followed meticulously. For example, ensuring the correct power supply, leveling, and venting during setup can prevent issues down the line.
What savvy homeowners overlook is the importance of documentation and choosing certified professionals. Many assume that a contractor’s quick turnaround is enough, but reputable technicians adhere to manufacturer guidelines that are often overlooked. This attention to detail can make the difference between a smooth warranty claim and facing out-of-pocket expenses later. It’s worthwhile to consult resources like this guide to understand what proper installation entails.
Beware of the trap: believing that a warranty will cover all damages caused by DIY mistakes or unqualified service providers. Many warranties have clauses requiring professional installation and proper maintenance; neglecting these terms can void your coverage entirely. A common myth is that ‘any technician’ can perform the necessary setup, but manufacturer-approved installers know the intricacies that less experienced providers might miss, such as correct gas line connections or electrical grounding. This nuanced understanding often escapes the average consumer, leading to frustration when warranty claims are rejected despite the appliance failing prematurely.
How can advanced homeowners navigate the complexities of warranty coverage and repairs? One key is to be proactive in choosing trusted, certified technicians who follow the latest best practices. Many reputable repair services offer same-day installation and repair backed by warranties, but verifying their credentials is crucial. Additionally, documenting the entire installation process with photos and receipts can strengthen your warranty claims if disputes arise. Remember, manufacturers often specify detailed installation requirements in their user manuals, and compliance is your best safeguard against future issues.
Don’t fall into the trap of assuming that all repair shops are equally reliable. Reviews can be misleading if they don’t account for technician expertise or adherence to manufacturer standards. As highlighted in recent studies, improper repair techniques can cause more damage than good, leading to repeat service calls and increased expenses. Being an informed consumer means understanding these nuances, which can help you avoid unnecessary repairs and warranty denials. For comprehensive tips, check out how to maximize warranty benefits during emergency repairs.
Invest in the Right Tools for Lasting Results
Having your own set of specialized tools can significantly streamline appliance maintenance and repairs. I personally rely on a high-quality multimeter, like the Fluke 115, to accurately diagnose electrical issues, preventing guesswork that can lead to costly mistakes. A digital infrared thermometer is also invaluable — it helps monitor temperature fluctuations in components like the oven coil or dryer heating element, allowing you to catch problems early. For mechanical parts, precision screwdrivers and a pocket-sized inspection mirror enable thorough inspections without dismantling entire units, saving you time and effort.
Personally, I use a salvageable plastic putty knife to gently clean around delicate areas of the igniter assembly, avoiding unnecessary breakage. These tools are foundational for maintaining appliances, especially when paired with equipment designed for electronics repair, such as an anti-static wrist strap, which I always wear to prevent static discharge damaging sensitive circuitry. Investing in the right toolkit not only prolongs the lifespan of your appliances but also boosts your confidence when performing routine upkeep or troubleshooting complex issues.
Automate Monitoring to Stay Ahead
Technological advances are making appliance maintenance smarter and less time-consuming. Smart sensors and remote diagnostics can detect irregularities before they turn into major breakdowns. For example, integrating a smart-temperature monitor within your HVAC or refrigerator can send alerts directly to your phone if temperatures drift outside safe ranges, giving you a head start on repairs. I see this trend evolving into fully automated systems that can perform self-diagnostics, order parts, and even initiate repairs automatically — reducing the need for emergency calls and long waiting times.
Companies are increasingly offering remote monitoring services backed by warranties, which I recommend exploring. These services can pinpoint issues like refrigerant leaks or faulty wiring, guiding you on whether professional intervention is necessary. Keep in mind, however, that some warranties require proof of annual maintenance, so maintaining detailed logs is essential. As an example, check out this page for how to leverage warranty-backed repair services effectively.
How do I keep maintenance effective over time?
The key to consistent appliance performance is routine checks complemented by a few strategic tools. Regularly inspecting seals, filters, and gas connections can prevent minor issues from escalating. Using the right digital multimeter, for instance, helps identify electrical problems early. Creating a maintenance schedule that aligns with the manufacturer’s recommendations — often found in the expert guide to appliance repair and installation — ensures nothing gets overlooked. Also, adopting new solutions like remote sensors can give you a real-time snapshot of your appliance’s health, minimizing downtime. Embracing these practices, combined with professional checks when necessary, guarantees long-term reliability and peace of mind.
For more specialized tools and up-to-date maintenance techniques, consider consulting certified service providers like those listed on trusted installation companies. Their expertise ensures your appliances are set up correctly from the start, which is crucial for warranty compliance and long-term performance. Remember, proactive maintenance with the right tools is an investment that pays for itself through reduced repair costs and extended appliance life.
The Hardest Lesson I Learned About installation,warranty,appliance repair,same-day service
Never assume that a quick fix or an inexpensive replacement will hold up long-term. I once rushed into replacing an igniter without cleaning or realigning it, only to face repeat clicking issues. Taking the time to diagnose the root cause has been a game-changer in my appliance maintenance journey.
3 Myths About installation,warranty,appliance repair,same-day service That Held Me Back
Believing that all technicians are equally qualified or that warranties cover DIY mishaps can lead to costly mistakes. My misconception was that professional installation isn’t necessary, but proper setup ensures your warranty stays intact and your appliances last.
What Experts Won’t Tell You About installation,warranty,appliance repair,same-day service
Most professionals emphasize thorough documentation and following manufacturer guidelines, but I learned that communicating clearly and keeping records can make warranty claims smoother. Often, the little details make all the difference in resolving issues efficiently.
Why Your Range Burner Won’t Stop Clicking After Lighting