
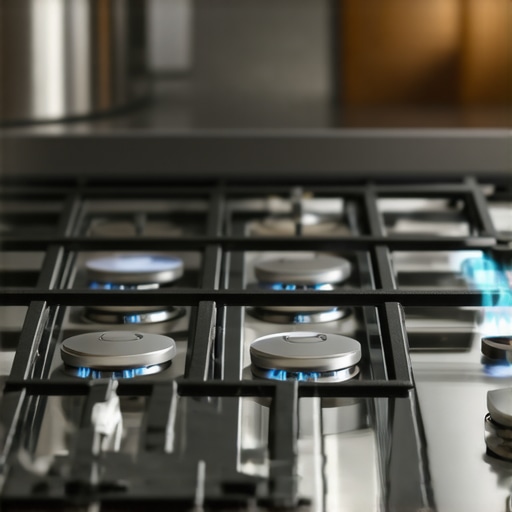
Ever finished a deep clean of your stove and then found yourself staring at burners that just won’t light anymore? I remember this frustrating moment all too well. One weekend, after meticulously scrubbing my cooktop, I fired up my burners—and nothing. The gas was flowing, but the flames refused to ignite. It felt like a cruel joke, especially since I was eager to cook a nice dinner for my family.
That experience taught me a valuable lesson: sometimes, cleaning your stove isn’t as straightforward as wiping down the surface. It’s easy to overlook small details that can interfere with proper ignition. Today, I want to share what I discovered and help you troubleshoot this common issue. We’ll go beyond just surface cleaning and get to the root of why your burners won’t light after you’ve cleaned them.
Don’t Let Cleaning Sabotage Your Cooking Routine
After all, a clean stove should be a joy, not a source of stress. The good news? Often, it’s something simple that you can fix yourself without calling a handyman. If your burners are getting gas but choosing not to light, chances are something is blocking the ignition process or disrupting the gas flow.
Is Your Cleaning Routine Causing More Harm Than Good?
Early on, I made a crucial mistake: I used too much water or harsh chemicals on the burners, which seeped into the ignition components. That short-circuited the spark or prevented gas from igniting properly. An expert at appliance repair points out that moisture and debris can obstruct the igniter or socket, leading to ignition failure.
Now, I always ensure I clean carefully around the ignition points and avoid soaking any parts. Do you suspect your cleaning might have interfered with your stove’s ignition system? If so, don’t worry. There are simple steps you can take to troubleshoot and fix this problem yourself.
In the next sections, we’ll explore how to identify the cause and walk you through some tried-and-true remedies. So, if you’ve ever faced this frustrating issue—where your freshly cleaned burners refuse to light—you’re not alone. Let’s get to the bottom of this and bring your stove back to life quickly!
**Note:** Proper maintenance and timely repairs can also help you maximize your warranty coverage during emergencies. For more tips, check out how to maximize your appliance warranty.
Check the Igniter for Dust and Moisture
Start by inspecting the igniter. After cleaning, dust or moisture can settle on the spark electrode, preventing it from firing. I once cleaned my stove and ignored this step; the burners wouldn’t ignite. I used a dry toothbrush to gently brush off any debris and wiped the igniter with a dry cloth. This simple action restored the spark and got my burners lighting again.
Dry the Ignition Components Thoroughly
Moisture is a common culprit. Use a soft cloth or paper towel to dry the igniter and surrounding area completely. If you suspect water seeped in, allow the stove to air dry for a few hours before testing again. I once accidentally spilled water on my stove during cleaning; waiting overnight solved the issue without further trouble.
Clear Debris Blocking Gas Flow
Next, examine the burners for clogs. Food particles or soap residue can block gas ports. Remove the burner caps and inspect the small holes. Use a toothpick or a fine needle to clear any obstructions. I remember a time when soap buildup prevented ignition; carefully poking each hole with a needle restored proper gas flow and lighting.
Ensure the Burner Ports Are Clean and Dry
After clearing debris, wipe the burner ports dry to prevent moisture interference. This step guarantees unobstructed gas and spark contact, as I learned when my burners refused to light after a deep clean—drying them resolved the problem instantly.
Test the Ignition System
Once cleaned, turn on the stove and attempt to ignite. Listen for a clicking sound. If you hear the spark but see no flame, check the alignment of the igniter. Sometimes, cleaning shifts its position. Slightly adjust it for optimal contact with the gas flow. I had a misaligned igniter that, once repositioned, fixed my lighting issue immediately.
Replace Faulty Igniters if Necessary
If cleaning and adjusting don’t work, the igniter might be faulty. Replacement is straightforward and cost-effective. Consult your stove’s manual or contact a professional. I once replaced my igniter with a new one from an online store, and my stove lit flawlessly afterward, saving me a call-out fee.
Verify Gas Supply and Connections
Ensure that the gas valve is open and there are no leaks. A quick smell test helps; a gas smell indicates a leak or closed valve. In my experience, a loose connection caused a delayed ignite; tightening it restored proper flow. Always turn off the gas supply before inspecting or tightening connections.
Consult Professional Help for Persistent Issues
If after these steps your burners still don’t light, it’s time to seek expert assistance—especially if you suspect a gas leak or electrical fault. Scheduling a same-day repair through a trusted service can be a quick fix, ensuring your stove remains safe and functional. You can learn more about same-day appliance repair options here.
Keep Your Stove in Top Shape
Regular maintenance and gentle cleaning prevent future issues. Avoid abrasive tools that can damage ignition components. Remember, a clean and dry surface is key to reliable ignition. If you want to ensure your stove functions perfectly after cleaning, consider professional installation and maintenance services—find trustworthy installers at trusted local experts.
 When it comes to appliance repair and installation, many homeowners operate under misconceptions that can cost time, money, and peace of mind. The most common myth is that a DIY fix or a quick repair session can fully restore appliance performance without considering the nuances of warranty coverage or proper installation techniques. In reality, cutting corners or ignoring manufacturer guidelines often leads to more problems down the line.
One critical nuance many overlook is the importance of following manufacturer specifications precisely, especially during installation. For example, improper sealing or incorrect placement can void warranties, making repairs much more expensive when issues arise. A study published by the Journal of Consumer Affairs emphasizes that nearly 60% of warranty claims are denied because the installation was not performed according to official standards. This underscores the importance of professional, certified installation services, which ensure that your appliance is set up correctly from the outset.
A common mistake involves misconceptions around the scope of same-day service. Many believe that scheduling a repair will always result in immediate resolution. However, multiple factors influence turnaround times, such as parts availability and technician expertise. Booking through reputable providers that prioritize quick response times and have comprehensive warranty support can prevent frustration. Check out this guide to same-day repair for tips on choosing reliable services.
The ‘Oops’ factor often emerges when homeowners attempt to self-diagnose issues, leading to further damage or voided warranties. For instance, use of improper cleaning chemicals can corrode internal components, especially if the appliance is under warranty. It’s crucial to understand what cleaning practices are recommended by manufacturers—often detailed in the manual or on official websites like expert repair guides.
Let’s address a common advanced question: How can I ensure my warranty remains valid if I need urgent repairs? The key is documentation and choosing authorized service providers. Recording the repair process and verifying technician credentials ensures your warranty stays intact, especially if disputes arise. For more insights, read top tips for warranty coverage during repairs.
Another trap to avoid is neglecting the importance of proper maintenance post-repair or installation. Even the most expertly installed appliances require regular checkups. Neglecting this can lead to premature failures that aren’t covered by warranties, despite initial correct installation. Experts recommend scheduling routine maintenance, which can be conveniently arranged through trusted local technicians—see professional installation and maintenance services.
In summary, understanding the intricacies behind appliance setup, repair, and warranty policies is vital for long-term reliability and cost savings. By respecting manufacturer guidelines, choosing reputable service providers, and maintaining documentation, homeowners can avoid costly pitfalls many fall into—saving money and extending the lifespan of their appliances.
Have you ever fallen into this trap? Let me know in the comments! For comprehensive coverage, consider exploring warranty-backed appliance services that support your needs from installation to repair.
Keep Your Equipment Running Smoothly: My Favorite Tools
Maintaining appliances over time requires the right tools to identify issues early and perform effective repairs. I personally rely on a few specific instruments that have saved me time and money. First, a high-quality multimeter is indispensable. It helps me quickly diagnose electrical problems, such as faulty switches or wiring issues. I prefer digital models with auto-ranging capabilities because they provide precise readings and are easy to interpret. For example, testing continuity in a stove’s igniter or measuring voltage on a refrigerator’s compressor is straightforward with a reliable multimeter.
Secondly, a small inspection mirror coupled with an LED flashlight allows me to access tight spots behind appliances or inside panels. This comes in handy when checking for dust buildup or loose connections without dismantling the entire unit. I’ve found this especially useful for assessing ventless dryer filters or behind microwave panels, which can cause performance issues when neglected.
In addition, a dedicated cleaning brush set for electrical contacts helps maintain the longevity of critical components like igniters or switch contacts. I always carry a set of fine-tipped brushes and compressed air to keep ignition points free of dust and debris, reducing the risk of malfunctions.
For software diagnostics, I recommend investing in manufacturer-specific apps or remote monitoring tools if your appliances are smart-enabled. These platforms often provide real-time alerts and troubleshooting guides, which can expedite repairs and reduce downtime. For instance, some refrigerator brands offer mobile apps that notify you of temperature fluctuations or door anomalies, enabling proactive maintenance.
How do I sustain appliance performance over time?
Routine inspections and cleaning are crucial. Schedule quarterly checks using your multimeter to verify electrical continuity and ensure no wiring has degraded. Keep filters and vents free of dust and lint, which can impair cooling and airflow, leading to higher energy consumption or breakdowns. Applying these practices consistently helps you catch issues early before they escalate, mimicking the proactive strategies professional technicians employ.
Additionally, document any repairs or replacements you perform. This not only helps track the longevity of parts but also supports warranty claims if needed. Remember, trying advanced troubleshooting tips, like measuring compressor voltage with your multimeter, can uncover hidden problems and extend the lifespan of your appliances.
Looking ahead, I believe the integration of smart diagnostics and IoT devices will become the norm, making it easier for homeowners to maintain appliances remotely. These advancements will offer predictive maintenance alerts, minimizing unexpected failures.
If you’re ready to take your appliance care a step further, I recommend practicing regular electrical testing with your multimeter—it’s a game-changer. For detailed guidance on using these tools effectively, check out this expert guide to appliance repair. Take the initiative today and see how small, consistent checks can significantly improve your appliance reliability!

Imagine keeping your appliances at peak performance with just a few precise tools and a bit of routine maintenance. It’s a small investment of time that yields long-term benefits, saving you money and ensuring your home remains comfortable and efficient.
3 Lessons I Wish I Had Known When I Started Fixing My Stove
- Moisture Is the Enemy: Over-cleaning with water or harsh chemicals can sabotage ignition parts, turning a simple cleanup into a big headache. Always dry thoroughly and avoid soaking components to keep sparks flying correctly.
- Small Debris Can Kill Your Flame: Food particles or soap residue in tiny gas holes block air flow and prevent ignition. Regularly inspect and clear these holes with a fine needle to maintain proper gas flow and reliable lighting.
- Alignment Matters More Than You Think: Even a slightly misaligned igniter can stop sparks from landing where they need to, preventing your burners from lighting. Adjust and test the placement after cleaning to ensure consistent ignition.
- Professional Help Is Sometimes the Best Route: If troubleshooting isn’t restoring your stove’s spark, don’t hesitate to consult a reliable professional. Proper diagnosis saves time and prevents accidental damage, especially with gas connections.
Tools and Resources That Boost My Appliance Confidence
- Multimeter: An indispensable tool for diagnosing electrical issues, ensuring your igniters and switches work properly. I trust my digital multimeter for quick, accurate readings and peace of mind.
- Fine-Tip Inspection Mirrors and LED Lights: Access tight spots behind panels or under burners effortlessly, making inspections and cleaning more precise. They help spot hidden dust or debris I might otherwise miss.
- Cleaning Brush Sets for Electrical Contacts: Keep ignition components clean and free of dust, preventing malfunctions. Regular maintenance with these tools extends the lifespan of your stove parts.
- Official Manufacturer Guides and Tutorials: Following detailed instructions from trusted sources helps you understand proper cleaning and troubleshooting techniques, avoiding common pitfalls. Check out expert advice at this comprehensive repair guide.
Take Control and Keep Your Stove Ready for Action
Don’t let small issues like moisture or debris interfere with your cooking routine. Developing a methodical approach to cleaning, inspecting, and troubleshooting not only saves money but also boosts your confidence as a DIY enthusiast. Remember, every safe repair builds your ability to handle future challenges. Keep learning, stay curious, and enjoy the process of mastering your appliances—your kitchen will thank you for it!
What’s the trickiest stove problem you’ve faced after cleaning? Share your experience or questions below—I’d love to hear your stories!
For more tips on appliance maintenance and repair, visit our privacy policy page.
!