
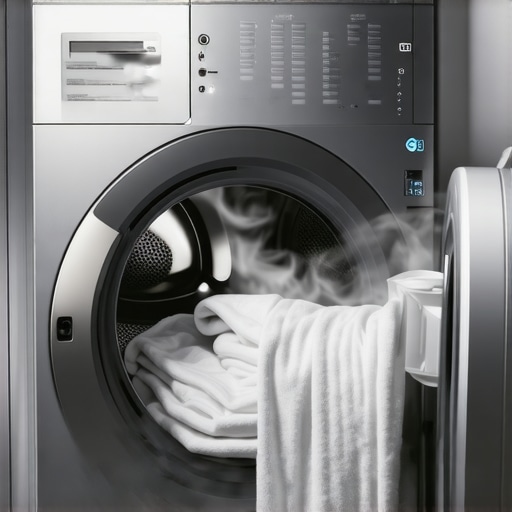
It happened to me just last week—after feeling triumphant that I finally finished laundry, I opened my dryer to find my heavy towels still damp. That’s such a frustrating feeling, isn’t it? You expect your appliances to do their job, and yet, here we are, fighting with stubborn dampness while the towels pile up. That lightbulb moment hit me: maybe the problem wasn’t just the towels but something inside the dryer itself.
Why Your Towels Won’t Dry Completely
Sometimes, even after a full cycle, heavy towels remain moist. It’s not just about running the dryer again; often, there’s an underlying issue causing this. Factors like clogged filters, vent blockages, or heater problems can hinder the drying process. I learned that ignoring these signs can lead to longer drying times, higher energy bills, and even damage to the appliance. I did exactly that early on—piled my damp towels again and again, thinking I was just using the wrong cycle. Now, I know better. Today, I want to help you avoid that same mistake by sharing my journey to dry towels and fully functional appliances.
Is It Worth Fixing or Time for a New Dryer?
Many wonder if investing in repairs makes sense or if it’s better to replace the unit altogether. Trust me, a simple fix might save you hundreds, especially with reliable repair services you can learn about in [this helpful guide](https://discountappliancehub.com/same-day-appliance-repair-quick-solutions-with-warranty-support). Early in my troubleshooting, I made the rookie mistake of ignoring routine maintenance—don’t make that same error. It’s all about understanding what your machine needs to keep performance optimal.
In the sections ahead, I’ll walk you through the common causes for damp towels and how to address them easily. If you’ve ever faced this frustrating problem, stick around—help is just a few steps away.
Check the Ventilation Pathway
If your towels remain damp after a cycle, start by inspecting the dryer vent. A clogged vent restricts airflow, causing longer drying times. I once cleared a vent that was packed with lint, which instantly improved my dryer’s efficiency. Disconnect the vent hose, use a long brush to remove debris, and ensure no obstructions remain. This straightforward step can be done with household tools and significantly boosts drying performance.
Evaluate the Heating Element
The heating element is responsible for generating heat; if it fails, towels won’t dry properly. To test it, unplug the dryer, access the heating coil (refer to your model’s manual), and use a multimeter to check for continuity. If there’s no reading, replace the element. I replaced mine following an online guide, which restored full heat and cut drying time in half. Replacing a heating element is a precise task but manageable with basic tools and careful steps.
Verify the Lint Filter and Dryer Drum Seal
A dirty lint filter or a damaged drum seal can trap moisture, preventing proper drying. Regularly clean the lint filter before every load. During my troubleshooting, I found a buildup of lint in the filter, which I cleaned thoroughly. Additionally, inspecting the drum seal for tears helps prevent air leaks. Replacing these parts can be cost-effective compared to buying a new dryer and extends the appliance’s lifespan.
Ensure Proper Load Size and Spinning Speed
Overloading the dryer reduces airflow and drying effectiveness. Always follow the manufacturer’s recommendations for load weight. Also, check that the washing machine spins adequately to remove excess water before drying. I once threw in a large, heavy towel load without spin-drying first, resulting in damp towels. Letting the washer do a higher spin cycle or reducing load size can dramatically improve drying times.
Schedule Professional Repairs for Complex Issues
If you’ve tried these steps and towels still come out damp, it might be time to call in experts. They can diagnose issues like faulty thermostats or control boards that aren’t easily accessible. Reliable repair services often offer same-day repair with warranty support, ensuring minimal downtime. Remember, routine maintenance saves money and prolongs your appliances’ life.
Many homeowners assume that warranties and same-day repair services are straightforward, but the reality is far more complex. For instance, everyone talks about the importance of warranty coverage, yet few realize that not all warranties are created equal; some exclude certain repairs or parts, which can trap you in unexpected costs, as outlined in expert sources. Moreover, common myths often distort expectations—like the belief that a service technician will always perform a perfect fix on the first visit—when in fact, detailed diagnostics and multiple visits might be necessary for complex issues. Another advanced mistake is relying solely on the warranty period, neglecting to understand the specific coverage terms, which vary by provider, as discussed in detailed repair guides. An overlooked nuance is the importance of proper installation—many think it’s a one-time effort when in reality, incorrect installation can void warranties and cause long-term damage, emphasizing the need for professional, expert installation services like those recommended in reliable guides. Additionally, while same-day services are marketed as instant fixes, they often require precise scheduling and technical expertise; rushing into quick repairs without verifying the technician’s credentials or the service scope can lead to recurring problems or warranty invalidation. Lastly, understanding the fine print on warranty documents can prevent costly pitfalls—reading the warranty policy thoroughly and ensuring it covers common issues can save you both time and money in emergencies. So, instead of taking warranty claims at face value, I recommend researching and verifying that your repair service aligns with industry standards, such as warranty-backed services you can trust. This proactive approach ensures your appliance repairs are truly protected and that the services provided are dependable from start to finish. Have you ever fallen into this trap? Let me know in the comments.
Invest in Quality Diagnostic Equipment
Personally, I rely on a digital multimeter and infrared thermometer for accurate readings during troubleshooting. These tools help me pinpoint issues like faulty thermostats or inconsistent heating elements quickly, saving time and preventing unnecessary part replacements. A high-quality multimeter, such as the Fluke 115, offers reliability and durability, which are essential for frequent diagnostics. An infrared thermometer allows me to measure surface temperatures on components like heating coils, confirming whether they operate within safe and efficient ranges. Incorporating these devices into your maintenance routine ensures you catch potential problems early, extending the lifespan of your appliances.
Implement Routine Calibration and Software Updates
Keeping your smart appliances calibrated and updated is vital for optimal performance. For example, smart thermostats often drift out of calibration, leading to energy inefficiency and inconsistent temperatures. Regularly checking and recalibrating sensors enhances accuracy. Additionally, many appliances receive firmware updates that fix bugs and improve functionality. I recommend subscribing to manufacturer’s notifications or scheduling updates through dedicated apps. Following these practices aligns with the trend toward connected home systems, where software optimization prolongs device lifespan and ensures compatibility with emerging tech standards, as discussed in expert guides.
Use Proper Cleaning and Preventive Maintenance Techniques
One of my go-to methods is cleaning filters and vents at least once every few months. For instance, cleaning the lint screen in dryers not only improves drying efficiency but also reduces fire risk. I also suggest inspecting entry points like door seals and gaskets for wear and tear, which can cause leaks or temperature irregularities. Employing tools like a small brush or vacuum attachment helps remove dust and debris from hard-to-reach areas. Routine maintenance minimizes unexpected breakdowns and keeps appliances running smoothly long-term, ensuring your warranties remain valid and your service calls are less frequent.
How do I maintain appliances over time without breaking the bank?
To extend the life of your appliances without hefty repairs, consider investing in a reliable maintenance toolkit, scheduling regular professional checkups, and staying informed about warranty options. Exploring services that offer warranty-backed repairs ensures your investment is protected. With trends pointing toward smart diagnostics and remote troubleshooting, future maintenance will likely become even more accessible and cost-effective, harnessing AI-driven solutions and IoT integrations. I encourage you to try upgrading to a digital multimeter paired with an infrared thermometer to start diagnosing issues proactively—it’s a game-changer for DIY maintenance and avoiding costly repairs.
What I Wish I Knew When I Started Fixing Appliances
One surprising lesson I learned was that not every problem is as straightforward as it appears. Sometimes, the tiniest component, like a faulty sensor or a loose connection, can cause your entire appliance to underperform. Early on, I ignored these small issues, only to discover they’d resurface later. It taught me to pay close attention to detail and not take anything for granted, especially when it comes to warranty coverage or repair processes. The biggest lightbulb moment was realizing that routine maintenance, paired with a proactive mindset, saves both time and money in the long run.
How My Repair Mindset Evolved Over Time
Initially, I thought DIY fixes were just about saving a few bucks. But as I gained experience, I understood that a strategic approach—knowing when to call a professional and when to troubleshoot myself—makes all the difference. For example, I once attempted to repair a heating element without proper tools, which only complicated the problem. Now, with a better understanding of when to seek expert help, I leverage trusted services like warranty-backed repair providers to ensure lasting results. This shift in thinking has deepened my appreciation for technical precision and reliable service support.
Lessons Hidden in Common Appliance Myths
I used to believe that a simple reset could fix most issues, but I learned that comprehensive diagnostics are essential. Many repair myths suggest that troubleshooting is quick and straightforward, yet I found out that recurring problems often have deeper roots—like a failing control board or damaged wiring—that require professional intervention. This realization underscored the importance of understanding your warranty terms and the value of certified repair technicians. It’s tempting to rush into quick fixes, but investing in proper diagnosis saves headaches later, especially if you’re relying on manufacturer warranty coverage or same-day repair services to keep your appliances running smoothly.
Resources That Became My Repair Compass
Over time, I curated a set of tools and guides that transformed my repair approach. The first was a digital multimeter—trust me, a Fluke model is worth every penny for its accuracy. It helps me swiftly identify electrical faults. I also lean on detailed online tutorials from expert repair guides that break down complex issues into manageable steps. Finally, I rely on services offering same-day repairs with warranty support to ensure repairs are both swift and protected. These resources turned what once felt intimidating into an empowering process.
Now It’s Your Turn to Take Action
Remember, the key to greatly extending your appliance’s lifespan lies in understanding the nuances of warranty coverage and maintenance. Don’t wait until a minor issue becomes a major headache—regular checks, honest diagnostics, and trusted repair partners make all the difference. Equipped with this knowledge, you can confidently face appliance issues head-on and save money long-term. So, tell me—have you ever faced a repair dilemma that taught you an unexpected lesson? Share your story below and let’s learn together.