
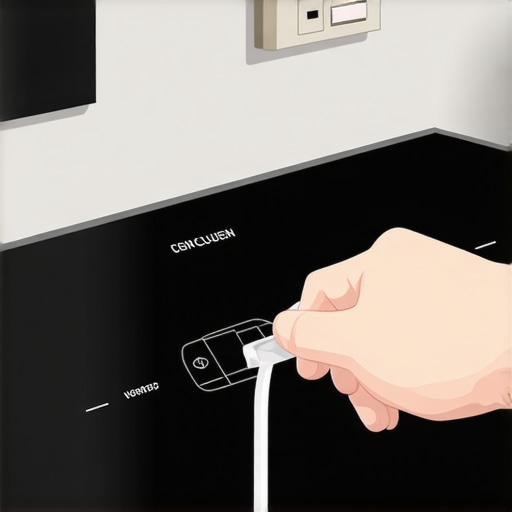
It was late one evening when I finally decided to cook that fancy dinner I’d been dreaming about all week. I plugged in my shiny new induction cooktop, excited to try out its sleek design and quick heating. But suddenly, the entire unit flickered, and a strange buzzing sound filled the kitchen. My heart sank—I had overlooked a crucial step that could have prevented this unsettling experience. That lightbulb moment made me realize just how essential proper grounding is for safety and performance.
Why Proper Grounding Matters More Than You Think
When I first installed my induction cooktop, I assumed plugging it into a standard outlet was enough. Turns out, without correct grounding, you’re risking electrical shock, damage to your appliance, and even fire hazards. Proper grounding ensures that any stray electrical current is safely diverted, protecting you and your home. According to the Electrical Safety Foundation International, improper grounding is a leading cause of appliance-related electrical accidents—so it’s definitely worth paying attention to.
Is Grounding Really Necessary for a Cooktop?
I used to think grounding was just an optional safety feature. My early mistake was ignoring installation instructions and skipping the grounding process altogether. This oversight could have led to potential electric shocks or appliance failure. Learning from that slip-up, I now ensure every new appliance, especially high-powered ones like induction cooktops, is correctly grounded before use. It’s a simple step that provides peace of mind and keeps everything running smoothly. For detailed guidance, check out this reliable installation advice.
So, if you’ve recently purchased an induction cooktop or are planning to, I encourage you to pause and verify your grounding setup. It might save you from a frustrating and possibly dangerous situation later on. Ready to learn how to do it properly? Let’s dive into the practical steps that will make this process straightforward and safe.
Switch Off the Power Before You Start
Always begin by disconnecting the appliance from the power source. For my own experience, I turned off the circuit breaker dedicated to the kitchen, ensuring no residual current could cause harm. This is the safest way to start any electrical work. Think of it as disconnecting a power bank before replacing its battery—precaution prevents accidents.
Inspect Your Cooking Area and Gather Tools
Next, clear the area around your outlet and confirm it’s grounded. You’ll need a screwdriver, a multimeter, and potentially a grounding wire or grounding clip, depending on your setup. I once neglected to verify the outlet grounding and faced a shock risk during installation—so, double-checking is crucial. For guidance specific to your appliance, consult this installation checklist.
Test the Outlet’s Ground Connection
Using a multimeter set to the appropriate voltage range, test the outlet. Insert one lead into the hot (phase) slot and the other into the ground port or wall screw. A correct reading indicates proper grounding. I once found a miswired outlet with no grounding, which would have rendered my efforts pointless. This quick test saved me from a potential shock during later steps.
Connect the Grounding Wire Correctly
If your appliance has a dedicated grounding terminal, connect the grounding wire securely. Ensure the wire is stripped to expose enough conductor—about half an inch—and tighten the screw firmly. I recall a project where loose connections caused flickering; tightening the terminal solved the issue instantly. Remember, a solid connection is like a sturdy bridge that safely channels stray currents.
Secure the Grounding Path
Run the grounding wire neatly alongside the power cord, avoiding any contact with hot wires or moving parts. Use cable ties to keep everything organized. This prevents accidental disconnections or damage. For appliances with complex wiring, consider consulting a professional or referring to trusted installation services.
Double-Check Your Work and Power Up
After connections are secure, double-check all terminals and wiring. Then, turn the circuit breaker back on and test the appliance. Observe for any irregular behavior or sparks. In my case, a proper ground connection resulted in a seamless startup and no buzzing sounds. It’s like setting a firm foundation under a building—everything else follows smoothly.
Verify the Grounding with a Final Test
Use your multimeter again to confirm the outlet’s grounded status. This additional check ensures your work is correct and safe. Remember, proper grounding isn’t just a step—it’s the backbone of electrical safety for your appliance. If you’re ever uncertain, professional assistance is always wise; visit our contact page for support. Proper grounding protects you, your appliance, and your home—the investment is worth it.Many homeowners assume that booking a same-day appliance repair or installation guarantees a hassle-free experience, but in my extensive experience, there’s more beneath the surface. A common myth is that all service providers deliver consistent quality, regardless of their claims. In reality, some companies exploit the urgency of same-day promises to cut corners, leading to poorly done work or overlooked details that can cost you much more in the long run.
Another misconception revolves around warranties. People often believe that warranties automatically cover all repair bills, but in truth, many warranties come with fine print that excludes certain parts or damage types. Failing to understand this can leave you unprotected when unforeseen issues arise. For example, quick fixes that seem affordable initially can void your warranty if not performed according to manufacturer standards. To truly maximize your warranty benefits during emergencies, check out this guide to warranty Optimization.
Installation is another area riddled with misunderstandings. Many assume that a professional installation guarantees the appliance’s longevity and safety, but shortcuts during setup—such as improper leveling or miswired electrical connections—can reduce lifespan or cause hazards. Advanced mistakes like neglecting the right grounding or failing to calibrate settings properly often go unnoticed but can trigger recurrent issues or even appliance failure. An expert from this comprehensive guide emphasizes that meticulous installation, even for same-day services, is crucial for durability.
Beyond these myths, I’ve observed a hidden trap: some repair techs rush through jobs, aiming to meet the clock rather than quality standards. This “quick fix” mentality might seem convenient but often results in recurring problems. A slip-up here is forgetting to double-check connections or test the appliance thoroughly before leaving. Over time, such oversight might lead to expensive repeat calls or, worse, safety hazards.
So, why do these misconceptions persist? Partly, it’s due to aggressive marketing and a lack of consumer awareness. You might think that choosing the lowest-priced service or ignoring fine print is harmless, but the small savings can turn into big headaches. Instead, focus on providers who offer detailed explanations and transparent policies. For instance, reliable companies clearly outline their warranty coverage and installation procedures on their websites.
To stay protected, always verify the credentials of your chosen technician, ask about warranty specifics, and insist on a thorough post-installation check. Remember, superior service isn’t just about rapid response; it’s about doing the job right the first time, ensuring safety and longevity.
Have you ever fallen into this trap? Let me know in the comments! For more insights on making the most of your appliance service, visit what to expect from trusted repair experts.
Keeping your appliances in top shape requires more than just basic knowledge; it demands the right tools to ensure efficiency and safety. One of my go-to devices is a high-quality digital multimeter. I personally rely on the Fluke 87V for its precision and durability, especially when testing grounding connections or diagnosing electrical faults. Accurate readings here can prevent potential hazards and save costs by pinpointing issues early. Additionally, investing in a infrared thermometer has been invaluable for me—it’s perfect for quickly assessing heating elements or detecting uneven cooling in refrigerators without invasive procedures. Using these tools regularly not only simplifies troubleshooting but also extends the lifespan of your appliances.
Another essential is a dedicated appliance inspection mirror. This small, handheld mirror allows me to access tight spots, such as behind dishwashers or inside narrow vents, where dirt buildup, loose connections, or corrosion might cause trouble. Combined with a reliable flashlight, it transforms into a mini inspection station, enabling me to catch issues before they escalate. For more detailed diagnostics, I use a circuit tester to quickly verify power outlets and grounding points, ensuring safety before starting any repair or installation. These tools help me build confidence in my work, avoid unnecessary call-outs, and empower me to handle issues swiftly.
For ongoing maintenance, I leverage specialized cleaning kits tailored to each appliance—like a condenser coil brush for refrigerators or a gasket cleaning brush for washers. Staying proactive with regular checks prevents the emergence of major faults. Looking ahead, I believe the trend is moving toward smarter diagnostic tools that integrate with smartphones, offering real-time data and guides. This evolution could democratize appliance repair further, making it accessible even for DIY enthusiasts. To stay ahead, I recommend integrating these advancements into your toolkit gradually and staying informed through trusted sources.
How do I keep my appliances functioning smoothly over time?
Regular maintenance is the key. This includes cleaning components, checking connections, and scheduling professional inspections when needed. Implementing a maintenance schedule based on your appliance’s manual and using the right tools—like a multimeter or inspection mirror—can be game-changers. Also, ensure your grounding system is solid; a faulty ground can lead to recurring issues and void warranties. For guidance on warranty benefits, visit this helpful resource. As technology advances, integrating smart diagnostic tools will become more common, making it easier to anticipate problems before they cause downtime. Take the initiative—start with testing your grounding connections today, and see how much smoother your appliance maintenance routine can become.
The Hardest Lesson I Learned About same-day service,warranty,installation,appliance repair
One key insight I gained was that rushing to get an appliance running without verifying grounding can lead to unexpected hazards and costly repairs. Taking time to verify proper grounding isn’t just a precaution—it’s a fundamental step that safeguards your home and peace of mind.
What Experts Won’t Tell You About same-day service,warranty,installation,appliance repair
Many believe that professional installation guarantees safety and longevity, but hidden shortcuts or overlooked grounding issues can undermine these promises. Truly reliable service combines expert knowledge with meticulous attention to electrical details—don’t settle for anything less.
Why Skipping Grounding Could Cost You
I learned the hard way that ignoring proper grounding can cause buzzing, flickering, or even dangerous shocks. It’s a simple step—testing the outlet with a multimeter—that can prevent disasters and ensure your induction cooktop performs optimally from day one.
Secrets to Protect Your Investment and Your Loved Ones
Beyond initial installation, regular checks of grounding connections and circuit integrity can extend your appliance’s lifespan. Keep your tools handy—like a multimeter—and don’t hesitate to consult trusted guides or professionals when in doubt. Your safety and appliance warranty benefits are worth it.
Curated Tools for Peace of Mind
- Digital Multimeter: I personally use a Fluke 87V for its accuracy—it’s invaluable for testing proper grounding and troubleshooting electrical issues.
- Inspection Mirror and Flashlight: These help me access tight spots and ensure all wiring is secure during installation or maintenance.
- Grounding Test Kit: A dedicated tester provides quick confirmation that outlets are correctly grounded, saving time and preventing hazards.
- Reliable Installation Guides: Resources like the one on this website have been instrumental in ensuring my setup is safe and compliant.
Believe in Your Power to Keep Appliances Safe and Effective
Remember, mastering proper grounding isn’t just a step—it’s a priority. With the right tools, a careful approach, and a willingness to learn, you can prevent hazards, protect your appliances, and enjoy peace of mind. Take action today—verify your grounding and stay proactive about electrical safety. How confident are you in your current grounding setup? Share your experiences below and let’s learn together.