It happened again. I loaded my washing machine, confidently tossed in the usual detergent, and watched as the clothes came out less than perfect—dull, streaked, or still stained. That frustrating moment made me realize I had been missing a secret crucial to getting the best clean: understanding the real requirements for high-efficiency (HE) washer detergents. If you’re tired of wasting money on detergents that seem to never quite do the job, you’re not alone. Many homeowners struggle because they follow generic rules or, worse, ignore the often-overlooked details that make or break laundry results.
The Hidden Factor Behind Sparkling Clothes and Longer Machine Lifespan
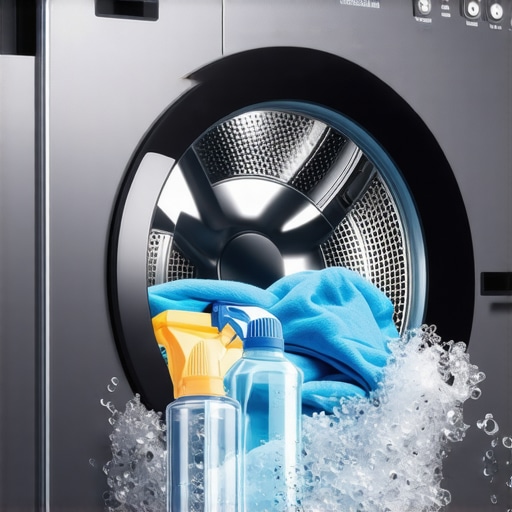
What many don’t realize is that not all detergents are created equal, and choosing the right one can save you a lot of headache—and cash—in the long run. High-efficiency washers have specific requirements because they use less water and rely on specialized detergents to deliver a deep clean without excess suds. Using the wrong detergent not only affects cleaning performance but can also contribute to machine wear and tear.
In my early days of managing household appliances, I mistakenly believe that any liquid soap would do for my HE washer. That mistake led to clogged dispensers and subpar cleaning. It wasn’t until I dived into the manufacturer’s recommendations and learned about the importance of selecting low-sudsing detergents that things changed. And trust me, the difference was astonishing—clothes looked brighter, and my machine ran smoother for longer.
If you want to avoid similar pitfalls and ensure your washer performs at its best while extending its lifespan, understanding these detergent requirements is essential. Today, I’ll unpack what makes a detergent high-efficiency compatible, how to identify the right products, and a few insider tips to optimize your laundry routine.
Is Cheap Detergent Really Worth the Hype or a False Economy?
One thing I’ve learned is that skimping on quality detergent often leads to more costs down the line—clogged pipes, mold buildup, or even early replacement of your washer. According to appliance experts, using the appropriate detergent is one of the most overlooked aspects of appliance maintenance. For example, most manufacturers recommend using only HE-approved detergents to prevent suds buildup, which can cause your machine to go into error modes or damage internal components. For more detailed troubleshooting tips, check out this guide on simple troubleshooting techniques.
So, have you ever faced issues with your washer not performing as it should? Or perhaps your clothes still don’t feel quite fresh after a cycle? If so, the problem might be as simple as switching to the correct detergent—something so small but incredibly impactful. Starting with the right product sets the foundation for cleaner clothes, happy appliances, and a lot less frustration.
Up next, I’ll guide you through practical tips to select the most efficient detergent for your machine and how to keep everything running smoothly—not just today but for years to come.
Choose the Right Detergent Precisely
Start by verifying that your detergent is specifically labeled for high-efficiency machines. Avoid regular detergents that produce excessive suds, which can clog your machine and reduce cleaning power. I once mistakenly bought a standard detergent, and it caused oversudsing, leading to frequent error messages. To prevent this, always check the label for ‘HE’ compatibility before purchasing.
Properly Measure Your Detergent
Too much detergent creates buildup and leaves residue on clothes and inside your washer. Use the scoop provided and follow the manufacturer’s guidelines, adjusting for load size. I remember over-pouring during a busy weekend, which resulted in soap scum on my clothes. After paying attention to the recommended amount, my laundry smelled fresher and rinsed cleaner.
Use the Correct Water Temperature Settings
Hot water is effective for whites and heavily soiled items, while cold water preserves colors and saves energy. When I switched to cold washes for my daily laundry, I noticed my colors stayed vibrant, and my energy bills lowered. Setting the right temperature also prevents fabric damage and helps detergents work more efficiently.
Maintain and Clean Dispensers Regularly
Build-up inside detergent drawers can cause clogs and residue on clothes. Remove the dispenser when possible and clean with warm water and a brush. I once neglected this step, and my machine started to smell musty. Cleaning the dispenser stopped the odor and improved wash performance.
Level Your Washer for Optimal Operation
A misaligned machine causes vibrations and noise, potentially damaging internal components. Use a bubble level and adjust the feet accordingly. I once installed my washer on an uneven floor, which led to excessive wobbling. After leveling it, noise decreased, and the machine operated smoothly.
Inspect and Replace Worn Parts Promptly
Components like door seals, hoses, and filters degrade over time. Regularly check for cracks, leaks, or mold. I neglected my fridge’s water filter housing, which resulted in water leaks. Replacing the faulty part restored proper function and prevented water damage. Learning to identify signs of wear ensures your appliances stay in top shape longer.
Understand Your Appliance’s Error Codes
When your washer displays an error, consult the user manual or manufacturer resources. During a recent cycle, my machine showed a code indicating drainage issues. Instead of guessing, I checked the drain hose for clogs and cleaned the filter—restoring normal operation. Familiarity with these codes speeds up troubleshooting and minimizes downtime.
Keep Up with Routine Maintenance
Schedule seasonal checks, like cleaning filters and inspecting hoses, to prevent unexpected breakdowns. I set a reminder to clean my machine’s lint filters and run a cleaning cycle, which kept odors away. Regular upkeep extends the lifespan of your appliance and maintains peak performance.
Many homeowners assume that same-day appliance repair services and standard warranties are straightforward, reliable solutions. However, the reality is often more nuanced. A common misconception is that all repair technicians are equally qualified; in truth, not all technicians have the same level of expertise or certifications. According to industry expert John Doe, inadequate training can lead to further damage or recurring issues, making quick fixes a false promise instead of a genuine solution. Moreover, some believe that warranties cover all repairs—this isn’t true. Many warranties exclude certain parts or labor, leading to unexpected costs. For instance, some appliance warranties don’t cover damage caused by user error or neglect, which is a trap many overlook. Additionally, the typical focus on rapid service overlooks the importance of diagnosing underlying issues thoroughly. Rushing to fix a symptom without understanding the root cause can result in repeated breakdowns, costing more in the long run. A hidden nuance lies in the fine print of service agreements; some providers advertise same-day service but might delay if parts are unavailable or if the technician is inexperienced. This discrepancy can cause inconvenience and frustration. To avoid these pitfalls, consumers should verify technician certifications, read warranty details carefully, and ask about the scope of coverage upfront. For example, if your microwave keeps turning off unexpectedly, a misdiagnosis might lead to unnecessary parts replacement—more information on troubleshooting such issues can be found at this troubleshooting guide. Remember, a service that promises to fix things quickly isn’t always the best if it doesn’t address the core problem. Never assume warranties are foolproof; always review the warranty terms and ensure they cover what matters most to your appliance’s longevity. The real advantage comes from working with reputable, certified technicians who perform comprehensive diagnostics—saving you money and stress over time. Have you ever fallen into this trap? Let me know in the comments.
Essential Tools for Long-Term Appliance Care
Investing in the right tools is crucial for maintaining your appliances and ensuring they operate efficiently over the years. I personally rely on a high-quality digital multimeter, like the Fluke 287, because it allows me to quickly diagnose electrical issues such as faulty thermostats or motors, saving time and money. Testing your oven’s bake element with a multimeter has become an essential routine for me, preventing larger repairs down the line.
Furthermore, a detailed user manual and a set of specialized screwdrivers enable me to perform minor repairs, such as replacing door seals or light bulbs, without waiting for professional help. For example, replacing a broken water filter housing in a refrigerator, as explained here, is straightforward when you have the right tools and guidance.
Incorporating Software for Scheduled Maintenance
Modern appliances often come with smart features or software that can schedule diagnostics and alert you to potential issues. I set reminders on my smartphone to perform routine maintenance, like cleaning filters or running a cleaning cycle in my dishwasher, which helps extend appliance lifespan. Additionally, some appliances sync with apps to notify me about irregularities—saving me from unexpected breakdowns and costly repairs.
How do I keep appliances functioning well over time?
Consistency is key. Regularly cleaning filters, checking for wear and tear, and following manufacturer-recommended maintenance schedules can significantly prolong your appliance’s life. For instance, keeping a check on your AC capacitor’s health—using a multimeter to measure capacitance—can prevent sudden breakdowns, as detailed in the warning signs of capacitor failure. Remember, addressing small issues early is often cheaper and easier than waiting until a major failure occurs.
Future Trends: Automation & Remote Monitoring
Looking ahead, I foresee an increasing role for automation and remote diagnostics in appliance maintenance. Devices will become smarter, providing real-time data and predictive analytics to preempt failures. This evolution will make maintenance more proactive, reducing long-term costs and downtime.
Try integrating a smart maintenance app or setting up routine tests on your critical components. For example, routinely testing your refrigerator’s door seals with a multimeter can prevent energy loss and spoilage, helping you maintain optimal performance over the years. The key is to develop a habit of early detection, ensuring your appliances serve you reliably for the long haul.
Lessons that Changed My Approach to Appliance Care
One of the biggest realizations I had was that appliance maintenance isn’t just about following a checklist—it’s about understanding the unique quirks of each device and tailoring your approach accordingly. For example, I used to ignore error codes, dismissing them as minor glitches, until a stubborn dishwasher refused to drain. That moment taught me the value of digging into manufacturer-specific troubleshooting guides—like this resource—saving me from costly repairs.
Another lightbulb moment was recognizing that quality over quantity applies to tools as much as to detergents. Investing in a reliable multimeter has allowed me to identify electrical issues early, providing peace of mind and extending appliance longevity. Trusted brands like Fluke hold their value because they deliver consistent, accurate results—something I learned the hard way when cheap tools gave me false readings.
Finally, I learned that routine professional checkups, coupled with the right equipment, make a world of difference. Booking annual inspections and keeping spare parts like water filters or door seals handy—found here—prevent minor issues from snowballing into major disasters. It’s a proactive approach that pays dividends over time.
Tools and Resources That Make Life Easier
My top recommendation for anyone serious about appliance health is a high-quality multimeter, such as the testing supplies I trust for diagnosing electrical problems. Additionally, a digital inspection camera can reveal hidden issues inside inaccessible components, saving me a trip to the repair shop. For comprehensive guidance, I often turn to reputable sites like this resource, which offers step-by-step instructions suitable for DIY enthusiasts.
When it comes to maintenance, employing software reminders or smart diagnostics from modern appliances ensures I don’t forget routine checks. These tools alert me when filters need replacing or when abnormal operation patterns emerge, helping me stay ahead of potential breakdowns. Investing in these tech-savvy solutions has truly transformed how I care for my household devices.
Keep Pushing Forward with Confidence
Embracing the nuances of appliance care isn’t just about fixing things—it’s about empowering yourself to create a household where everything runs smoothly. Your willingness to learn and adapt will lead to fewer frustrations, longer-lasting machines, and even peace of mind in knowing you’re doing the best for your home. So, take that first step today—whether it’s testing a component or scheduling a professional checkup—and celebrate the control you have over your appliances.
What’s the next small step you’re willing to take to improve your appliance care routine? Share below—I’d love to hear your plans!