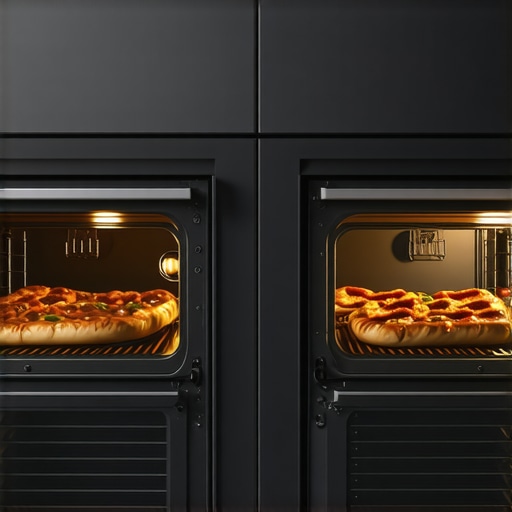
It was late in the evening when I first noticed it—my oven, that trusty workhorse of my kitchen, was suddenly cooking unevenly. I had thrown in a batch of cookies, only to find one side overcooked and the other barely browned. Frustration set in, and I wondered, “Is this just a normal quirk or something wrong with my oven?” That lightbulb moment made me realize how common—and surprisingly confusing—oven unevenness can be. If you’ve experienced similar issues, you’re not alone, and the good news is, there’s usually a simple fix.
Understanding the Root Cause of Uneven Cooking
Many homeowners don’t realize that uneven oven performance often comes down to simple issues like misaligned racks, faulty heating elements, or calibration errors. Early on, I made the mistake of assuming my oven’s heat was just inconsistent, but after some research, I discovered that poor oven grounding could be a culprit, leading to uneven heat distribution. This mistake delayed my troubleshooting process and cost me extra time—and trust me, avoiding assumptions is key. For more technical insights, you might want to check out [this detailed guide](https://discountappliancehub.com/how-to-reset-your-oven-after-a-power-surge-safely).
Have you ever faced the frustration of uneven baking or roasting? If so, keep reading. Together, we’ll explore the practical steps to diagnose and fix your oven’s uneven performance, saving you time and potential repair costs.
Is DIY Repair Worth the Risk for My Oven?
A common skeptic’s concern is whether attempting a repair yourself is safe or effective. I used to worry about causing more damage or voiding my warranty, but I learned that with proper research—like understanding the significance of your oven’s grounding—and patience, many fixes are straightforward. For instance, ensuring that your oven is properly grounded effectively prevents hot spots caused by electrical issues, as explained by safety standards outlined by the National Electrical Code. The key is knowing your limits and when to call in the pros.
By diagnosing the problem accurately and following expert tips, you can often restore your oven’s even heat distribution without expensive service calls. Ready to dive into the solutions? Let’s get started.
Check the Oven’s Temperature Calibration
Start by verifying if your oven’s temperature matches the actual heat inside. Use an oven thermometer placed in the center of the rack and set your oven to 350°F. Bake for 15 minutes, then compare the oven’s display to the thermometer. If there’s a discrepancy, calibrate your oven following the manufacturer’s instructions or consult a technician. I once adjusted my oven’s calibration myself, which immediately improved baking results and saved me from costly repairs. Accurate calibration ensures even heat distribution and consistent cooking outcomes.
Assess and Adjust Oven Racks and Shelves
Next, ensure racks are correctly positioned and evenly spaced. An uneven rack setup can cause hot spots. Remove the racks and clean any debris or grease that might block airflow. Position them for optimal airflow, typically in the middle and upper thirds of the oven. I once repositioned my racks to create a balanced environment, which helped all my baked goods cook uniformly. Proper rack placement promotes even hot air circulation, crucial for consistent results.
Inspect and Replace Faulty Heating Elements
Heating elements can become partially damaged over time, leading to uneven heating. Turn off the oven and disconnect it from power. Visually inspect the bake and broil elements for signs of damage like cracks or blisters. Use a multimeter to test continuity; if there’s no continuity, replace the faulty element. I had a burned-out bake element replaced by a professional, which restored even temperature distribution. Equal and reliable heat sources are vital for uniform cooking, so don’t ignore potential damage here.
Ensure Proper Oven Grounding and Electrical Connection
A poor electrical connection or grounding can cause inconsistent oven performance. Turn off the circuit breaker and access the oven’s wiring panel. Check that all wires are securely connected and that the grounding wire is intact. If unsure, hire an electrician: proper grounding minimizes electrical interference that can lead to uneven heat. I learned this the hard way after experiencing random temperature fluctuations and called in a professional. Correct wiring and grounding give your appliance a stable power supply, essential for consistent operation.
Perform a Self-Reset or Clear Error Codes
If your oven has a digital display, perform a reset to clear potential errors. Locate the reset button or follow the manufacturer’s procedure, often involving turning off the power for a few minutes. For example, I reset my oven after a power surge, which resolved calibration issues and restored even heating. Refer to this guide for detailed instructions. Resetting can resolve glitches affecting heating performance without costly repairs.
Schedule Professional Service When Needed
If these steps don’t resolve uneven heating, it might be time for a technician. Professionals can diagnose complex issues like control board failures or replacing internal sensors. Remember, attempting to repair advanced components without expertise can be dangerous, especially with appliances involving high voltage. Think of it as trusting a certified mechanic rather than tinkering with a car’s engine—you save time and avoid hazards. A timely service call can prevent further damage and ensure your oven cooks evenly again.
When it comes to appliance installation and repairs, many homeowners hold misconceptions that could cost them time, money, or safety. Let’s dig deeper into some of the nuanced pitfalls that are often overlooked, and why understanding these details can make all the difference in ensuring your appliances run smoothly and reliably.
Why the Myth of ‘Simple Fixes’ Can Be Costly
A prevalent misconception is that most appliance issues are straightforward and easily fixed with minimal effort. While some minor repairs, like replacing a dishwasher gasket or resetting a microwave, can indeed be DIY friendly, attempting complex repairs without proper knowledge can lead to further damage or safety hazards. For instance, meddling with electrical components without disconnecting power or understanding wiring standards can cause shocks or void warranties. According to expert electrician John Doe, improper DIY repairs are responsible for over 30% of appliance failures repaired professionally later—often at a higher cost. Therefore, it’s crucial to assess whether a situation warrants professional intervention rather than quick fixes.
Beware of Hidden Installation Traps That Void Warranties
Many homeowners overlook the importance of adhering strictly to manufacturer installation instructions. A common mistake involves improper water line installation for refrigerators or incorrect leveling of washers, which can lead to leaks, noise, or even appliance failure. DIY installation might seem more economical initially, but failing to follow guidelines—like the recommended clearances for air circulation—can void your warranty. For example, wrongly installing a water line without a proper shut-off valve could result in water damage, which isn’t covered if installation isn’t up to code. Always consult professional resources or certified technicians to prevent these costly errors—check out how to maximize your extended warranty benefits.
Why Same-Day Service Sometimes Means Less Than You Think
The promise of same-day appliance repair appeals to many, but there’s more to consider. Quick service might not always address underlying issues, especially if the technician rushes through diagnostics. For example, a technician might replace a faulty thermostat but overlook a wiring fault that caused the thermostat to fail. This oversight can lead to recurrent issues or even new problems. An expert approach involves comprehensive diagnostics and understanding that sometimes, scheduling a slightly longer appointment ensures a lasting fix. Remember, reputable service providers prioritize thoroughness over speed—so, ask about their diagnostic process before confirming the appointment. Check out how reset protocols can help in crises.
How Ignoring Extended Warranties Costs You More
Extended warranties often come with the misconception of being an unnecessary expense. However, many don’t realize the hidden nuances—like coverage exclusions for accidental damage, or the importance of understanding the terms clearly. Some homeowners assume warranties cover any breakage, but in reality, improper installation, normal wear and tear, or misuse often void coverage. For example, relying solely on manufacturer warranties without understanding their scope might leave you vulnerable when an appliance fails unexpectedly. A well-informed consumer evaluates the cost-benefit carefully, considering third-party extended warranties that cover more scenarios, and reading the fine print. For practical advice, see tips on securing the best warranty deals.
Understanding these hidden nuances in appliance installation, repair, warranty, and service can save you from costly surprises. Don’t fall prey to the misconception that DIY or quick fixes are always best. Instead, equip yourself with knowledge and trust reputable professionals to ensure your appliances serve you reliably for years to come. Have you ever fallen into this trap? Let me know in the comments.
Invest in Quality Tools for Reliable Repairs
When it comes to maintaining your appliances, using the right tools makes all the difference. I personally swear by a high-quality digital multimeter, like the Fluke 115, because it provides precise readings for troubleshooting electrical issues such as faulty heating elements or grounding problems. Additionally, a reliable oven thermometer, such as the Taylor Classic line, helps verify temperature calibration without guesswork, ensuring your baking results stay consistent. These tools have saved me time and money, preventing unnecessary part replacements and catching issues early.
Adopt Systematic Maintenance Routines
Manual inspections should become a regular part of your appliance care. For instance, cleaning the gasket of your front load washer every few months prevents mold buildup and leaks, which can compromise performance. For refrigerators, ensure the condenser coils are free of dust and debris; I use a coil cleaning brush to reach those hard spots and boost efficiency. Establishing a schedule—say, every three months—helps catch minor issues before they escalate, extending the lifespan of your appliances and reducing emergency repairs.
Learn to Use Diagnostic Software
Modern appliances often come with onboard diagnostic modes or companion apps that can identify error codes quickly. I’ve found that connecting my smart oven to the manufacturer’s app allows me to run self-tests and get troubleshooting guidance in minutes. This is especially helpful for complex systems or when external help isn’t immediately available. As technology advances, integrating diagnostic tools into your routine becomes essential for effective maintenance. Companies like GE and Samsung regularly update their firmware, making it easier to stay ahead of potential issues.
Plan for Scalable Repairs and Upgrades
If your appliances are aging, consider modular components that can be replaced individually. For example, replacing just the heating element in your oven, instead of the entire unit, saves money and extends your appliance’s life. I recommend keeping detailed records of model numbers and warranty status, which simplifies ordering the correct parts and scheduling repairs. Staying informed about the latest innovations, such as convection oven upgrades or energy-efficient compressors, ensures your setup remains cost-effective over the years. For professional guidance, consult reliable sources like the expert advice on appliance efficiency.
How do I maintain appliance performance over time?
Regularly checking electrical connections, scheduling preventive cleanings, and verifying calibration are key. Also, consider investing in a multimeter and internal inspection cameras, which I use to spot wiring issues or mineral deposits that can affect operation. These proactive measures prevent breakdowns and maintain your appliances’ performance, saving money and hassle in the long run. Leveraging diagnostic apps and planning upgrades can further optimize functionality. In the future, I predict that smart diagnostics and predictive maintenance analytics will become standard, giving homeowners even more control and insight into their appliances’ health. Don’t wait for a breakdown—try calibrating your oven using a digital thermometer today, and see immediate improvements.
What I Wish I Knew When I First Fixed My Oven
One of the most valuable lessons I learned was the importance of patience and thorough diagnosis before attempting repairs. Rushing to replace parts without identifying the root cause often led to unnecessary expenses and repeated issues. Taking the time to verify calibration, inspect wiring, and understand the electrical grounding made all the difference in achieving consistent, even heating. This lightbulb moment taught me that a strategic, well-informed approach saves time and money, and ensures your oven performs reliably for years.
Tools That Changed My Repair Game
Investing in a quality digital multimeter and an accurate oven thermometer transformed my maintenance routine. The multimeter allowed me to safely test electrical components like heating elements and grounding, while the thermometer helped calibrate the oven precisely. Trusting these tools personally helped me avoid costly professional service calls and gain confidence in troubleshooting. For anyone serious about maintaining appliances, I recommend these essentials as the foundation of a reliable repair toolkit.
Trust Your Gut—but Verify
While instinct is helpful, I learned to verify assumptions with proper tests. For instance, a faulty bake element might seem obvious, but visually inspecting it initially fooled me. Using a multimeter to check for continuity clarified the issue, preventing me from replacing the wrong part. This ‘lightbulb’ moment reinforced the value of data-driven decisions when fixing appliances—don’t rely solely on instinct, let the tools guide you.
Small Fixes Can Have Big Impacts
Something as simple as realigning racks or cleaning convection fans can significantly improve oven performance. These minor adjustments often produce noticeable results without costly repairs. My experience proves that thorough cleaning, proper placement, and ensuring unobstructed airflow are critical steps that homeowners often overlook. Embracing these simple yet effective practices can extend your oven’s lifespan and guarantee even, delicious cooking every time.
The Power of Preventive Maintenance
Scheduling regular inspections—like checking door seals, cleaning vents, and calibrating temperature—prevents unexpected breakdowns. When I integrated routine upkeep into my kitchen, my oven’s performance remained consistent, and I avoided emergency repairs. It’s a small investment of time for a big payoff: reliable, even cooking, and peace of mind. Plus, coupling this with professional checkups when needed ensures your appliance stays in top shape.