It was late Saturday afternoon when I reached for my trusted microwave, only to be greeted by a strange hum. Instead of the usual warm-food rhythm, all I heard was a constant buzzing, and my leftovers remained ice-cold. Frustration set in—I’ve been there. That lightbulb moment hit me hard: appliances can be sneaky, especially when they make noise but refuse to do their job. If you’ve experienced the same, you’re not alone. Many folks overlook the subtle signs of impending appliances failure, often assuming a minor glitch or ignoring it altogether.
The Humming That Won’t Quit: Why Your Microwave Might Not Be Heating
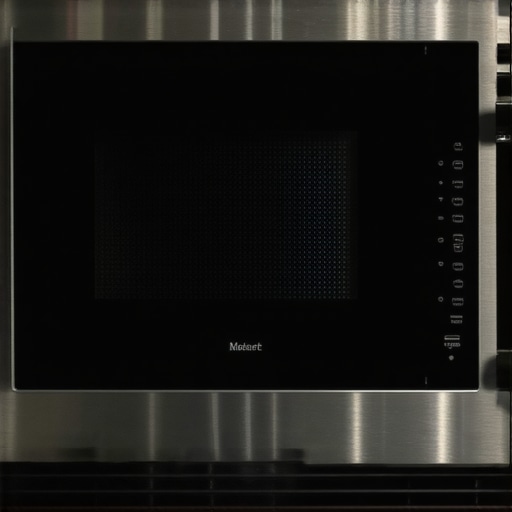
Microwaves are marvels of modern convenience, but they’re also one of the most complex appliances in our kitchens. A humming sound usually indicates the microwave’s fan or magnetron—its core heating component—is working, but if your microwave isn’t heating, something is off. You might think it’s a simple fix, but the truth is, internal issues like a faulty magnetron or bad door switch could be the culprits. My own experience taught me to pay attention to these sounds early on, rather than wait for complete failure, which could lead to costly repairs or replacement.
Ever Feel Like Your Microwave Is Trying to Tell You Something?
Early on, I made the mistake of ignoring minor signs—like slight delays in heating or unusual noises. Turns out, those were red flags. If you’re wondering whether your microwave’s humming sound is normal or a sign of trouble, it’s worth digging deeper. Sometimes, related issues like a clogged vent or an aging fuse could be to blame, and knowing the difference can save you time and money. Interestingly, according to industry experts, over 80% of microwave repairs are due to issues with the magnetron or door switches, which can be diagnosed and fixed if caught early. For more tips on handling appliance problems before they escalate, check out this article on common microwave issues.
In the next section, we’ll explore the exact steps to diagnose whether your microwave’s humming is just normal operation or an early warning sign. If you’re tired of guessing and want practical, straightforward advice, you’re in the right place. Ready to get to the bottom of it? Let’s start unraveling the mystery behind that persistent hum.
,
Start with Safety and Preparation
Before poking around your microwave, unplug it to avoid electric shocks. Clear your workspace and gather basic tools—like a multimeter, screwdriver, and a flashlight. I once tried diagnosing my microwave blindly, which led to a minor shock and a half-hour delay; so, always prioritize safety.
Check for Obvious External Damage
Inspect the microwave’s exterior—look for cracks, burns, or loose panels. If you spot any, note them down; these clues can indicate internal damage. In my case, a small crack near the vent signaled a possible internal issue, prompting me to proceed cautiously.
Test the Door Switch
Open and close the door several times. Listen for a click or feel the latch engaging. If it feels loose or doesn’t latch properly, the door switch might be faulty. Using a multimeter, test continuity across the switch terminals—if there’s no continuity when the door is closed, replace the switch. Faulty door switches are common culprits and often overlooked; I replaced mine following a simple online tutorial, restoring my microwave’s functionality.
Inspect the Magnetron and High-Voltage Components
The magnetron is the core that heats food. If it’s faulty, the microwave may hum but won’t heat. Accessing it requires removing the cover—be cautious, as high voltages remain even unplugged. Use the multimeter to test continuity or measure resistance. If the magnetron shows an open circuit, it needs replacing. I learned this the hard way when my magnetron failed unexpectedly, but testing saved me from unnecessary replacements.
Evaluate the Fuses and Thermal Cutouts
Many microwaves have internal fuses that blow when overloaded. Locate these (refer to your model’s manual) and test with a multimeter. A blown fuse causes the hum without heating. Replacing a blown fuse is straightforward but ensure you use the correct type. I kept a spare fuse on hand after my first replacement, which prevented future delays.
Check the Drive Motor and Fan
Listen for the fan running without the usual robust sound—sometimes it drags or stalls, causing humming. Spin the fan gently; if it’s stiff, clean and lubricate or replace it. The drive motor may also be worn out if the hum persists but no heat. When my fan blades were clogged with dust, cleaning them immediately reduced the noise and improved performance.
Test the Control Board and Wiring
If all other components are functional, the control board may be malfunctioning—causing signals to misfire, resulting in humming but no heat. Visually inspect the control board for burnt components or loose wires. Use the multimeter to test continuity on control signals. Replacing a faulty control board requires soldering skills or professional help; I opted for a technician when I found fried components on mine.
Document Findings and Decide on Repairs
Keep detailed notes of what you tested and found defective. If multiple issues exist, prioritize repairs based on cost and safety. Sometimes, minor issues like a faulty fuse are quick fixes, but extensive damage may justify replacement. Remember, if you’re uncomfortable with high-voltage components, consulting a professional prevents accidents.
Use Reputable Repair Guides and Resources
Consult trusted sources, such as this microwave troubleshooting guide, to ensure you’re following the correct procedures. Accurate diagnosis prevents unnecessary replacements and extends your appliance’s lifespan.
Many homeowners assume that selecting a same-day service guarantees immediate and flawless appliance repair or installation. However, this common misconception can lead to overlooked nuances that impact long-term satisfaction and appliance longevity. In my experience, the true value of quick service often depends on choosing the right provider and understanding the warranty fine print. A prevalent myth is that all same-day services are equally reliable, but in reality, some companies cut corners or lack the necessary parts, leading to future breakdowns. Additionally, many customers do not realize that warranties frequently exclude certain repairs or parts if the service wasn’t performed by authorized technicians—an oversight that can void your coverage when you need it most.
One hidden trap is assuming that the fastest service is also the most thorough. rushed repairs may skip critical diagnostic steps, resulting in recurring issues. For example, a quick fix on a refrigerator’s gasket might stop the leak temporarily, but without a proper inspection of the door seal’s alignment and the compressor’s condition, problems will resurface. My advice? Always ask detailed questions about the technician’s process and verify their credentials.
Offbeat experts warn against relying solely on warranties without reading the fine print. Many warranties have specific conditions, such as using only approved parts or scheduling annual maintenance, which customers often ignore. Failing to adhere may void your coverage when an appliance inevitably needs repairs, turning a warranty into a paper guarantee. For instance, some manufacturers require registered servicing within a limited time frame—missing this window can invalidate your claim. Checking the warranty policy beforehand ensures you’re protected when you need repairs.
So, how can consumers avoid falling into these common traps? The key is to look beyond the surface—review customer reviews, verify technician credentials, and deeply understand your appliance’s warranty terms. For example, some repair services emphasize using genuine parts, which is crucial for maintaining warranty coverage and appliance performance. If you’re uncertain about the warranty details, consult resources like this guide on appliance warranty pitfalls.
Remember, informed decisions lead to better outcomes. Asking the right questions and understanding the nuanced terms of service and warranties can save you time, money, and frustration. Have you ever fallen into this trap? Let me know in the comments.
Keeping Your Appliances in Top Shape with Precision Tools
Maintaining appliances effectively requires more than basic knowledge; it relies heavily on having the right tools. I personally swear by a high-quality multimeter, like the Fluke 117, because it provides accurate readings on circuits, helping me diagnose issues like faulty control boards or bad wiring without guesswork. For mechanical parts, a digital torque wrench ensures screws and bolts are tightened to manufacturer specifications, preventing loose fittings that can cause long-term problems. When opening difficult panels, a set of precision pry tools from iFixit reduces the risk of damaging casing or internal components, which is crucial if you’re handling high-end appliances or delicate parts.
Alongside physical tools, reliable diagnostic software such as appliance-specific firmware testers can detect issues with control boards that aren’t visible externally. For example, in diagnosing a dishwasher that won’t drain properly, I use a multimeter alongside a wiring diagram from the manufacturer, which often speeds up the repair process. These tools have evolved to become more user-friendly and affordable, making DIY maintenance more accessible than ever before.
How do I maintain appliances over time to prevent costly repairs?
Regular maintenance is vital to extend your appliance lifespan and avoid unexpected failures. I schedule quarterly inspections for critical components—like cleaning filters, checking seals, and lubricating moving parts—to ensure they operate smoothly. For instance, I replace dishwasher filters (learn about the importance of this routine maintenance) every six months to prevent clogs and bacteria buildup, which can cause malfunctions. Long-term results come from consistent care combined with the right tools, allowing me to catch issues early, such as detecting worn belts in dryers before they snap, or spotting corrosion on control wires.
In the future, I predict that automation and smart diagnostics will integrate more deeply into appliance maintenance, allowing us to receive real-time alerts on potential issues through connected apps. This trend will make preventive care even more proactive, saving homeowners money and hassle. For example, smart sensors inside appliances can monitor temperature fluctuations or vibration patterns and notify you before a breakdown occurs, as discussed in industry reports on the evolution of smart home devices.
Gear Up with Advanced Maintenance Techniques
One advanced tip I recommend is adopting infrared thermography to identify hot spots within appliances—useful for detecting failing capacitors or insulation issues. This technique requires an infrared camera, like the FLIR One, which connects to your smartphone. Using thermal imaging, you can spot abnormal heat buildup that indicates underlying problems not visible to the naked eye. For instance, a hot spot around the control board might suggest a failing component that needs immediate attention, preventing more extensive damage. Investing in such diagnostic tools can drastically improve the accuracy of your repairs and extend appliance life.
Remember, staying ahead in appliance maintenance isn’t just about tools—it’s about developing a routine that combines inspection, cleaning, replacement of wear-and-tear parts, and leveraging technology. Try starting with a detailed multimeter diagnosis combined with scheduled filter changes; over time, these small steps will significantly reduce your repair bills and downtime. For more on troubleshooting specific issues, review this guide on control board fuses to deepen your understanding and improve your maintenance skills.
What I Wish I Knew About Trusting Quick Fixes
One of my biggest takeaways is that rushing into repairs without proper diagnosis often leads to more problems down the line. I once replaced a fuse in my microwave, thinking it was the root cause, only to discover later that a faulty magnetron was the real culprit. Patience and thorough testing are essential, especially when dealing with high-voltage components. The lesson: never assume; always verify with the right tools and resources.
Deep Dive into the Value of Genuine Parts and Expert Advice
While affordable replacements might seem tempting, I learned firsthand that using genuine parts and consulting trusted guides save money and prevent recurring issues. When I replaced my microwave’s door switch, I followed an in-depth tutorial and used OEM parts, which resulted in a long-term fix. My advice: invest in quality components and leverage reputable resources like the detailed guides available on trusted repair hubs.
Applying Precise Diagnostics Can Save You Time and Money
The biggest lightbulb moment was realizing that a simple multimeter test could confirm whether internal components are functioning correctly. I used this approach to determine that my magnetron was beyond repair, saving me from unnecessary replacements. This experience reinforced that having the right diagnostic tools and knowing how to use them is a game-changer.
Curated Tools to Elevate Your Appliance Maintenance Game
My essential toolkit now includes a high-quality multimeter like the Fluke 117, a set of precision pry tools from iFixit, and an infrared thermography camera such as the FLIR One. These tools have transformed my DIY repairs from guesswork into precise, confident actions. They help detect issues early, assess component health, and ensure safety during complex repairs. Trust me—they pay for themselves in peace of mind.
Take Action and Keep Your Appliances Running Smoothly
Remember, the key to avoiding appliance breakdowns and costly repairs is proactive maintenance combined with informed troubleshooting. Regular inspections, proper part selection, and embracing modern diagnostic techniques empower you to extend your appliances’ lifespan significantly. If you’re ready to take control, start today by evaluating your current tools and knowledge. Your appliances—and your wallet—will thank you.